War Of The Roses Crossbowmen

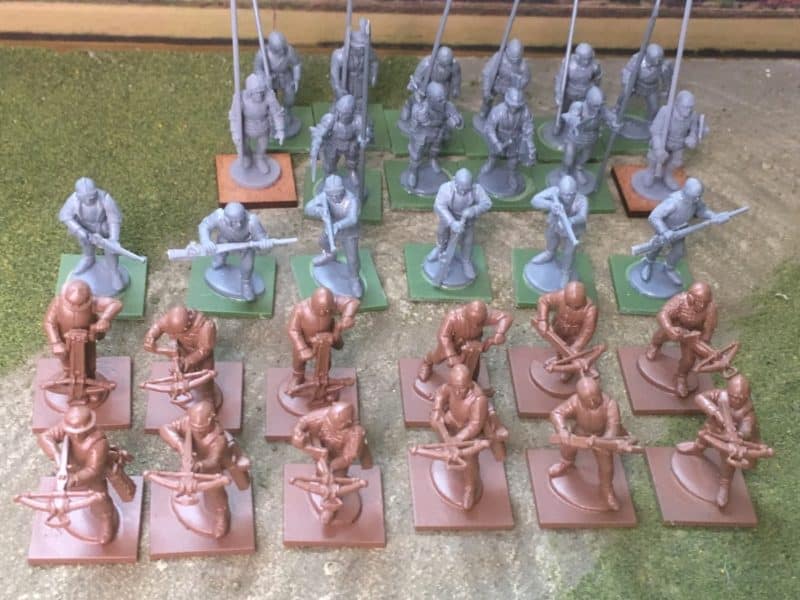
I have been working on completing my War of the Roses army and I wanted to add some crossbowmen and hand gunners to my contingent. Apparently, whilst used for sieges, there is no primary evidence that Crossbowmen actually took to the field of battle during the Wars of the Roses. I am now able to confirm that this is not the case, by providing photographic evidence of crossbowmen at the Battle of Bingham Fields 14.55. Mind you, I did put them back in the storage box at half past three, so it was only a short debut for them…
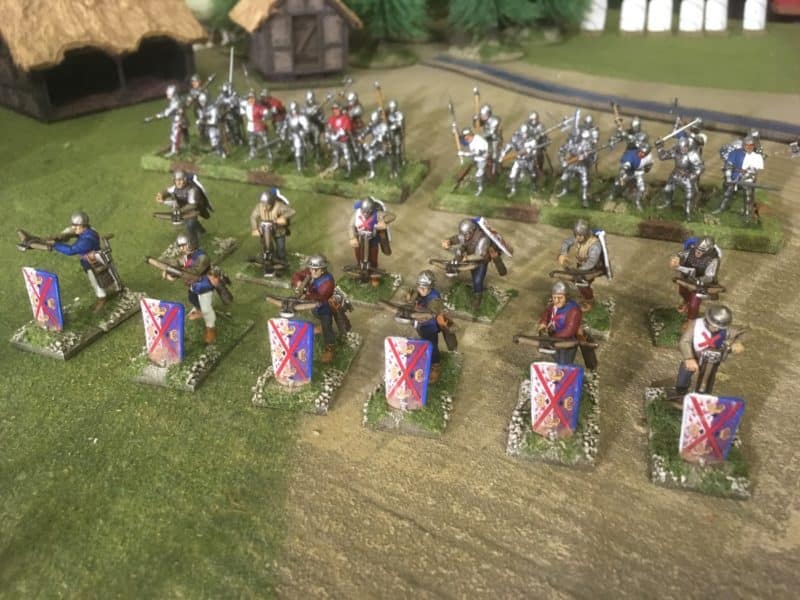
Crossbowmen in action at the Battle of Bingham Fields.

Crossbowmen in action at the Battle of Bingham Fields.

Regardless of whether they did or didn’t actually fight in the main battles of the WOTR, the Perry’s include crossbowmen and hand gunners in the Mercenary Infantry boxed set and illustrate them as Burgundian Mercenaries. It would be a shame not to complete these figures and make them available as small units for my Army. The current set of rules that we are using for our WOTR battles ‘Never mind the Billhooks’ have been written by Andy Callan and are in the process of play testing. The rules allow for small units of Skirmishers that can act independently of the main army to protect the flanks, larger units, provoke your opponent, skulk in cover and generally be a nuisance in the game without ever being a decisive force.  Crossbowmen and  Handgunners are ideal for this role in the game, (although bowmen and Irish Kern are also permitted) and protecting them with Pavises will also help when facing Archers or other skirmishers.
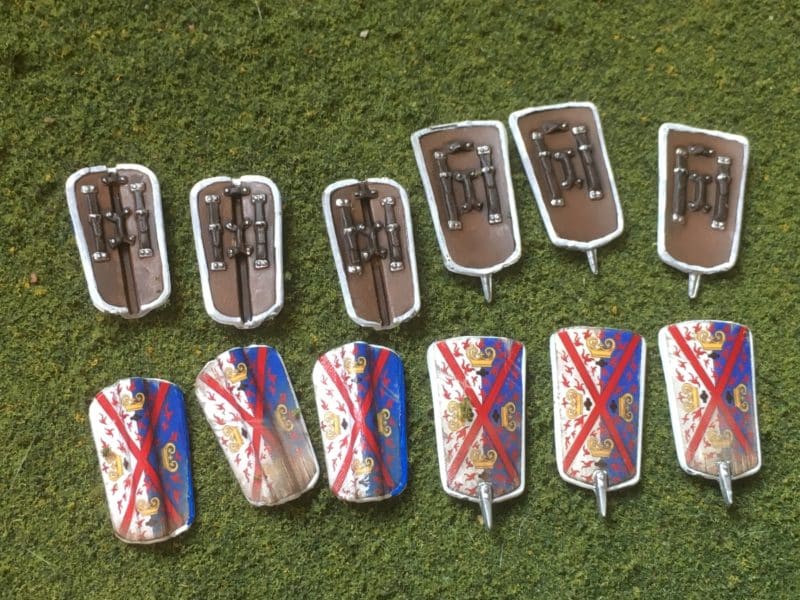
Pavises with LBM decals applied

Pavises with LBM decals applied

Here is a quick guide as to how I went about painting these figures, as well as some of the assumptions that I made whilst doing so.  As usual, I tend to ‘batch paint’ my figures for my wargames units and so once they were assembled, I undercoated them with Army Painter Leather Brown spray.
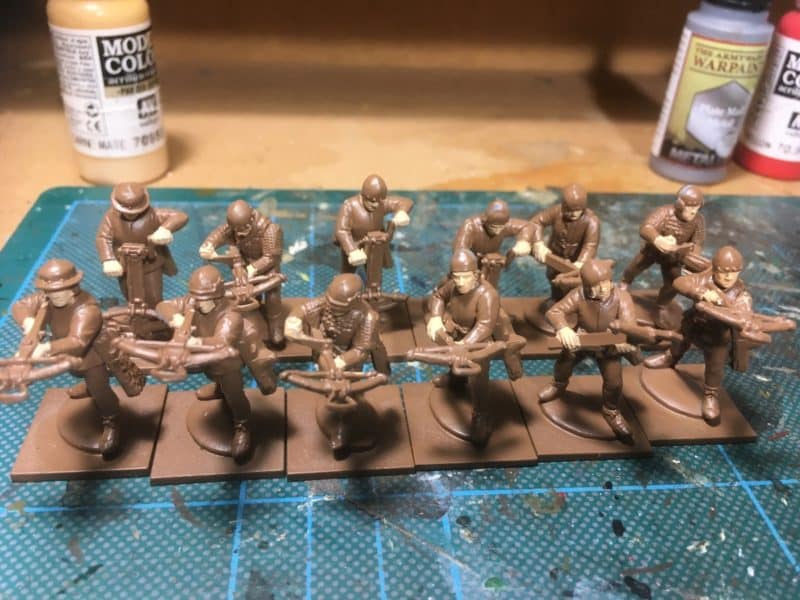
Crossbowmen primed and ready to paint - flesh already done.

Crossbowmen primed and ready to paint – flesh already done.

The next step was to start the block paint process. I tend to work from the inside out and top to bottom of the figure but this is only to give some structure to my painting. I paint in short ‘bursts’, up to an hour in one sitting, so having a routine allows me to pick up where I left off without having to think too much about the next stage. Whilst painting the helmets in Army Painter plate mail, I realised that it made sense to split the 12 figures into 3 sub groups for painting as they had slightly different clothing.
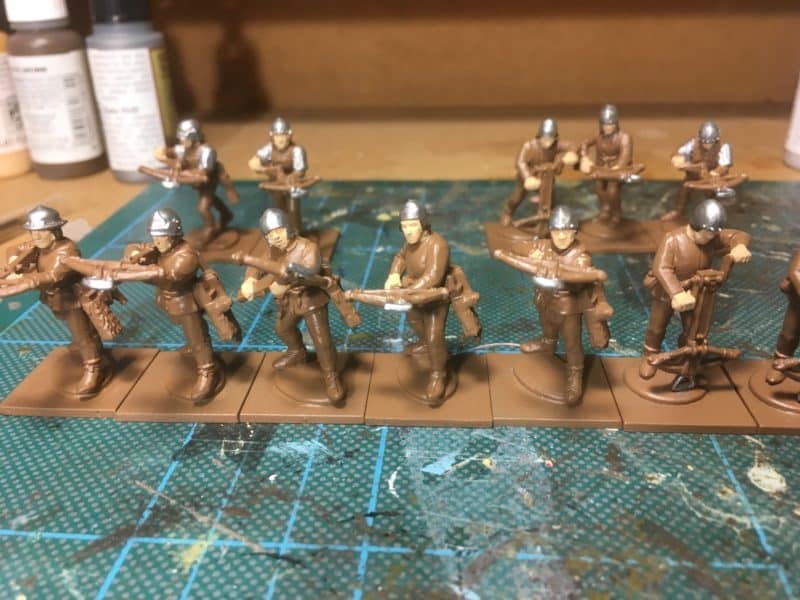
Crossbowmen - plate mail added

Crossbowmen – plate mail added

When it came to painting the clothing, I used Vallejo 70809 Royal blue and 70820 Off White for the Sur coat or tunics. The Royal blue being a nice bright blue to differentiate the Burgundian’s from the other troops in my retinue. The rest of the clothing was painted with a choice from 70821 German Camouflage Beige, 70814 Burnt Red, 70869, Basalt Grey and 70899 Dark Prussian Blue.
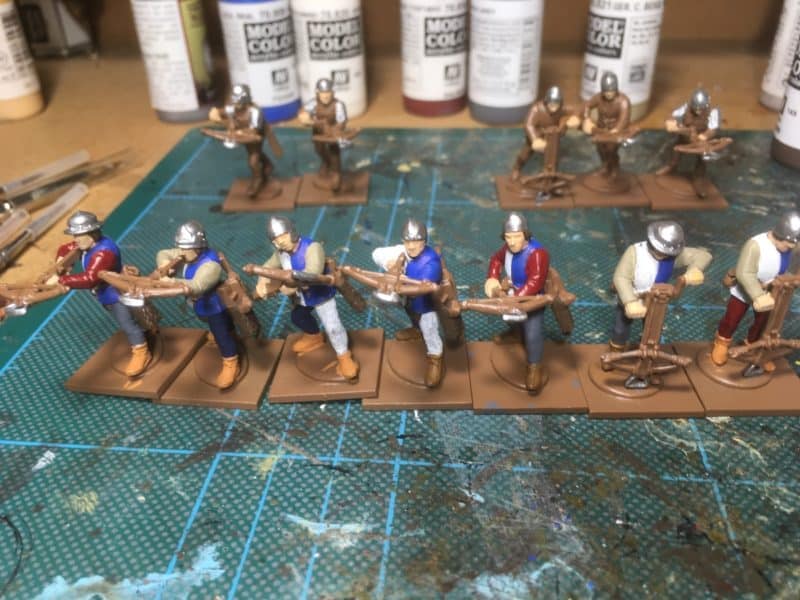
Clothing on Crossbow men block painted.

Clothing on Crossbow men block painted.

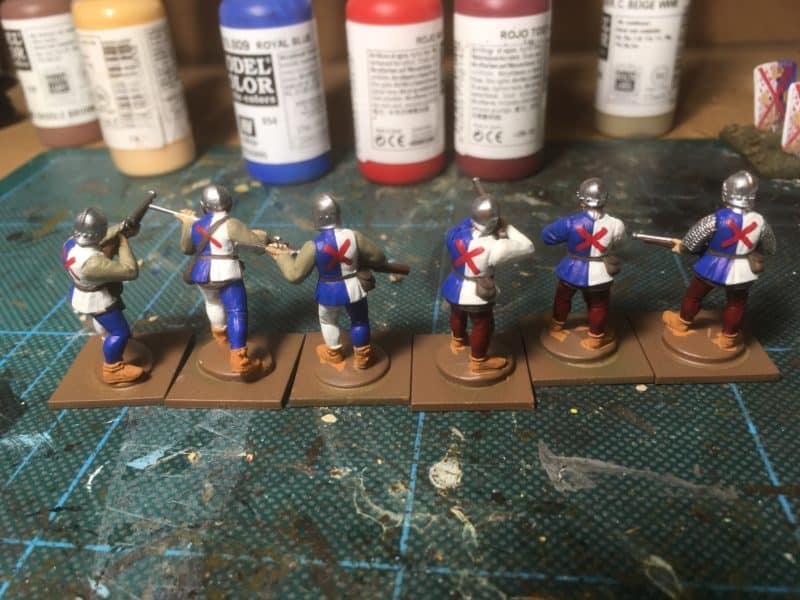
When it came to the crossbows, I painted these in Vallejo Old wood 310 with the detail picked out in Dark Brown and plate mail for the metal parts. The boots and leather equipment were painted in a variety of browns. I must confess that beyond looking at the box art, I didn’t put too much time into researching ‘uniforms’. I wanted to get these figures done fairly quickly. So much so, that I stopped taking pictures of the step by step process…However, the hand gunners in the next picture will give you an idea as to how the figures look after the block painting is done.  Note the crosses on the front and back of the tunic. I had been concerned that my painting wouldn’t be up to this but in the event, it was straight forward enough.
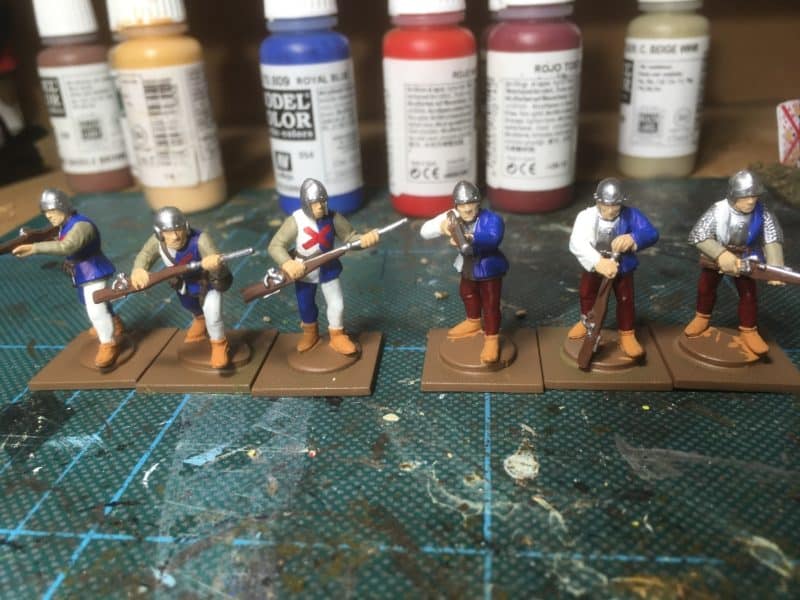
Hand gunners being bath painted.

Hand gunners being batch painted.

Hand gunners - rear view

Hand gunners – rear view

The next stage is to paint the figures with Army Painter Quick shade Dark Tone. This stuff is excellent at pulling the colours together, adding shading and bringing out the detail on the figures. I find it superior to inking the figures as it provides a hard varnish that will help to protect the figures when gaming. However, the Quick shade (and ink, for that matter) can ‘dirty’ the figures, particularly the lighter colours. It is a straight forward job to repaint these areas using the shading as a guide, this also has the effect of adding some additional highlighting.
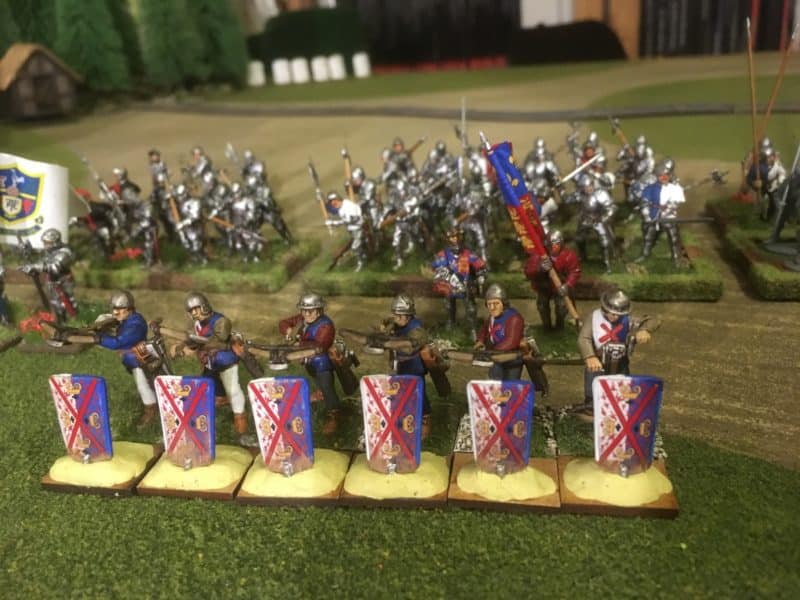
Crossbowmen - you cna see that I've repainted the whites.

Crossbowmen – you can see that I’ve repainted the whites.

When it came to the pavises, there are two distinct types supplied in the kit. I decided that the one’s with the spikes should be mounted separately on 15mm x 20mm bases so that I could use them for either the crossbowmen or handgunners. The Pavises without spike would be glued straight onto the other six crossbowmen figures (the ones that were loading). I used some milliput to make a mound on each base and stuck the pavises straight into it. You can also see that I have attempted to blend the LBM decals into the pavises by painting around the edges and adding some ‘mud’ to the bases.
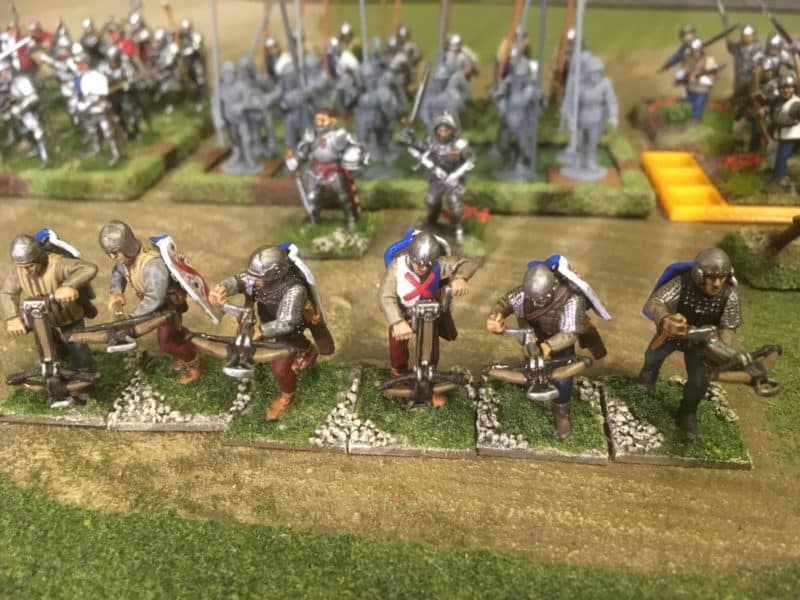
Loaders with pavises
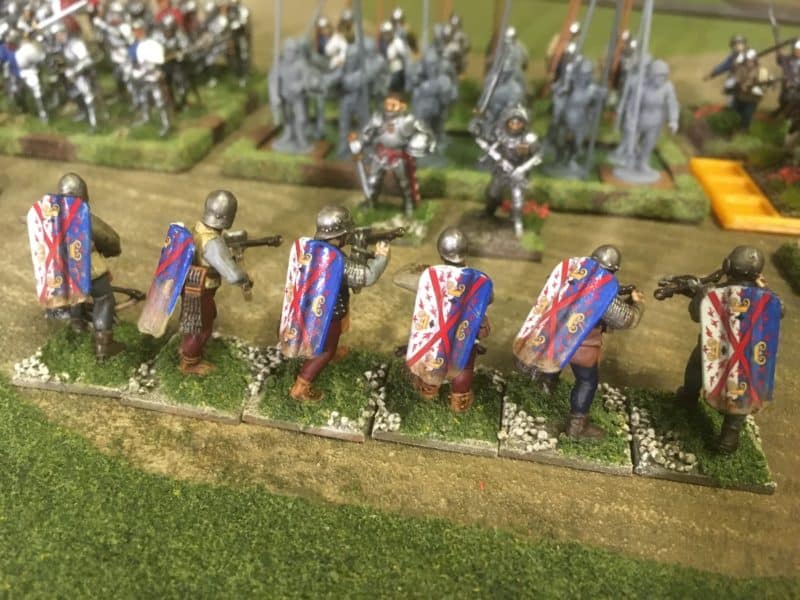
Loaders with pavises

An attackers view of the Crossbowmen!

An attackers view of the Crossbowmen!

The pavises were simply glued onto the back of the figures. To make them look more accurate, I really should have provided straps but as I have repeatedly said, these are wargaming figures not museum exhibits. I think that they will pass muster…

I based the figures using my current basing method. Vallejo dark earth paste was placed on the bases with some ballast added to the edges. The bases were then painted and dry brushed to highlight the stones and detail before adding some woodland scenics scatter. Another three units are ready to be added to my army – ‘skirmishers’ fight in units of 6 in our rules. The opening picture to my blog shows the crossbowmen posed in front of part of my army. I’ll let you know how they fight in a future battle report!

THE COMMERCIAL BIT

Almost all of the paints, miniatures, bases, basing materials and anything that you are likely to need for your hobby are available POST FREE from my shop here:

ARCANE SCENERY

Perry’s WOTR plastic range are here:

PERRY MINIATURES

Happy Modelling!


Black Seas – Age of Sail Battle Game

I’m very fortunate to be in the business of wargaming, modelling and painting, in that I get to see many of the products released in the development stage and well before they hit the shelves. Black Seas is a good example of this. I had seen the ‘test shots’ of the models on Gabrio’s desk ( Gabrio, being the author of the game at Warlord) months ago. However, I try not to get too involved in every new product. And, unless it is directly concerned with my hobby, my excitement stays at a business level.

Occasionally though, something comes along that really excites me as a hobbyist. Black Seas is one of those items! I have been eagerly awaiting it’s release and I am very pleased to have obtained a retailers prelaunch pack. So here is a sneak peak at what you can expect from the Rulebook. I must say at this point that I have only played one game at the Warlord open day and whilst I thoroughly enjoyed it, I wouldn’t review the game play on the basis of that outing, so the focus of this blog is simply on the actual book. No doubt, I’ll bring you a full battle report in a future blog, once I have put my fleet together!

THE RULE BOOK

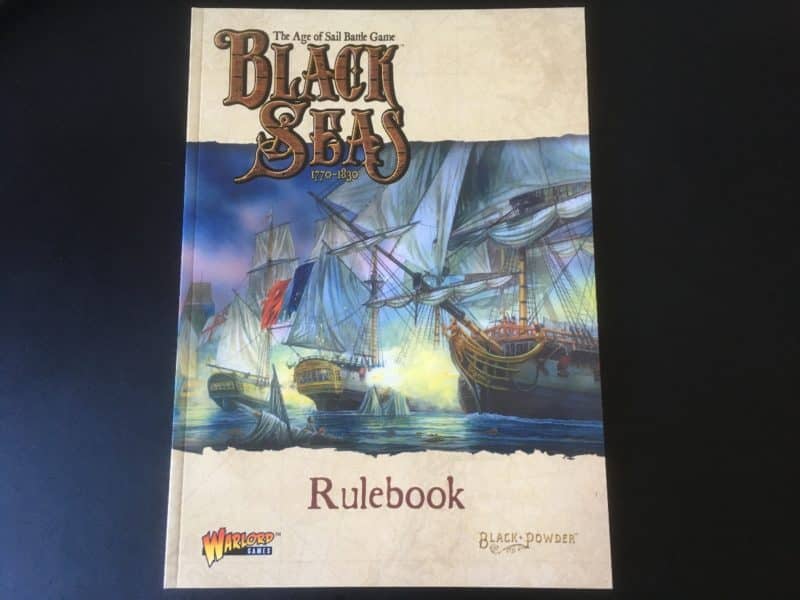
The Black Seas rule book is on my desk!

The Black Seas rule book is on my desk!

The rule book is to the high standards we have come to expect from Warlord. Black Seas is a very well produced, full colour 96 page soft back book containing the rules to the game, scenario’s, back ground information, modelling and painting guides and more. Here’s a selection of pictures from the book, captured using my iPhone, so the picture quality isn’t studio standard but gives you a idea of the book itself!

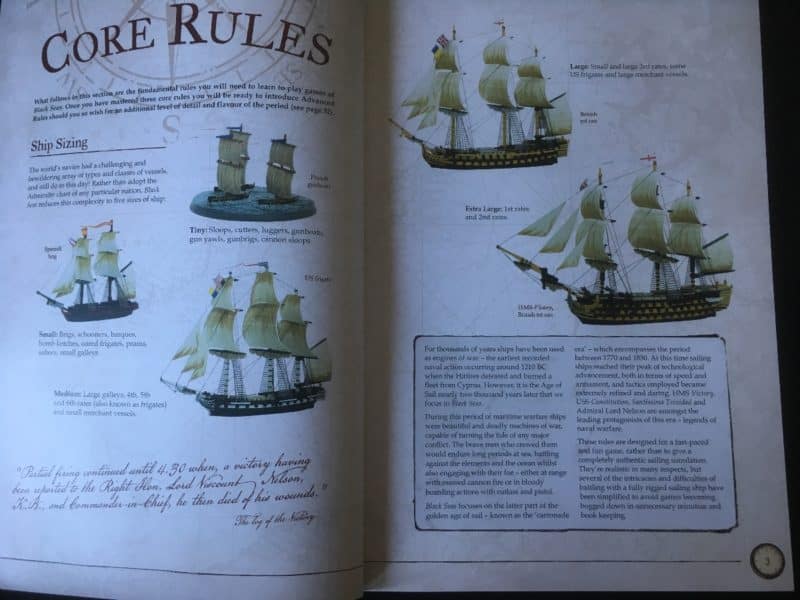
Core Rules section - a basic introduction to the game

Core Rules section – a basic introduction to the game

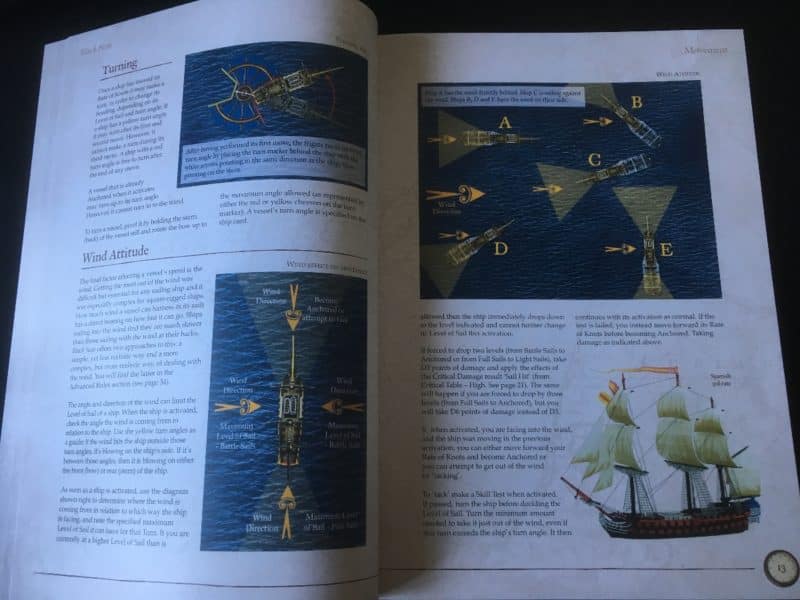
First impressions are that the rules are clearly explained, with plenty of diagrams to help understand what is going on.

Movement explained

Movement explained

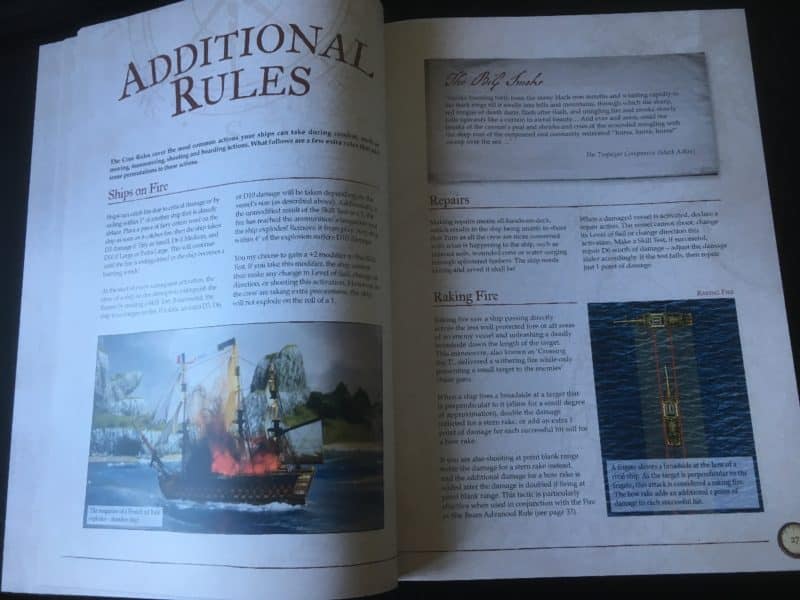
Once you have mastered the core rules, the additional rules broaden the game.

Additional Rules section

Additional Rules section

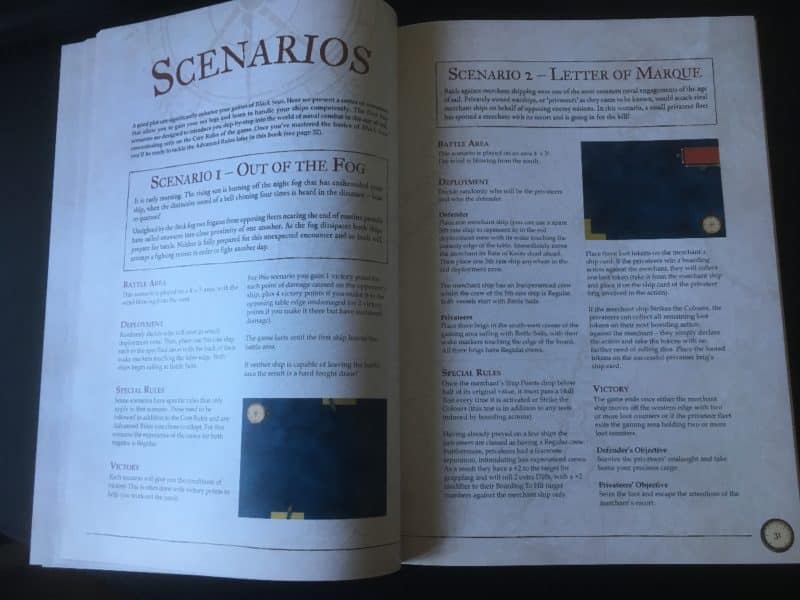
As well as the rules to the game there are 13 scenarios to play through to get you familiar with the game mechanics.

The Scenarios section

The Scenarios section

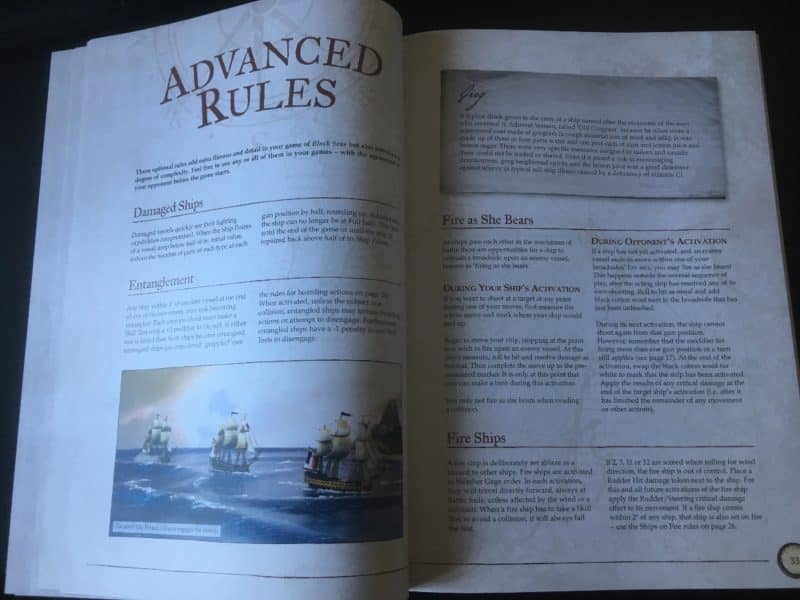
The advanced rules cover items such as Fire Ships, ‘Fire as she bears’, more realistic wind effects (wind effects are simplified in the basic rules), and other add ins to improve the gaming experience.

Advanced rules - Fire as she bears!

Advanced rules – Fire as she bears!

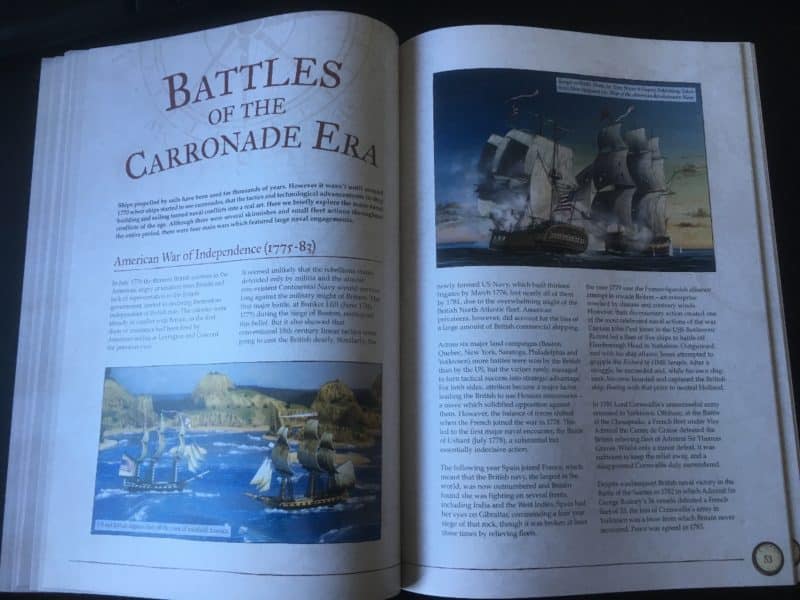
There is a very brief overview of some of the battles of the Carronade era, giving some historical context to the game. This section is illustrated with pictures from Osprey books, so there is plenty of visual reference material to use. This is a good introduction for those not in any way familiar with the naval wars of the period but I suspect that ‘old hands’ will find the section as a useful reminder of stuff they already knew!

2019-09-19 11.33.07

Historical backgroud to the game.

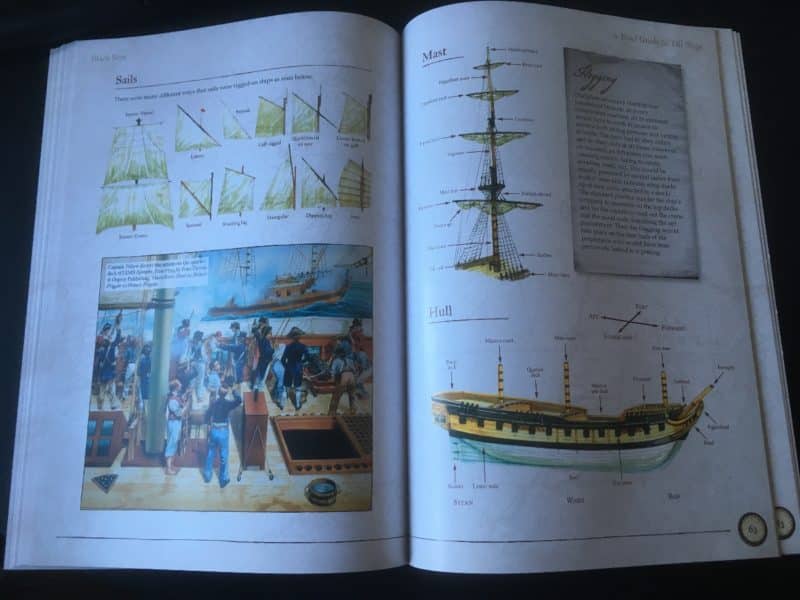
Also for all you ‘land lubbers’ out there, there is a very useful basic guide to the anatomy of a fighting ship of the age!

The anatomy of a fighting ship

The anatomy of a fighting ship

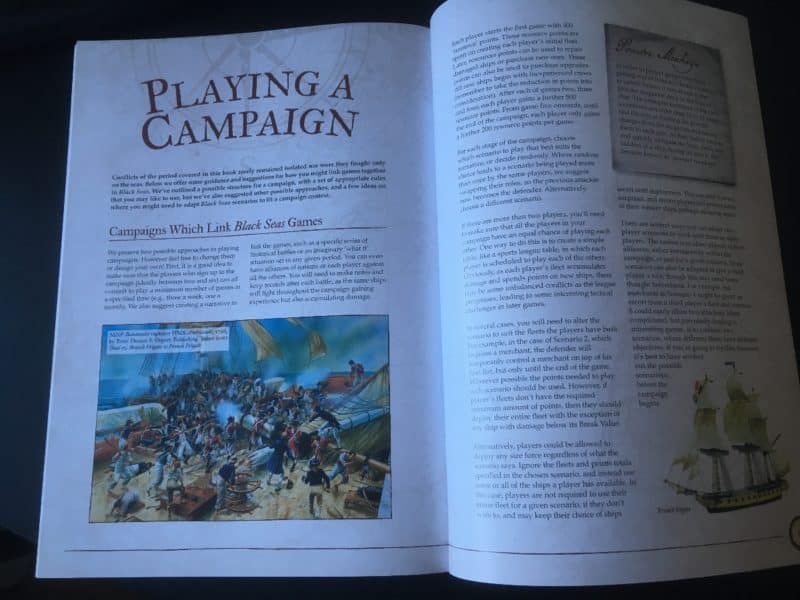
The rules have some ideas as to how you can link your battles to play a campaign, with a small section opening the possibility of linking your Black Seas games into a Black Powder campaign. This has already got me thinking of my Napoleonic Caribbean project!

Campaign Rules

Campaign Rules

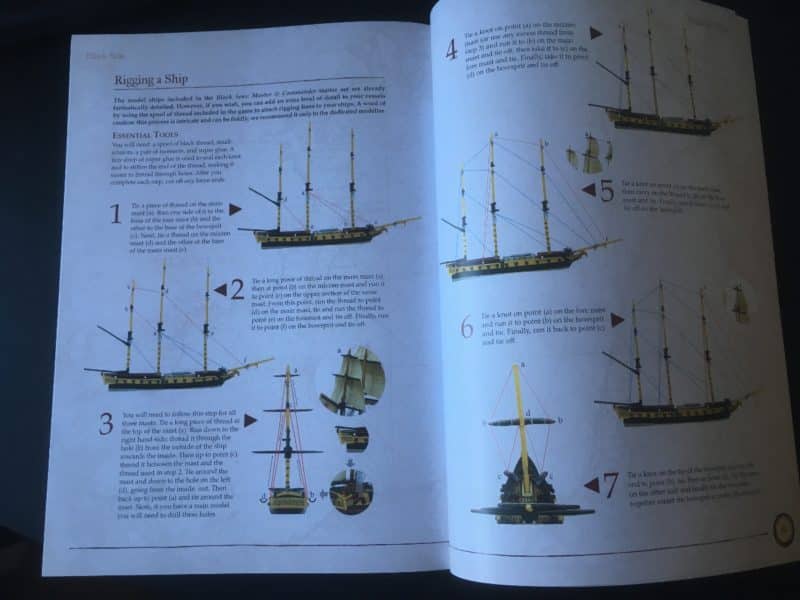
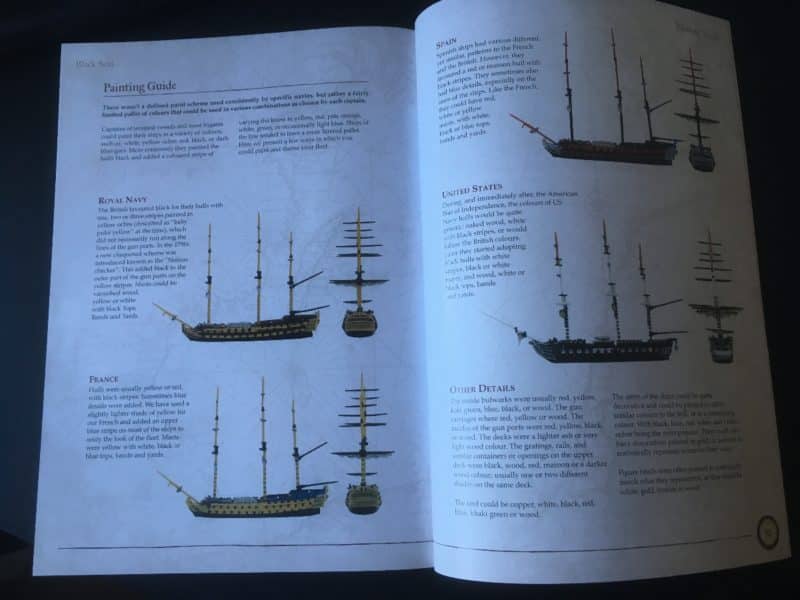
And finally, advice as to how to go about rigging and painting the superb miniatures that come with the game. The ship models are at 1/700th scale and are lovely models in their own right. I will be reviewing these in a subsequent blog, as I put my sample ships together!

The Ships painting guide

The Ships rigging guide

The painting guide

The painting guide

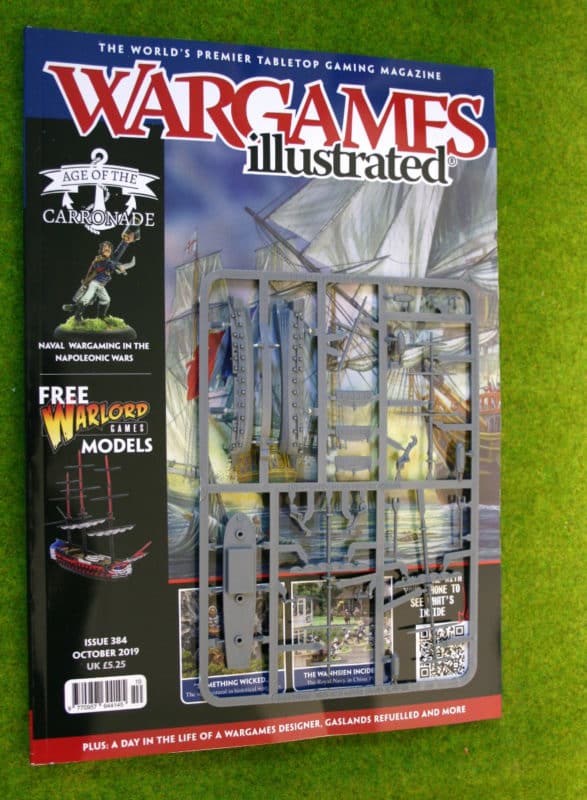
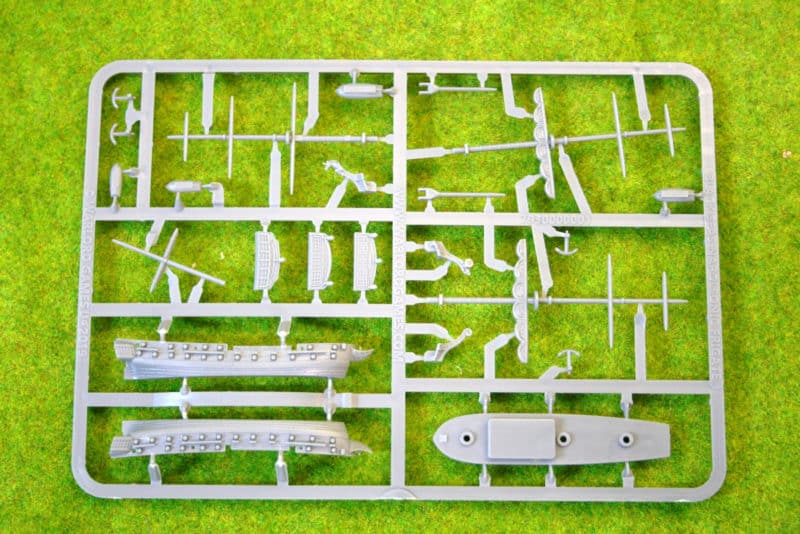
So, that’s just a quick look at the inside of the rule book. In my next blog, I’ll look at the other contents of the game as well of course as the ships themselves. But if you would like to see the sprues, then head on over to the Arcane Scenery shop – we still have copies of the latest Wargames Illustrated magazine which has a free sprue from Black seas on the front cover as well as an in depth look at the game.

WI384 frig

The Frigate spue.

The Frigate sprue.

THE COMMERCIAL BIT

If you are as excited as I am about the new Black seas game, you can pre- order it post free from Arcane Scenery here:

BLACK SEAS – THE GAME

If you would just like the rules book, you can pre-order it here:

BLACK SEAS RULE BOOK

Both items will be supplied with the free limited edition figure if you pre – order.

At the time of writing we still have stocks of Wargames Illustrated issue 384 with the free Black seas sprues. You can choose either the frigate sprue:

WARGAMES ILLUSTRATED FREE FRIGATE SPRUE

or the Brig Sprue:

WARGAMES ILLUSTRATED FREE BRIG SPRUE

These are selling through quickly, so if you would like a copy, visit my shop or click one of the links.

Happy Wargaming and Modelling!

The Black Watch

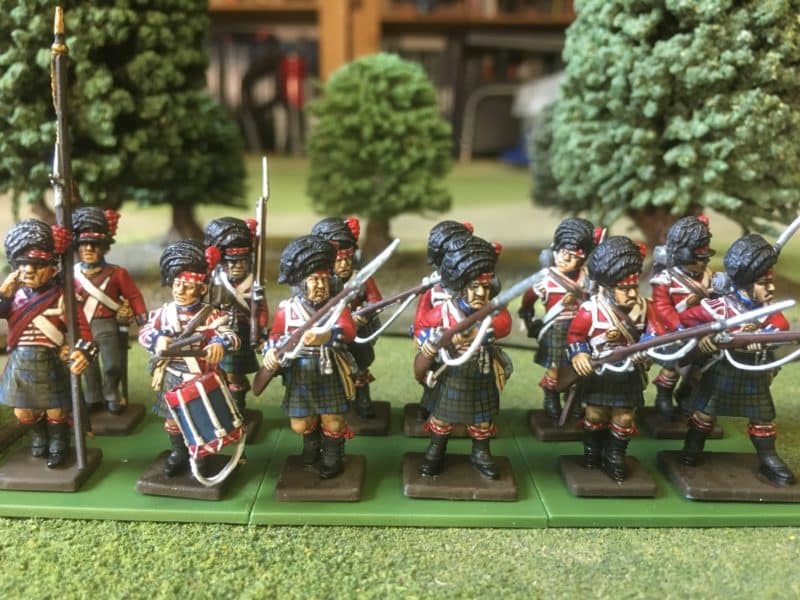
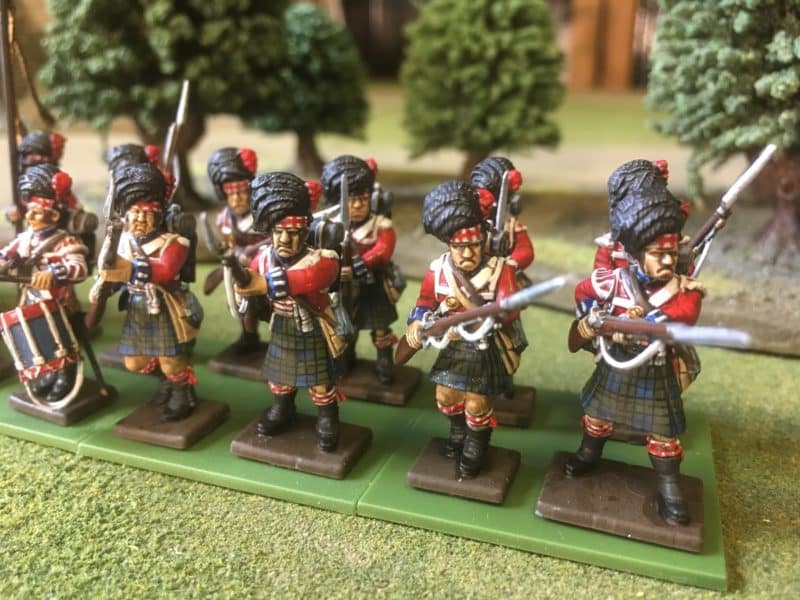
To give them their full name, the 1st Battalion, 42nd (Royal Highland) Regiment of foot, or the Black Watch, is the final Highland regiment that I wanted to add to my Napoleonic collection. I am using the 100 days War order of battle as the basis for my Napoleonic Army. The Black Watch is the last Highland regiment that I need to complete and the penultimate battalion required to finish the British contingent of the 5th British Infantry Division at Waterloo. I already have the 1/28th, 1/32nd, 1/95th and 1/79th of Kempts 8th British Brigade as well as 2/44th, 1/92nd of Pack’s 9th British brigade. The two brigades together, along with the 5th Hanoverian Brigade, formed the 5th Division under the command of Sir Thomas Picton.

1/42nd Battalion Centre Companies

1/42nd Battalion Centre Companies

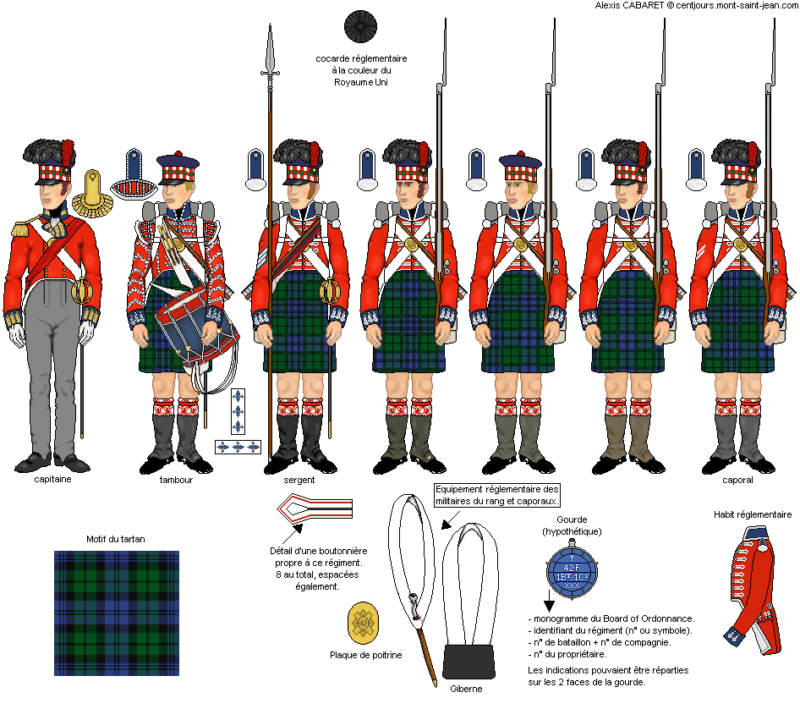
As usual, I referred to the superb Mont St John web site for painting details – I’ve put the link below. The challenge in painting Highland regiments is of course the kilts. As yet, paint manufacturers have woefully failed in attempting to produce tartan paint, so you have to do it yourself! ( That was a joke by the way – a very old one, but a joke nonetheless!) As I had already painted two Highland regiments, I was fairly confident that the Black watch would be straight forward as there are just three colours, Blue, Green and Black. My painting skills and patience are not sufficient to make an exact copy of the tartan in 28mm scale – I wanted something that looked about right for the wargames table. As is often the case, I did a ‘test figure’ before committing to batch painting the Battalion.

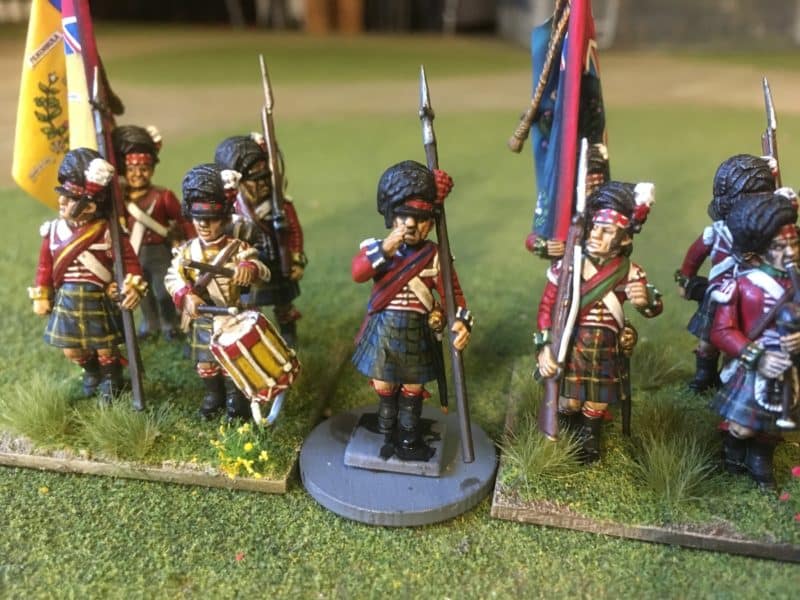
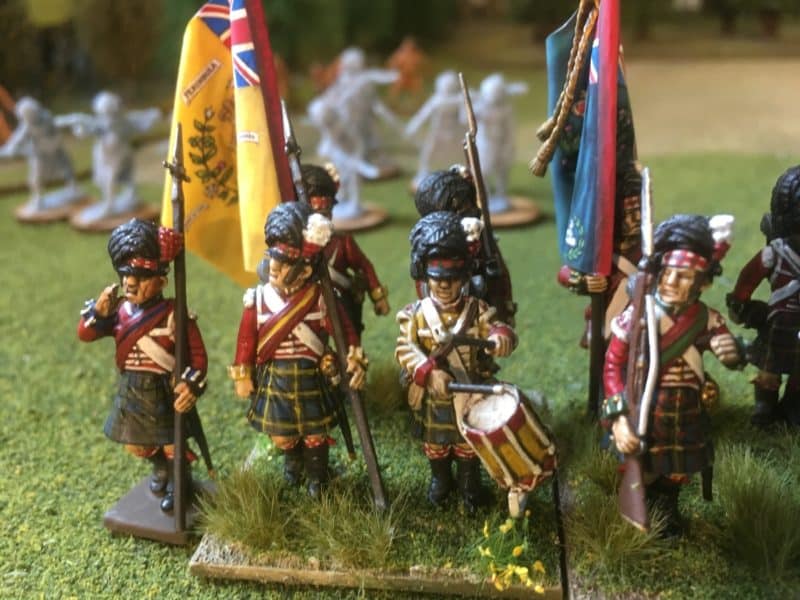
Black Watch Sergeant next to the Camerons and Gordons.

Black Watch Sergeant next to the Camerons and Gordons.

I was reasonably happy with the result but did try a figure with a slightly different, lighter green on the kilt. It made little difference and if anything, I preferred a darker look to the kilts so adding an extra black line to the design had the desired effect. Just for fun, I produced a very quick step by step guide to how I painted the tartan. It won’t be to everyone’s taste but if you are new to the hobby, it might be helpful as a place to start.

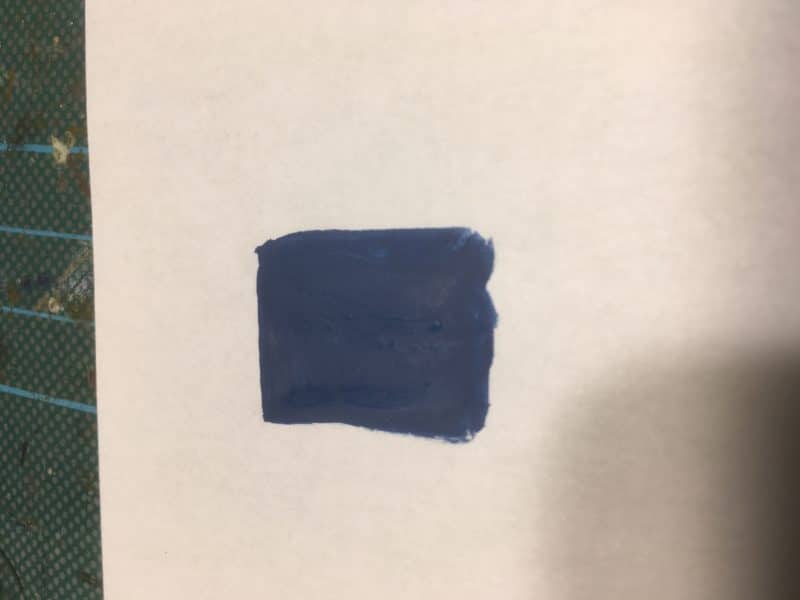
Vallejo Prussian Blue 70965

Vallejo Prussian Blue 70965

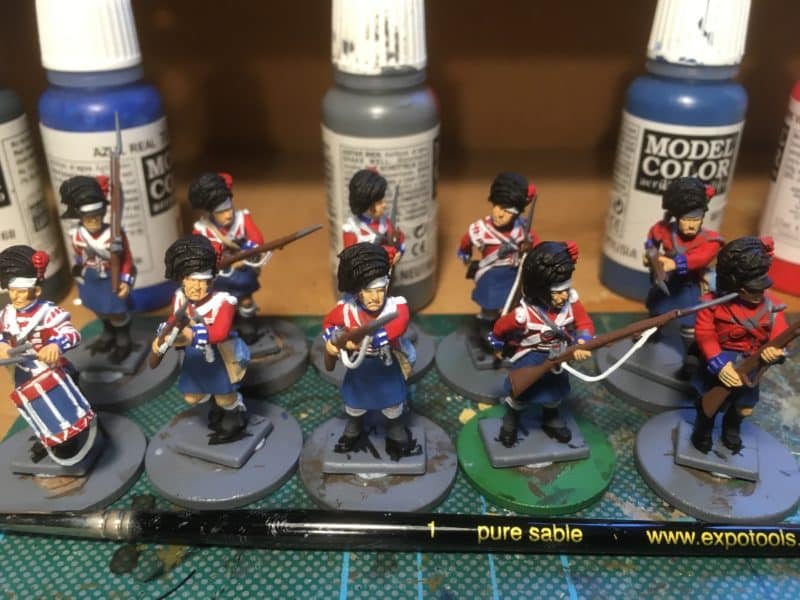
First I painted the kilts in Prussian Blue Vallejo 70965. You can see this both on the paper above and on the actual models below. For clarity, I’ll show the rest of the process on the paper only.

Kilts in prussian blue

Kilts in prussian blue

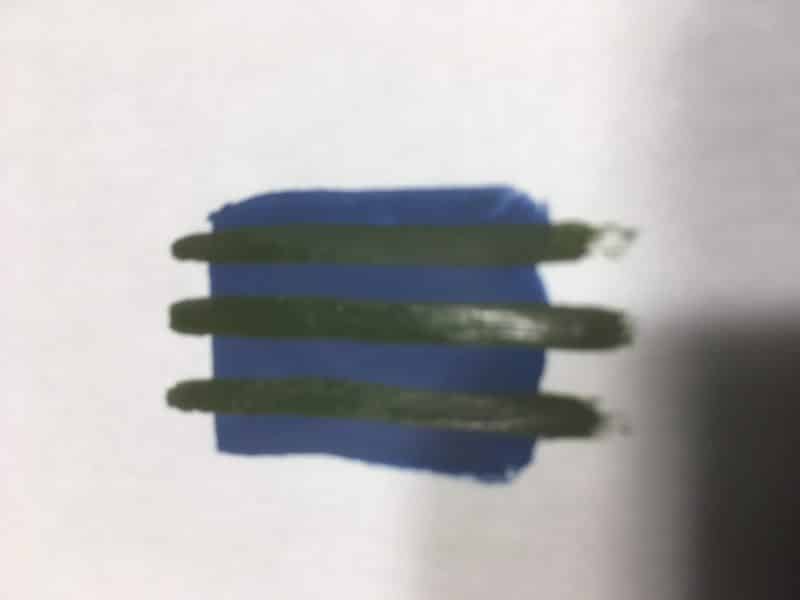
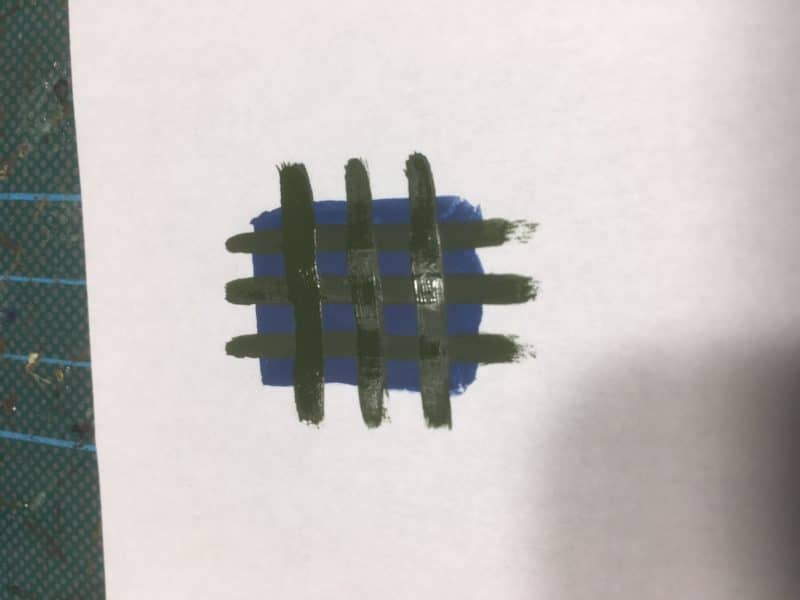
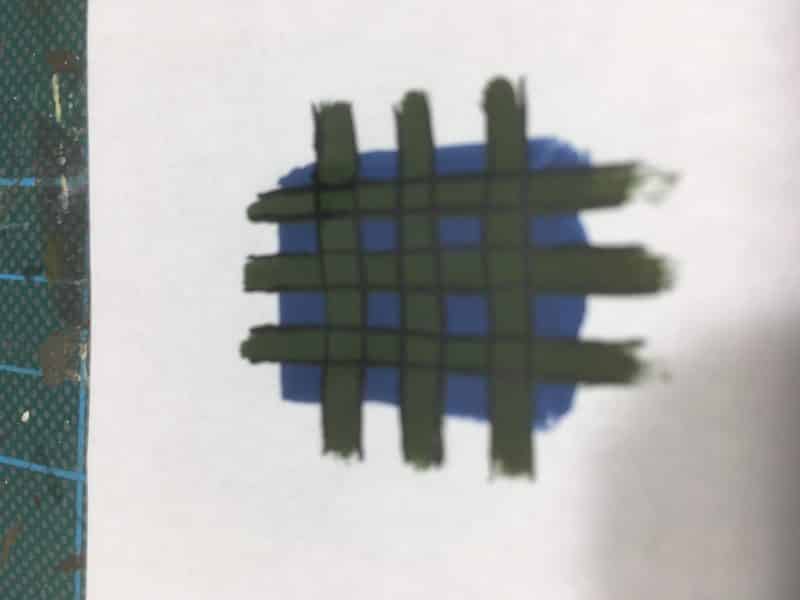
Next paint three stripes in Vallejo reflective green 70890. The trick here is to select the right sized paint brush and to make sure that the paint is flowing easily off of the brush by thinning it to the consistency of milk.

Three stripes of Green - vertically or horizontally - which ever you prefer first!

Three stripes of Green – vertically or horizontally – which ever you prefer first!

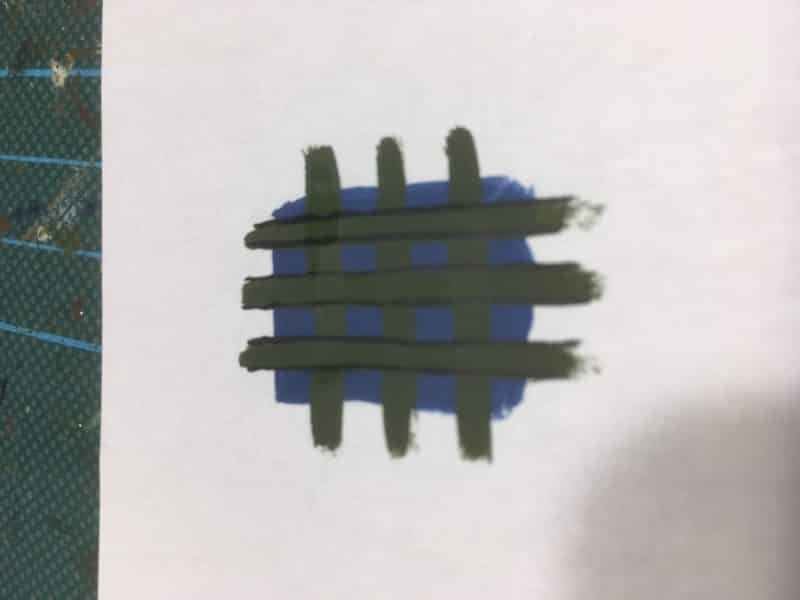
Now paint another three stripes across the first three. Again, let the brush do the work. The only other point to note is to try to space the stripes evenly at about the same width.

Reflective green 70890 cross hatched.

Reflective green 70890 cross hatched.

Now purists could paint the squares where the green lines cross with a slighter lighter shade. I ignore this detail – I am looking for a decent approximation of tartan, not an accurate reproduction.

Cross the lines!

Cross the lines! Outline the green lines in black.

The next two pictures show that I take a finer brush and again, thinning the paint to ensure that it flows smoothly, outline the green lines in black. You can see that it doesn’t have to be perfect! A steady hand does help but you can always touch up the green lines if the black is too thick.

Outlining complete

Outlining complete

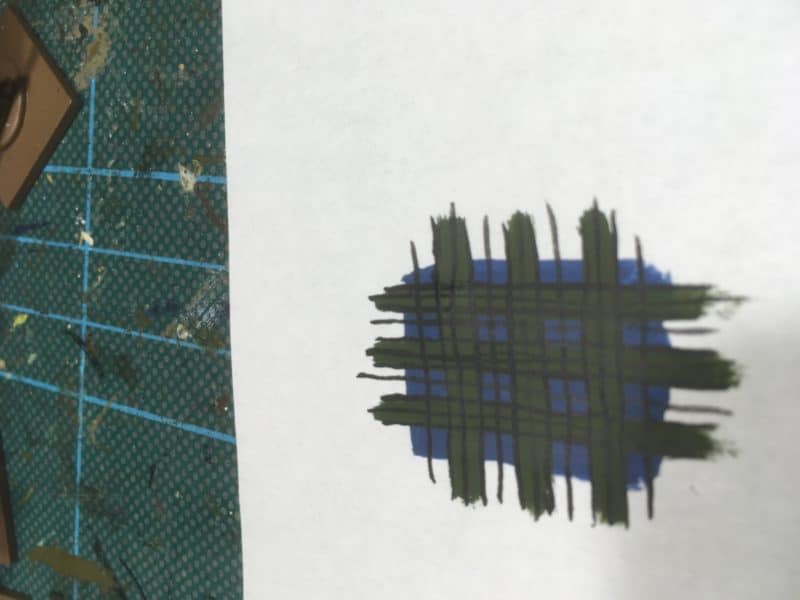
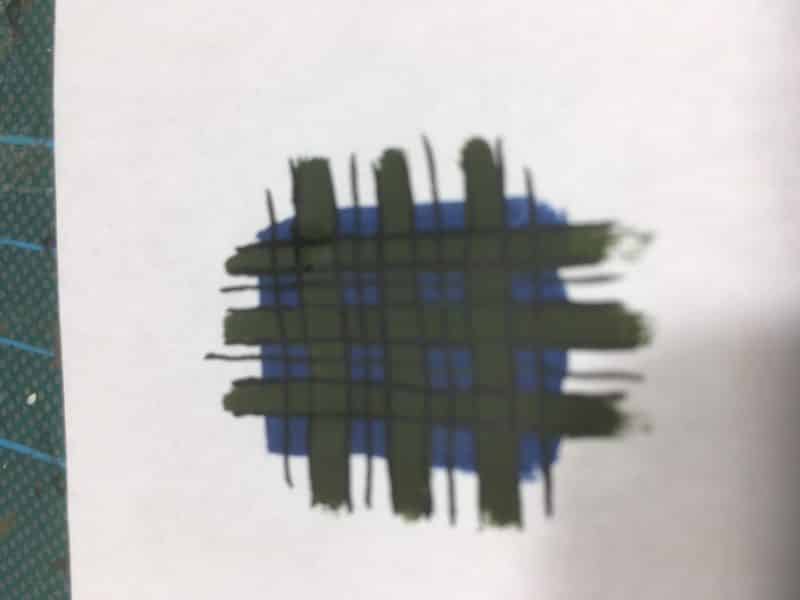
The next part is tricky and again, you will need a steady hand and importantly the paint must be thinned so that it flows off of the brush in one stroke. So paint a black line through the blue squares, both vertically and horizontally!

cross hatch through the blue squares

cross hatch through the blue squares!

Repeat the same pattern through the green lines.

Cross hatch through the green.

Cross hatch through the green.

You can see that I’ve made a few mistakes but I’m not too concerned and the next picture will show why. That said, it would be easy enough to correct with a touch of green paint. It’s worth pointing out again that you are painting a cloth pattern on a small miniature and unless you intend to enter your figures in a competition, perfection is not required.

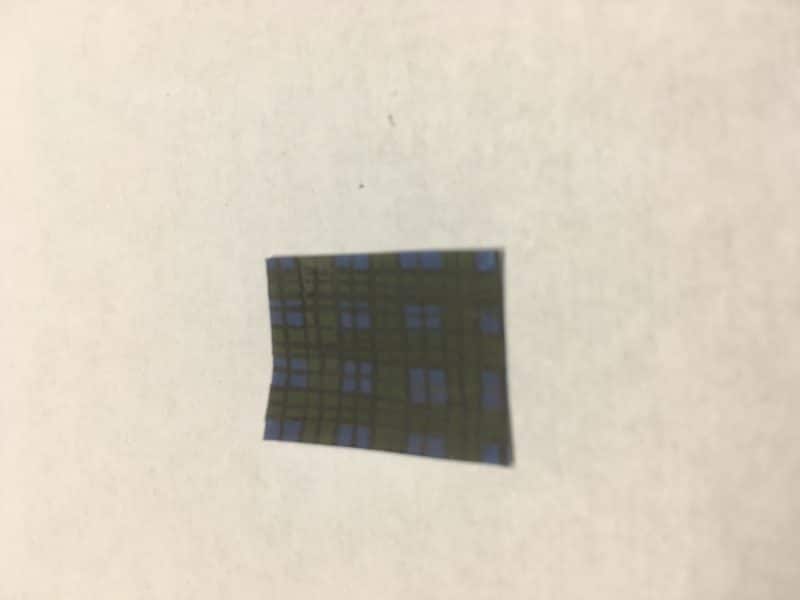
The finished pattern, cut from the paper.

The finished pattern, cut from the paper.

I did the above step by step in about 10 minutes last night just for the blog. Hence the glossy look on some of the pictures – the paint was still drying! I hope that you agree that the finished result, which I have tidied up by cutting from the paper looks fine for a battalion of wargames figures. Incidentally, I do paint straight onto the figures – this an exercise to show the method.

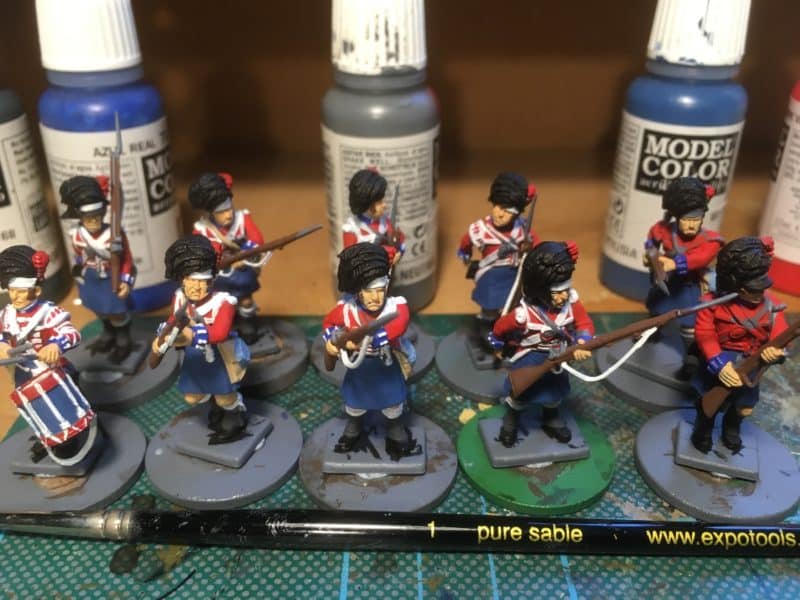
The nearly completed figures

The nearly completed figures

So this is how my first batch of 12 figures look at the moment. A few points to note. The Black Watch had all red tufts (hackles) on the centre company, red over green for the light company and red over white for the Grenadiers. I need to ‘dot’ in the green squares on the hat band and of course they need to be based properly. All of which I’ll do once the other 12 have been painted. I also need to go back to the test figure ( the sergeant) and add some extra lines to his kilt!

Another view of the first 12 figures

Another view of the first 12 figures

I hope that this has been useful to anyone that is wondering how to go about painting Highlanders. In the links below you can see how I went about completing the Gordons and Camerons. I’m putting these aside for a week or so, whilst I go back to my War of the Roses army – there’s only so much tartan I can paint in one batch!

THE COMMERCIAL BIT

Almost all of the paints, miniatures, bases, basing materials and anything that you are likely to need for your hobby are available POST FREE from my shop here:

ARCANE SCENERY

The Victrix Highlanders can be found in the Victrix category here:

VICTRIX MINIATURES

We carry a huge range of Vallejo, either browse the category – or to find individual paints, type the number into the search bar:

VALLEJO

You can visit the Mont St Jean site here:

MONT ST JEAN

To see another blog article on painting tartan, in this case the Camerons, click here:

TAMING THE TARTAN TERRORS

Happy Modelling!
John Rattenbury, Sir John Savage and other distractions!

You can tell that I have been distracted over the last month, as my blog has been focused as much on Battle reports and shows as it has on painting. Add to this, I have only written two blog posts since the end of July and you would be forgiven for thinking that I have had very little hobby time. My Wife would disagree! To be fair, it’s been a bit of a mixed month, with some nice weather, meaning that gardening and family barbeques have been a major part of my leisure time.

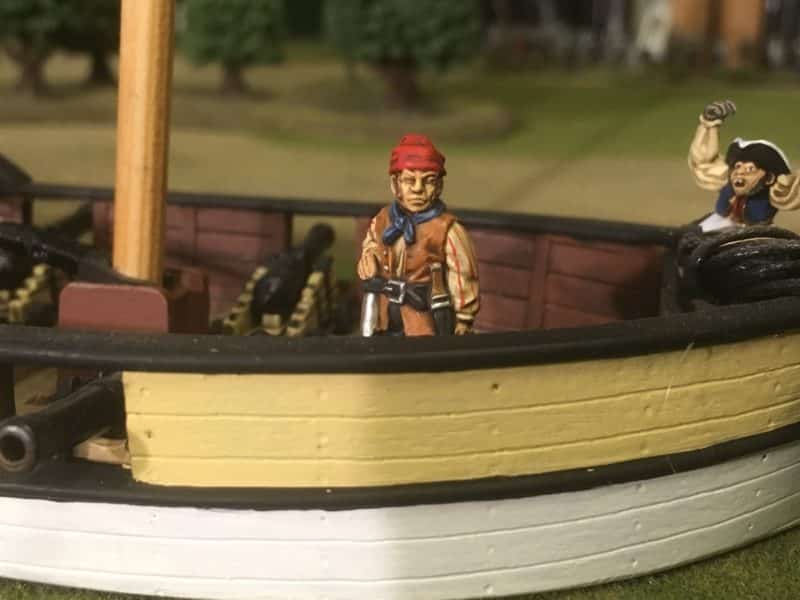
John Rattenbury takes to the seas!

John Rattenbury takes to the seas!

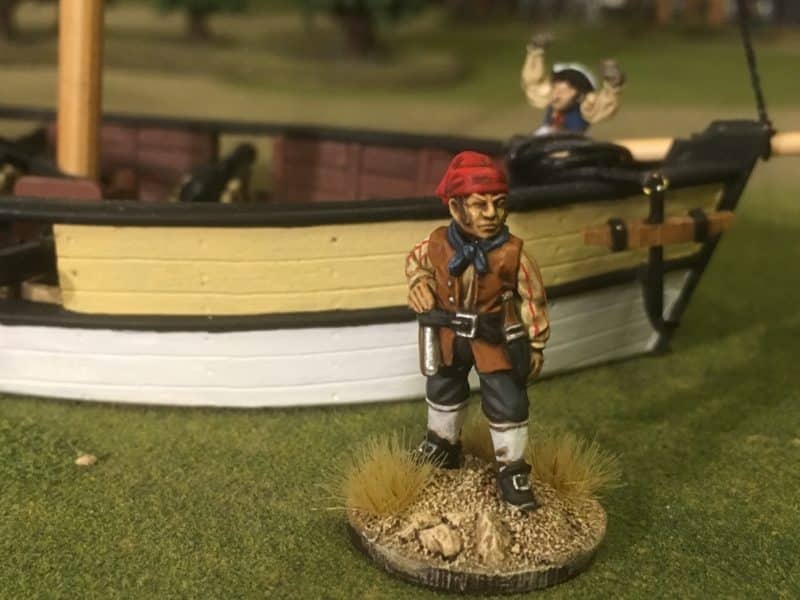
However, I always find time for my hobby and the truth is that I have not been quite as focused as I usually am when it comes to churning out the next unit for one of my armies. Duncan at Trent Miniatures hasn’t helped. He keeps producing some lovely character figures for his range and often pops into the office to show me the latest release. I was very taken with the new figure of John, or Jack Rattenbury, a famous Devonshire smuggler from the turn of the 18th century. I stopped everything to finish him and add him to my collection of maritime subjects!

John Rattenbury, the lastest addition to the crew!

John Rattenbury, the lastest addition to the crew!

I’ve also been working on my WOTR army, assembling the balance of a box of Perry’s European Mercenary’s. With a bit of ducking and diving, I now have 12 crossbow men assembled and primed, 6 handgunners and 12 Pikemen ready for painting.

The next batch of my WOTR army ready for painting.

The next batch of my WOTR army ready for painting.

With the crossbowmen being the first on the list to complete, I painted the Pavises that go with them and used a set of LBM decals to finish them off. I think that they will need a bit more work before I add them to the figures but I was very pleased with how straight forward the LBM decals were to apply, despite making a few mistakes with positioning.

Pavises with LBM decals applied

Pavises with LBM decals applied

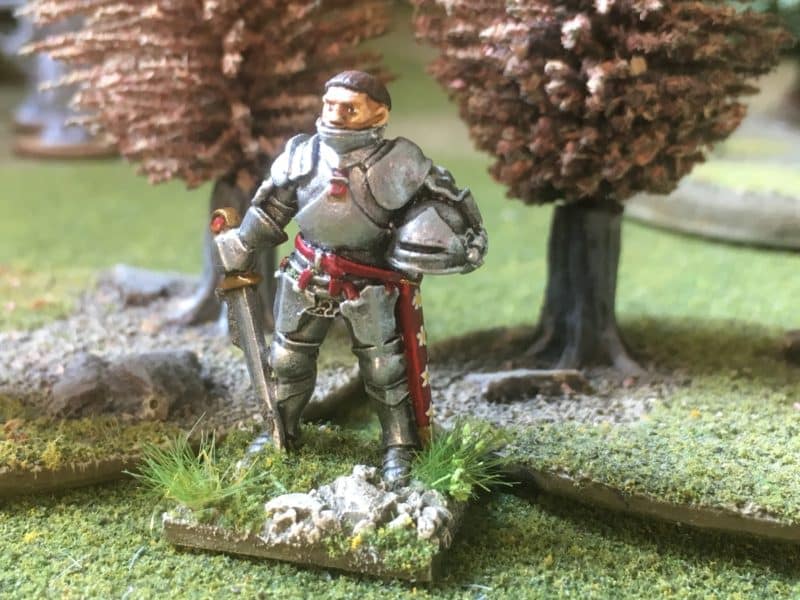
When chatting to Duncan about my WOTR project he reminded me that the Newark Character range has a model of Sir John Savage from the Battle of Stokes Field. Well, it would be rude not to include him in my army! Once again, Everything was put aside whilst I finished Sir John!

Sir John Savage joins my retinue!

Sir John Savage joins my retinue!

As if this all wasn’t enough, I am working on the final Highland Battalion for my Napoleonic Army, the Black Watch, or 42nd Highland Battalion. I wanted to do a ‘test shot’ of the tartan pattern that I would use and so finished off a sergeant to see how he looks next to the other battalions.

Black Watch Sergeant next to the Caerons and Gordons.

Black Watch Sergeant next to the Gordons and Camerons.

I think that I’m going to go with the dark pattern, essentially, my usual approach to painting Tartan but with more black lines! He looks a bit better in the next picture, as I have retouched the hat band and covered the grey base.

Another picture of the Sergeant of the Black Watch

Another picture of the Sergeant of the Black Watch

As is often the case with my painting, I’ll mull over whether to change things – I’m thinking of a slightly paler green tartan stripe but I better make my mind up as the other 11 on the painting desk are moving towards completion!

42nd Battalion Highlanders!

42nd Battalion Highlanders!

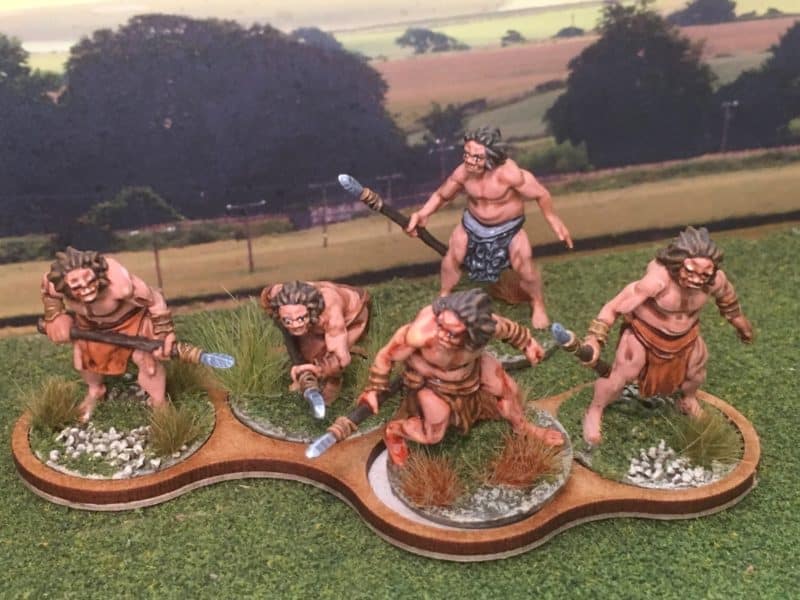
As if all of this wasn’t enough to keep me busy, there is also the small matter of the forthcoming release of the DeeZee Cavemen. There will be 10 cavemen in three blisters and I had test shots of four of the poses to play with. As a teaser, here is a picture of my first attempt at painting them. All being well, there will be more information and details of how I painted them to follow!

DeeZee Cavemen - sculpted by Matt Sofar of knuckle bones miniatures.

DeeZee Cavemen – sculpted by Matt Sofar of knuckle bones miniatures.

So, August has passed and we are well into September and the weather here already has that Autumnal feel, with the evenings being both cooler and shorter. I doubt that I will find much more time for painting in my busy schedule but perhaps this month, I can be a bit more focused!

THE COMMERCIAL BIT

Almost all of the paints, miniatures, bases, basing materials and anything that you are likely to need for your hobby are available POST FREE from my shop here:

ARCANE SCENERY

If you would like a model of John Rattenbury, click here:

JOHN RATTENBURY

Sir John Savage can be found here:

SIR JOHN SAVAGE

Perry’s WOTR plastic range are here:

PERRY MINIATURES

The Victrix Highlanders can be found in the Victrix category here:

VICTRIX MINIATURES

You can see the DeeZee range here…. but you will have to wait a bit longer for the cavemen!

DEEZEE MINIATURES

Happy Modelling!