Pauper Soldiers

I am gradually working my way through the Test of Honour boxed sets. Having completed all the figures in the Starter Box, Bandits and Brigands and most recently, the Samurai Cavalry, my next project was the Pauper Soldiers set. I very much like the main metal figure, Lord Senzo ‘The Thorn’ although I have to mention that the couple of occasions that I used him in a game, his accuracy with the bow led me to christen him something else – nothing to do with my dice rolling of course… I digress, back to the modelling!
ToH_pauper

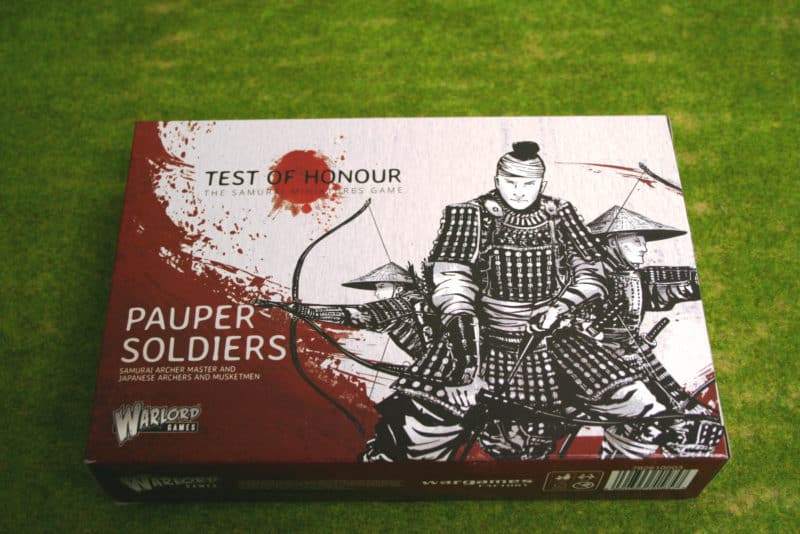
As well as Lord Senzo, the box contains two sprues of ‘Missile ashigaru’, enough to build ten bowmen and musket men. The cards supplied also enable you to field groups or single models of Bowmen or Musket men. I decided that I wanted to build 9 bowmen to go with Senzo. It seemed logical that as he was armed with a bow, his retainers would follow suit. A sort of Japanese version of Robin Hood and his merry men! The tenth model would be used as a musket man but I have plans for fielding a force of Musket men and if they come to fruition, I will post these in a separate blog article.
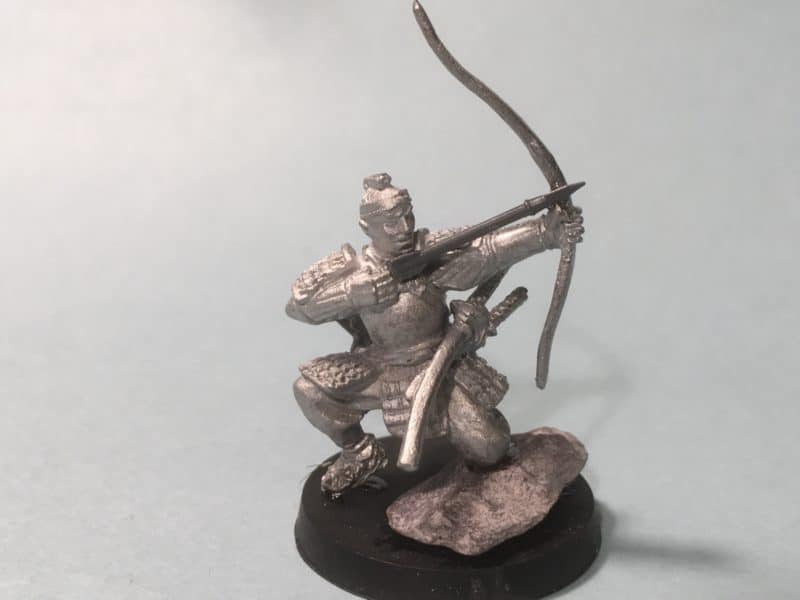
Lord Senzo ready for priming.

Lord Senzo ready for priming.

Lord Senzo himself was pretty straight forward to put together as he is essentially a one piece metal moulding. I made a couple of changes though. By carefully cutting an arrow away from one of the plastic arms on the sprue, I was able to add an arrow to his bow. I also wanted to alter the angle at which he was firing, so by adding a small piece of slate to the base, I super glued Senzo to this. as with the other archers that I have made,  I will add a bowstring once painting is complete.
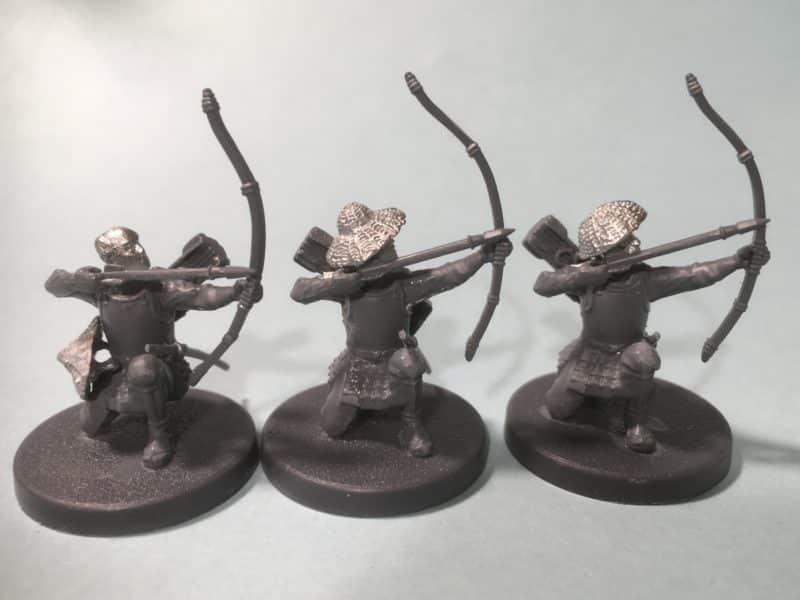
Kneeling Archers

Kneeling Archers

The Pauper Soldiers come with a selection of metal heads – some with hats and some with separate hats. I decided that I would leave the ones without hats bareheaded and hang the hats from the belt. I’m not sure whether this was the idea, but I quite like the effect. Two of the kneeling archers are aiming high. It was a case of finding the bow arms that looked about right for this pose and slightly modifying the arrow arm by adding a sliver of sprue to the shoulder to adjust the angle. Any gaps were filled with Vallejo plastic putty, which is easier and faster to use than green stuff for this small job.
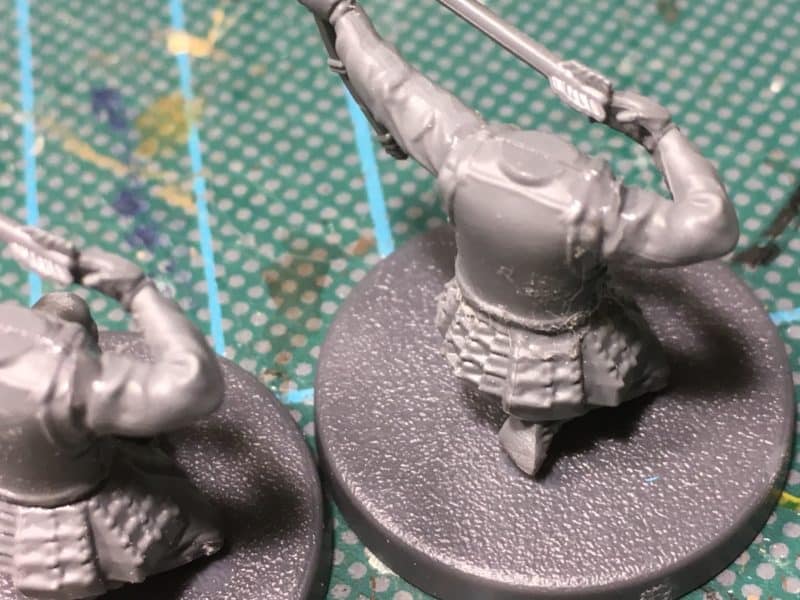
Adjusting the angle of the draw!

Adjusting the angle of the draw!

You can just about make out the inserts in the picture above – it looks messy but cleans up OK! Incidentally, I’ve cheated as you only get two kneeling figures in the set – I had a spare donated by a friend who didn’t build everything in the starter set.
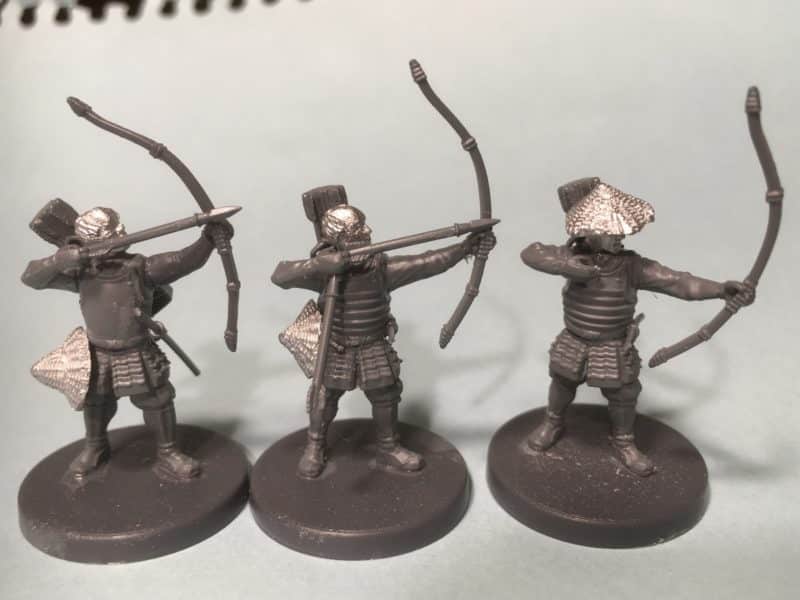
Standing archers

Standing archers

The standing archers are fairly straight forward to put together but I have made some slight modifications. I’ve used the legs that are have feet at right angle to each other and made sure that they are spread as wide as possible. There is no need to fill the slight gap but I did need to flatten the waist area slightly. The middle figure is holding a second arrow, ready to reload quickly! It’s a pose that I have seen in many pictures of Japanese archers. The spare arrow came by carefully cutting it away from the arm on the sprue. I’ve used that arm, now without an arrow, with the man on the far right. The idea is that the arrow has just been fired and when I fit the bow string this should look more obvious. I’ve also tried to tilt the bow down as though the tension has now gone.
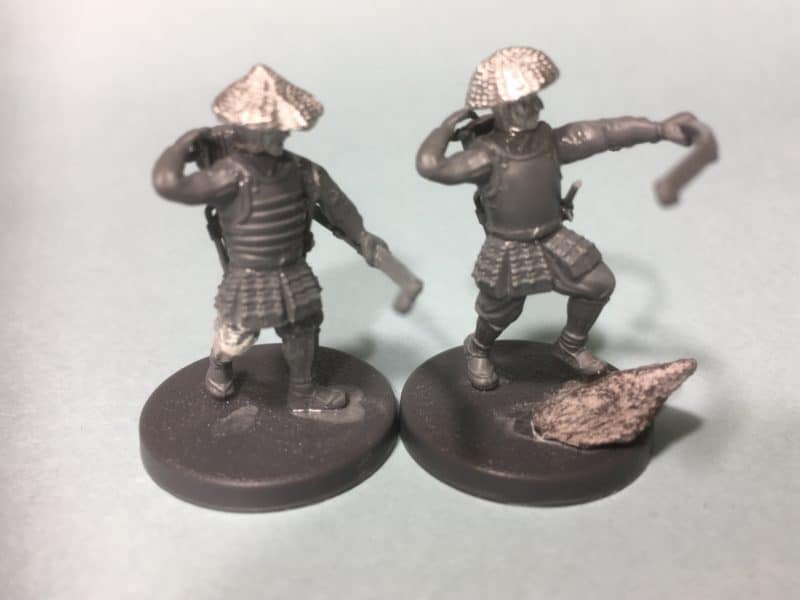
Bowmen Reloading

Bowmen Reloading

The two bowmen reloading have been made using the left arm that is designed to be used to hold the musket. By simply glueing it so that it is positioned reaching over the shoulder, it looks convincing enough. Of course the other trick is to glue the quiver in place right under the hand! The bowman on the left has had a bit of surgery on his leg to make it look as though he is supporting his body as he leans back to get an arrow. It’s a small modification to cut off the legs and re-join it at an angle. As before, I have used Vallejo plastic putty to fill the gap. If you are not familiar with this product, it is idea for filling gaps in plastic models, dries quickly and is easily sanded and primed. You use it straight for the bottle or tube with no mixing and the drying time is very fast. The final note is that I have again used a piece of slate on the base of the right hand figure to change the angle of his pose.
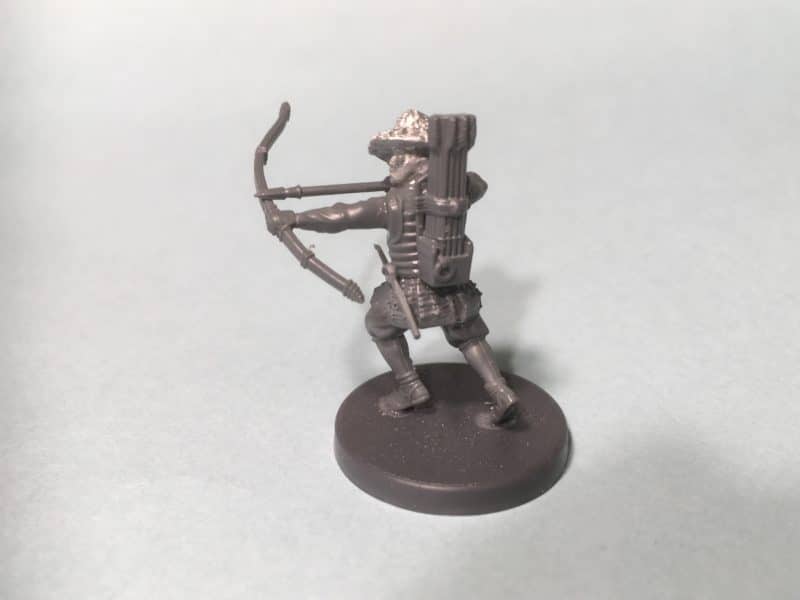
Running bowman.

Running bowman.

The final figure of the ninth bowman is pretty much a straight build except that I have altered the angle of the bow arm to one side and as a result, the arrow is resting on the ‘wrong’ side of the bow. As I’m not an archer, I’m not sure how realistic this is but it makes the pose more dynamic. The other point to note is that I have given him just one sword. This is true for all of the plastic pauper archers that I have made. I had originally thought to leave the swords off but decided that even paupers would have some sort of sword, so I have either given them one of the ‘extra’ short swords from the samurai sprue or simply cut the small sword away from the double Katana that is supplied.
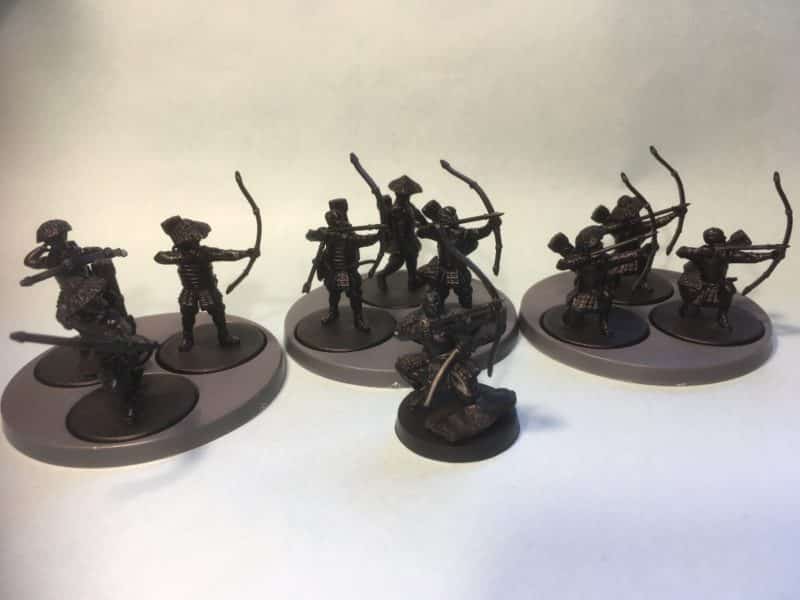
Pauper soldiers, primed and ready for painting.

Pauper soldiers, primed and ready for painting.

Here is the finished group, primed and ready for painting. I’m sorry that the picture doesn’t show the detail but it gives you the idea as to how they will look.  I have a colour scheme in mind that will hopefully make them look a bit like pauper soldiers – more of a drab scheme than I have used for my other archers. I’ll update you with my progress in a future blog.

The Commercial bit.

If you would like to have a go at building your own Pauper soldier warband, all of the products that I use are available from the Arcane Scenery shop and with the exception of aerosols are supplied post free to most worldwide locations at the time of writing. Here are some links:

SAMURAI AND TEST OF HONOUR CATEGORY

GLUES AND ADHESIVES

FILLERS, INCLUDING VALLEJO PLASTIC PUTTY

BASING MATERIALS INCLUDING SLATE


Samurai Cavalry

If you have been following the Arcane Scenery Facebook page, you will be aware that I have been working on the Test of Honour Mounted Samurai set. In this picture heavy blog post, I’ve pulled most of the pictures together to give a running commentary on how I finished the band. I haven’t detailed all the paint colours but I use Vallejo model colour throughout combined with the Army painter ink wash range.

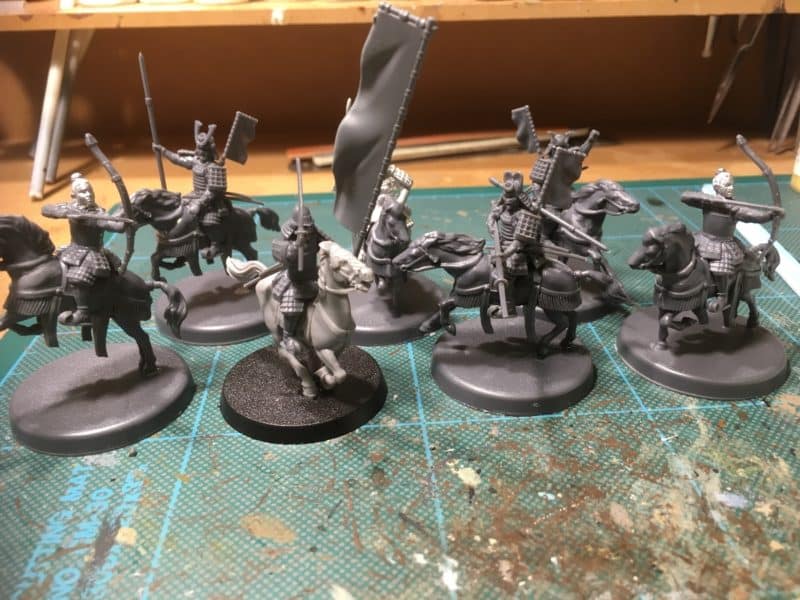
Mounted Samurai set assembled

Mounted Samurai set assembled

You can see that I have assembled the full set before I started to paint them. I already had an idea as to how they would look. It might sound a bit daft, but when working on a project like this I have a sort of story or narrative in my head as to how the warband should look. You will get the idea as the finished warband appears. Just as an aside, I have made a mistake when assembling the horses tails – I’ll leave the reader to figure out what it is but I decided to leave things as they were…

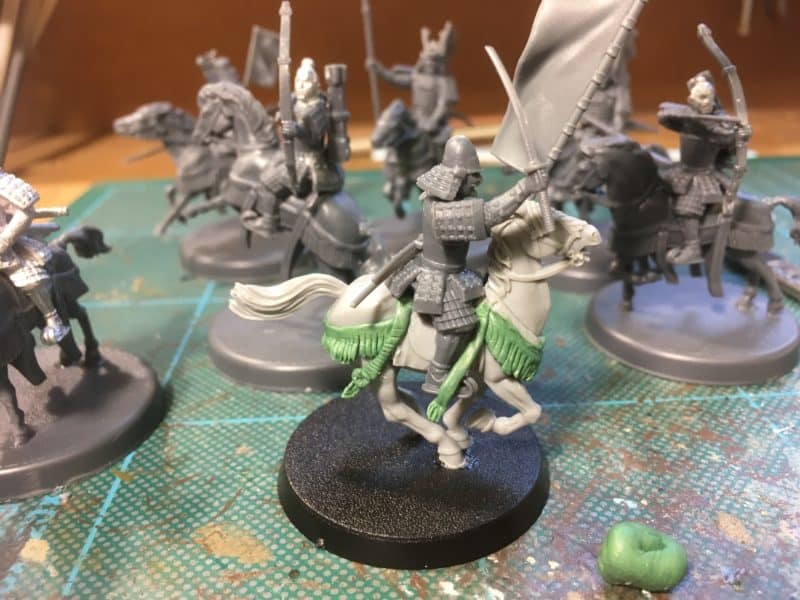
I modified an GW Elven horse with green stuuf

I modified an GW Elven horse with green stuff

The mounted Samurai set comes with six plastic samurai and their horses plus an extra metal character model, the widow Takeda Naoko, which means that you have a ‘spare’ samurai. I decided to use a spare GW horse and using green stuff, it was a simple job to add some samurai trimming! There were now seven Samurai in the warband.

Onna Bugeisha Takeda Nacko

Onna Bugeisha Takeda Naocko

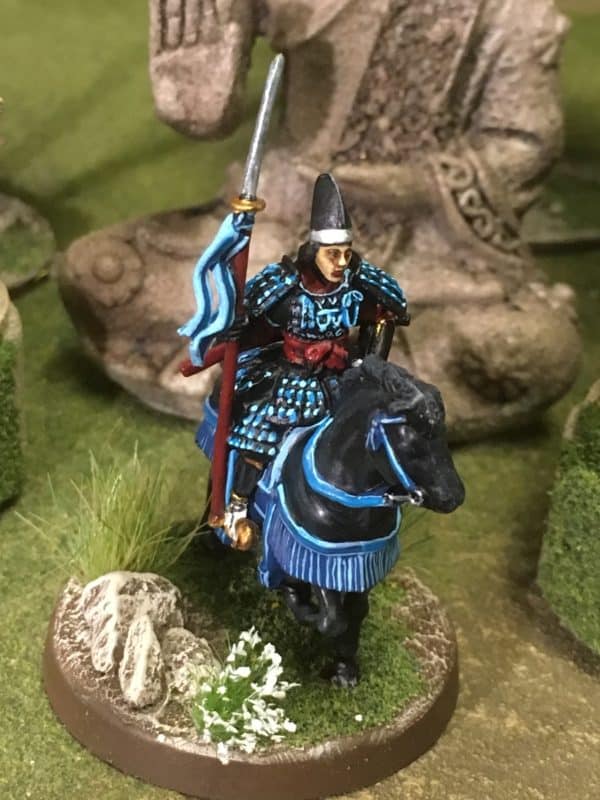
I started the painting with the Widow Takeda Naoko. It’s worth pointing out now, that my research regarding colours is limited to the warlord web site, my pinterest board ( link below) and googling ‘mounted samurai’, so don’t take any of my colours as ‘accurate’. I save all that malarkey for my Napoleonics and just want to have fun painting these models as the mood takes me. In my mind, I decided that a widow should have black armour and I put her on one of the more sedate horses. Her pose is not as dynamic as some that Warlord produce and it looked to me as she was watching over proceedings as her retinue wreaked vengeance!

Onna Bugeisha Takeda Naoko complete

Onna Bugeisha Takeda Naoko complete

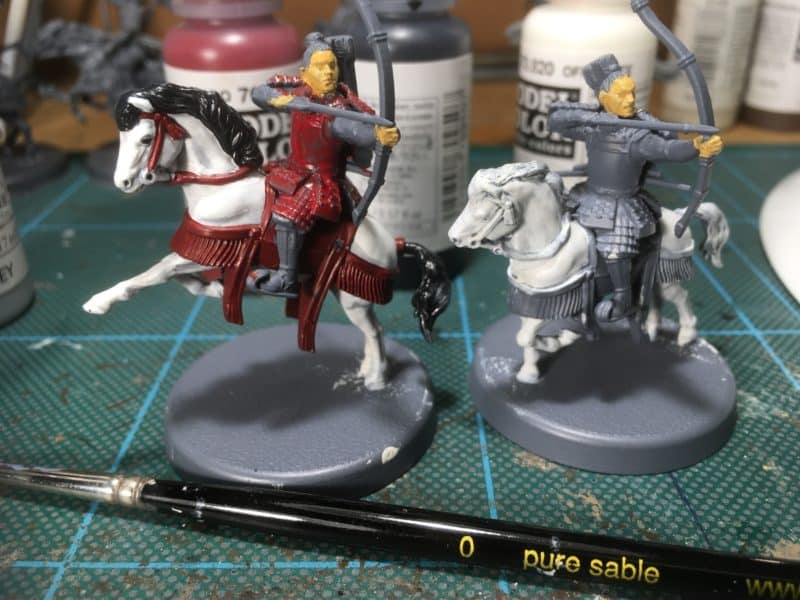
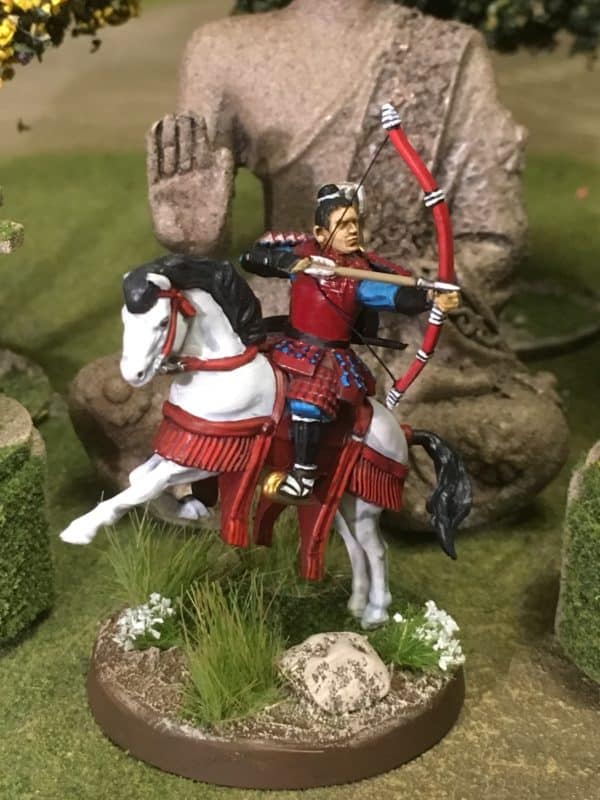
The next two models that I painted were the widows immediate bodyguard. In my imagination, she would have two faithful retainers who would put an arrow through anyone that came too close! I also wanted a bit of Hollywood, so one of the archers is firing from a rearing horse.

Samurai mounted archers

Samurai mounted archers

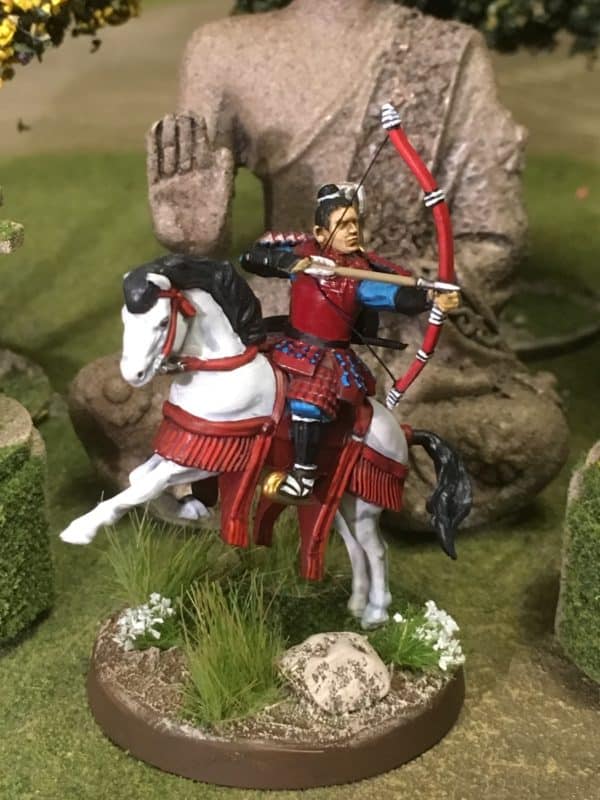
To contrast against the Widows horse, I decided to paint these two on matching white horses. I am also using my new favourite red, Vallejo burnt red 70814. The archer on the rearing horse just needed a bit of filling at waist level to get him to sit upright in the saddle.

Samurai Archer on rearing horse

Samurai Archer on rearing horse

The next picture shows the three models together as I had imagined them. The bowstrings on the archers are made using stretched sprue – its an old modelling technique that I have covered in a previous blog – again, the link is below.

Takeda Naoko and bodyguard.

Takeda Naoko and bodyguard.

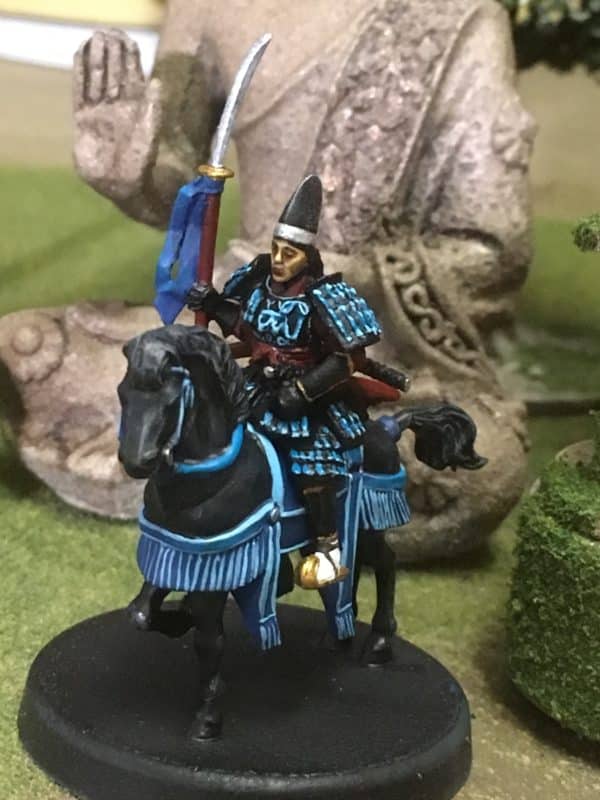
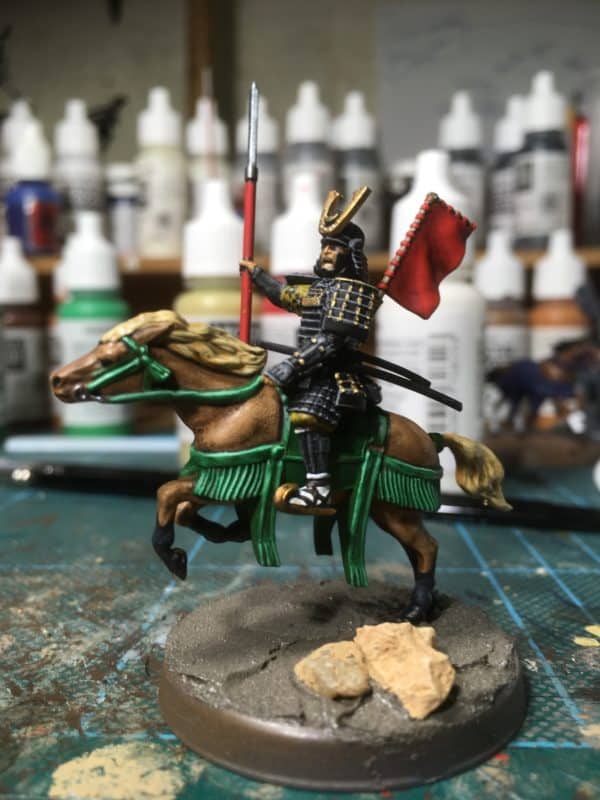
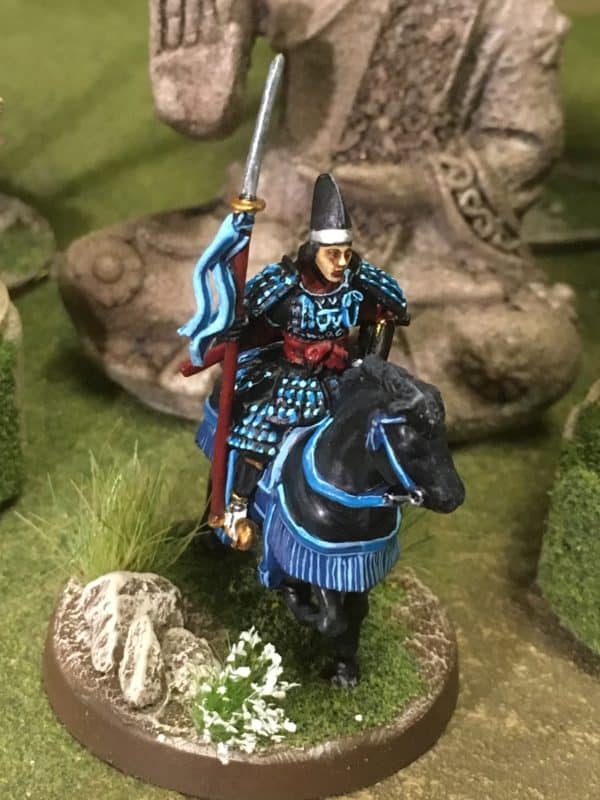
The next model was the ‘lead’ Samurai in another group of three that would make up the retinue. I planned to have these all in Black Armour with gold trim. The lead model is on a rearing horse and I thought that a light brown horse would look good.

The next samurai in the group

The next samurai in the group

This picture also shows my preferred basing method. I use Vallejo dark earth textured paste and add some small rocks as detail. I then paint the whole thing with Vallejo chocolate brown and dry brush with chocolate brown and Iraqi sand mix. For the rocks, I also added some white to get a brighter finish.

Five mounted samurai in the band.

Five mounted samurai in the band.

The basing is finished with some woodland scenic scatter, some Noch flowering tufts and my new favourite thing, Gamers grass long tufts. You can see the fifth Samurai on a brown horse, and in the next picture, the sixth on a similar horse.

Now six Samurai in the warband

Now six Samurai in the warband

It’s not clear but I have added the flags on the back of these three Samurai and using decals, added the Takeda mon to show their allegiance. I also used different colours on the horse decoration as what I hoped would be a subtle way of differentiating the different allegiances in the warband.

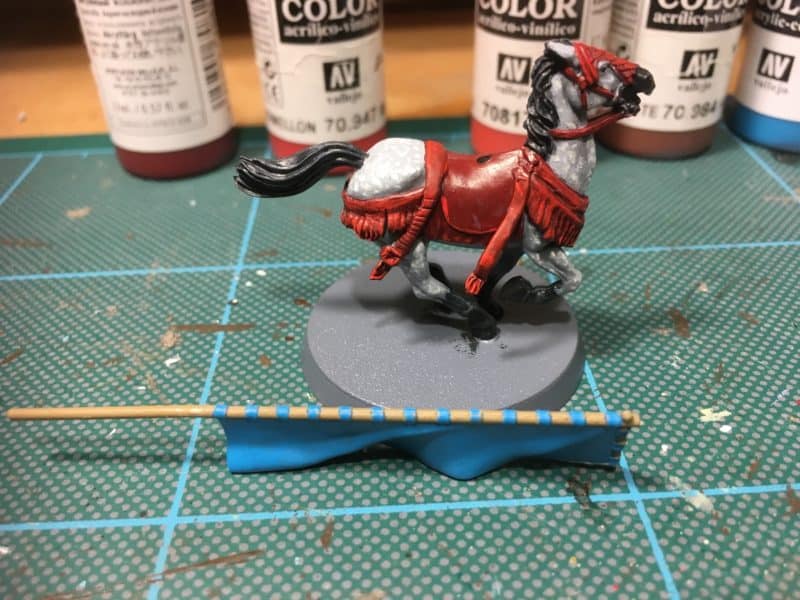
The final horse in progress.

The final horse in progress.

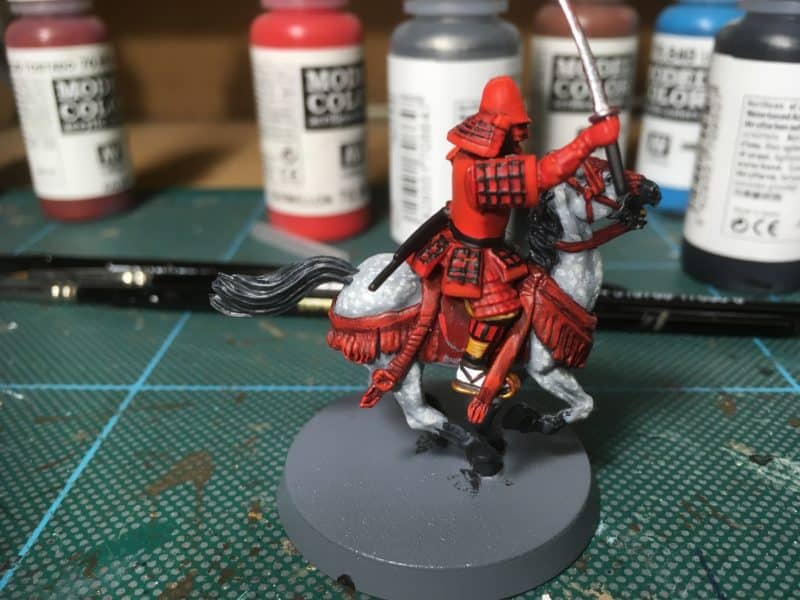
I wanted the final or ‘bonus Samurai’ to be different again. With a bit of a nod towards the movies, this one would be all red on a dappled grey horse carrying the Takeda Colours into battle. Perhaps he is the Brother or son of the Widow Takeda Naoko charging to avenge the death of his Father/Brother in law?

Takeda Charge!

Takeda Charge!

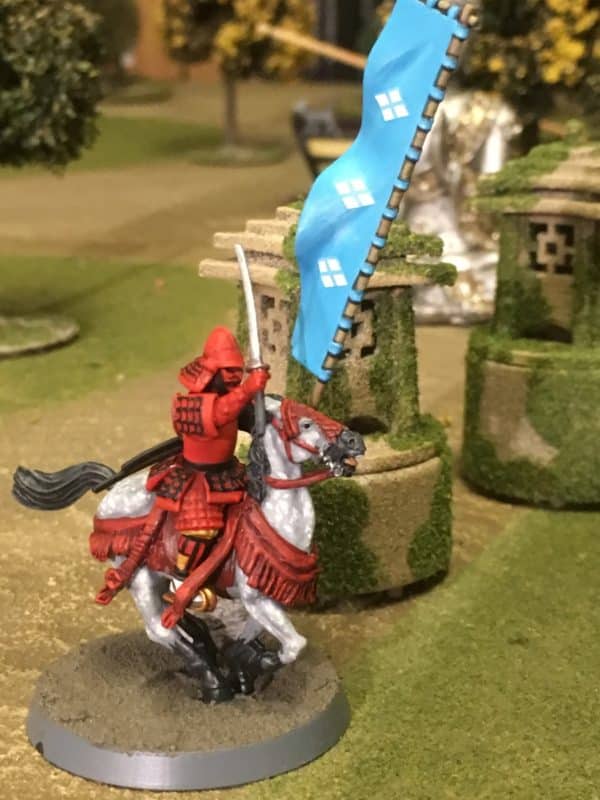
I was worried that perhaps I had used too much red so decided that the banner would have to be a different colour – a picture on google helped here.

Takeda banner added

Takeda banner added

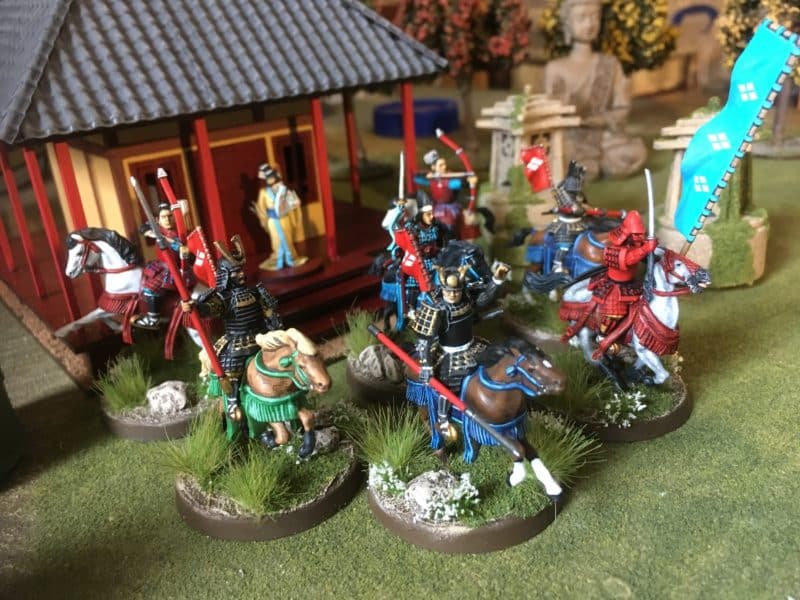
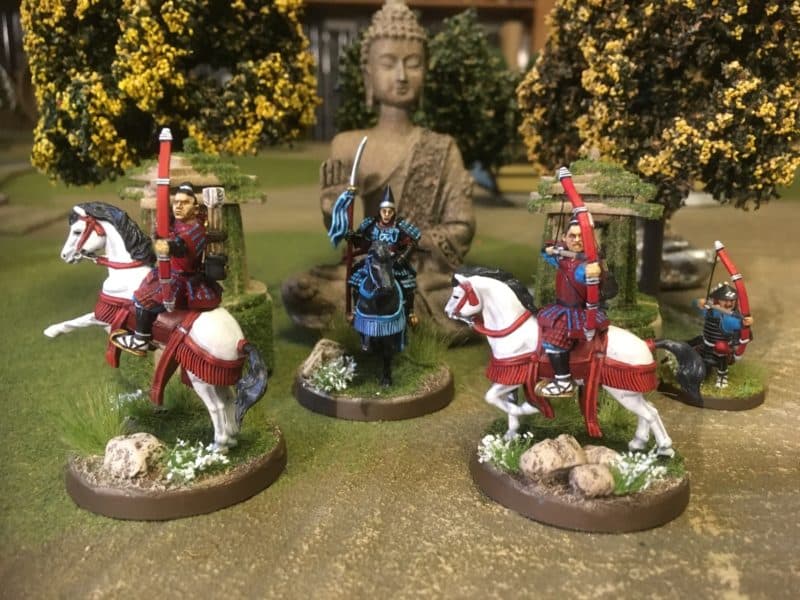
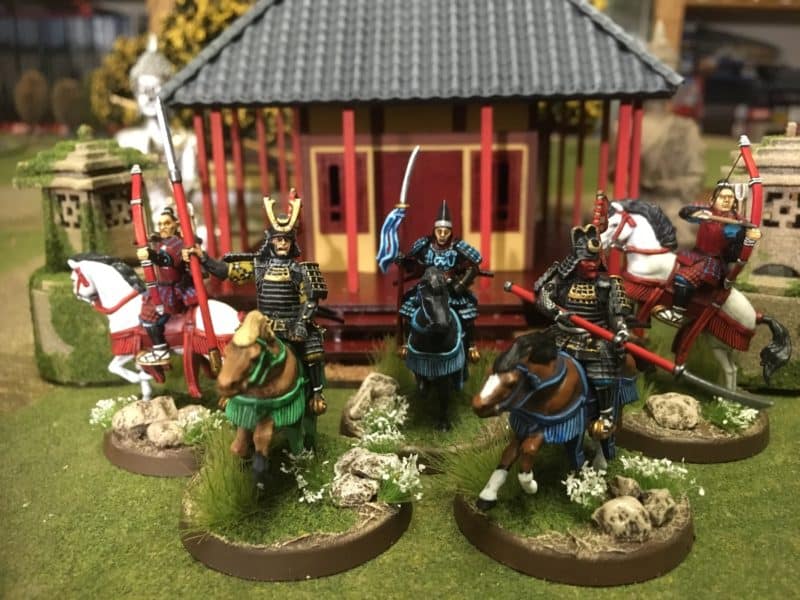
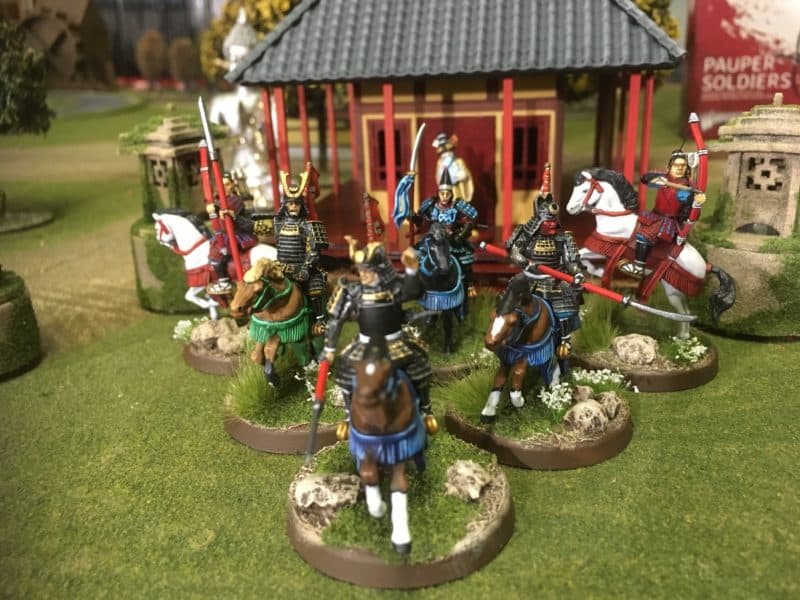
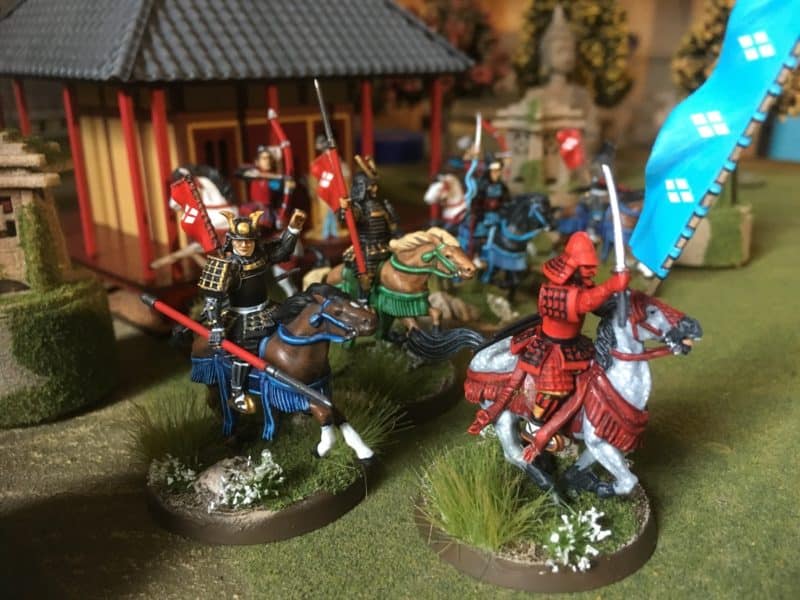
The last couple of pictures show the warband complete.

Takeda Naoko's warband complete

Takeda Naoko’s warband complete

Takeda Naoko's warband ride out to seek vengegance!

Takeda Naoko’s warband ride out to seek vengegance!

I started the project on 23 December 2017 and finished just this weekend. Painting these models have given me a great deal of pleasure as I have lost myself in the stories that I have imagined as I painted the models. I’m now looking forward to the battles that they will fight!

Below are some useful links, including links to products in the Arcane Scenery Shop. Remember we post free to most countries in the world.

SAMURAI RANGE

VALLEJO RANGE

ARMY PAINTER INKS

GAMERS GRASS

The joys of Sprue Stretching

MY PINTEREST SAMURAI BOARD


Does Size Matter?

The title, of course, is a cheap shot aimed at getting attention but stems from a serious question from a customer asking if one range of 28mm figures was compatible to another. The answer depends very much on your own standards or personal degree of OCD. I’ll be showing you my thoughts and opinions (never humble – but opinions, nevertheless!) through my own collection of Napoleonic figures. I think the principle will apply to most periods, though.

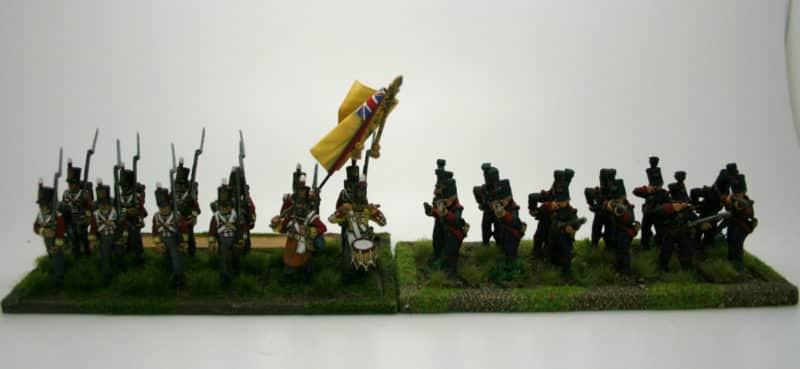
My collection features at least eight different manufacturers -it's difficult to see them at this distance.

My collection features at least eight different manufacturers -it’s difficult to see them at this distance.

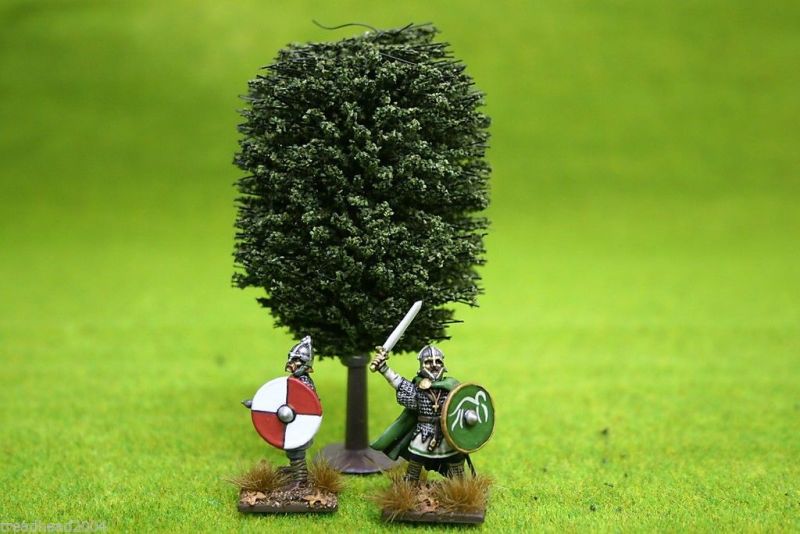
So first of all, lets establish that we are talking about 28mm figures here. Other sizes are available and again, many of my comments are as relevant to them as 28mm figures, particularly when the ‘scale’ is given in millimetres. So whether 6mm, 10mm, 15mm, 20mm, 25mm or 28mm we are talking about a size of figure NOT a scale. Whatever manufacturers may claim, it is not really sensible to think of scale when it comes to wargames figures. As a side issue, I get a bit twitchy when I am asked what ‘scale’ a model tree is –  it is rare that such items are a particular scale but simply a depiction of how a tree might look. But I digress and perhaps I’ll look at scenery in another blog.

What scale is this tree?

What scale is this tree?

Back to wargames figures. They are sculpted and manufactured to a size rather than a scale and for 28mm figures this is supposed to be the height, from feet to eye level of the figure. In theory, this means that all figures will be the same size. Which in scale terms is immediately a nonsense. People come in all shapes and sizes. So where has the idea of scale come from? I think in the main, the issue has grown out of the need to match figures to vehicles and guns, particularly as wargamers moved into the industrial age with their games. In the main, a gun or vehicle would be manufactured to a specific size, so one Sherman tank will be identical in size to another. The ‘hobby’ seems to have fixed on 1/56th scale as the ‘right size’ and there is a growing standardisation in this scale for vehicles. That in turn seems to have fed back into figures and customers seem to be increasingly concerned with a ‘scale’ as opposed to a ‘size’.

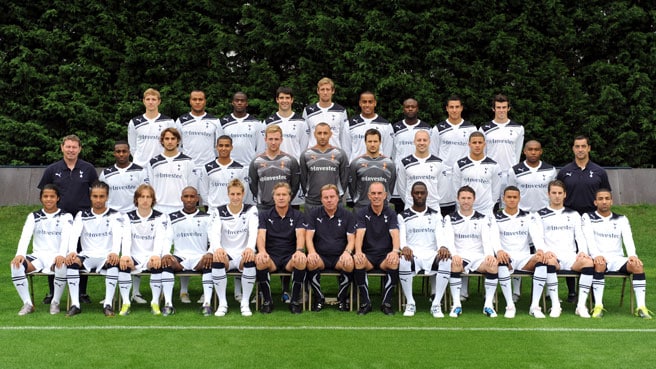
Peter Crouch was disappointed that he would not be represented in the Spurs Subbuteo team once again

Peter Crouch was disappointed that he would not be represented in the Spurs Subbuteo team once again

From my own point of view, so long as the figures are reasonably similar I guess that I am happy to mix and match…up to a point. Different companies use different sculptors for their figures and this leads to both variations in style and size. At the smaller end of the scale Foundry and HaT produce some nice figures in 28mm but Foundry can be smaller – some are closer to 25mm, although not all the range is so…HaT tend to produce plastic figures that look thinner and more to a ‘scale look’ than the ‘chunkier’ metal manufacturers. Sitting nicely in the middle, the main Plastic manufacturers , Perry, Victrix and Warlord are all very similar and certainly compatible with each other to the point that interchanging components is very straight forward when converting. At the top end of the size comes Front Rank and Trent Miniatures. Front Rank and Trent sculpts are simply superb but tend towards 30mm rather than 28mm.  So how do they all mix. See for yourself.

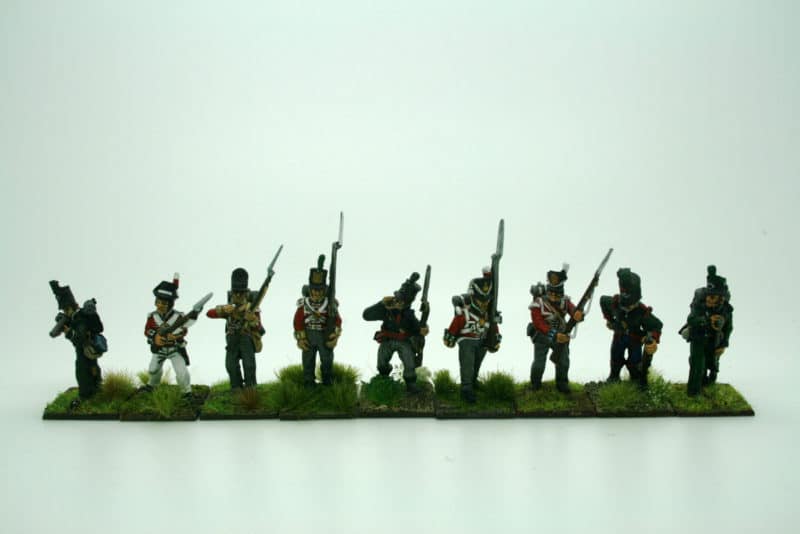
Infantry comparisons

I deliberately haven’t captioned this picture but I can tell you that there are Foundry, Perry metals & plastics, Warlord, Victrix, Front Rank and Trent Miniatures all present. If you start to look closely enough you will see differences in style and size but are the differences really that great? They look like a natural line of blokes in uniform…

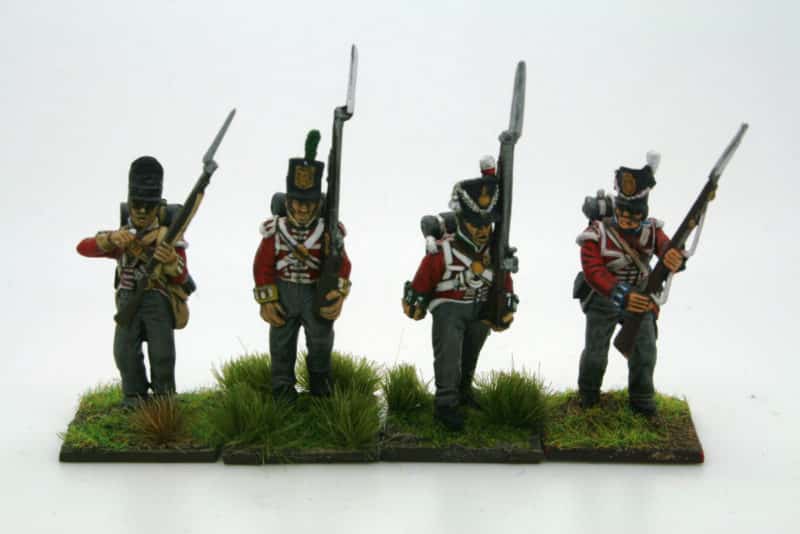
Line infantry Comparison

Line infantry Comparison

This picture shows from right to left, Perry Miniature plastics, Warlord games plastic, Front Rank Metal and Victrix plastic. The most obvious difference is the thicker bayonet on the metal figure.

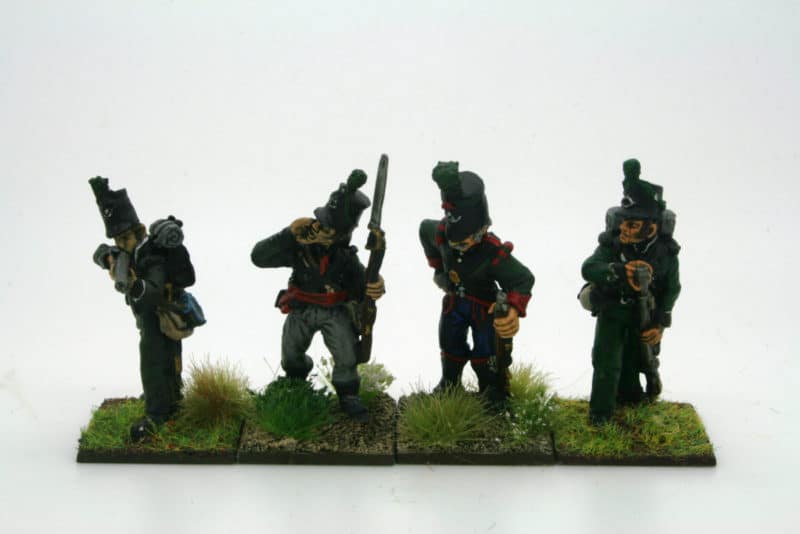
Light infantry Comparison

Light infantry Comparison

I’m actually not sure but I think the models here are Foundry, Front Rank, Trent Miniatures and Perry metal. Yes, there are slight differences but more in style than size and were they not side by side I think that it would be difficult to tell them apart.

Regiment Comparison

Regiment Comparison

Apologies for the poor photograph, but the point here is that if you use the same manufacturer for different units rather than mix them, the difference becomes less obvious, particularly when on the table. This means that I am more than happy to mix and match manufacturers in my collection and army. I tend to produce one unit from a manufacturer rather than do too much mixing within units. That said, when it comes to skirmishers, as they are individually based, I am happy to mix things up and if there is a noticeable height difference, an extra piece of plasticard under the base can level things out.

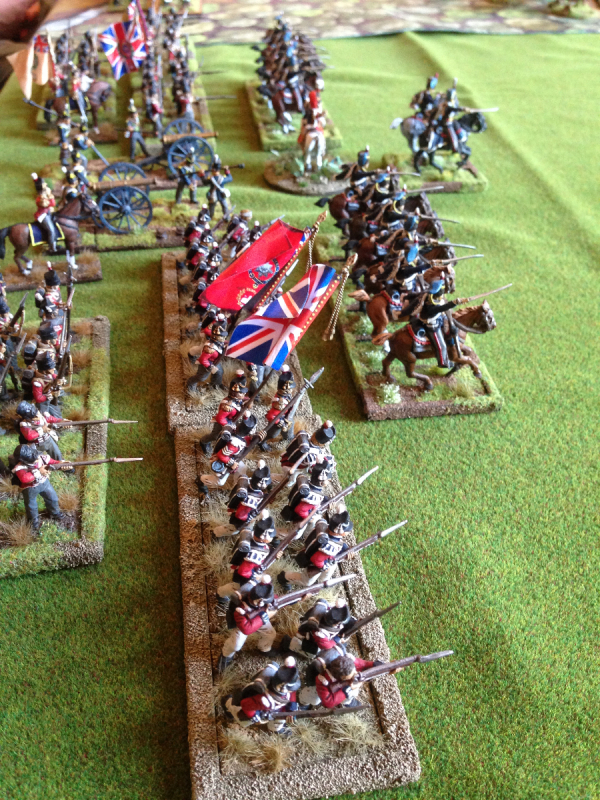
The Guards line up ready for battle!

The Guards line up ready for battle!

The final picture shows figures from at least four different manufacturers on the table. With hind sight, my army would look more cohesive if I had been more consistent with the basing! Unfortunately, I have a tendency to experiment with different products and techniques! The old wargaming adage that ‘faces, bases and flags make a good unit’ is great advice and applies to armies as well. I do have plans, or more accurately, dreams, to standardise all my movement trays and that will go a long way to give a more uniform look to my collection.

So, in the end it is up to you whether you mix things up or stick to just one or two manufacturers. My experience is that the majority of the well known manufacturers produce superb figures that in the main are compatible with each other. I guess that some people have their favourites but I have always been happy to mix and match. Without getting too analytical, I think that different people want different things from their hobby. I know that some collectors and wargamers prefer their figures to be identical and all lined up in the same pose. It’s not for me though. When discussing the subject of all units looking the same in the same pose with my wife, her opinion was that if you had 400 blokes marching down the road together, the chances are that at least one would be scratching his arse or picking his nose….

Happy modelling!

You can see our comprehensive range of 28mm Napoleonic models from many of the manufacturers mentioned above all mixed together here:

28mm NAPOLEONICS


Another year over, A new one has begun

Not quite John Lennon, but a good intro to my first blog of the year. I had intended to do a review of the year but to be honest, I’m not in the mood to look back, I prefer to look forward. If you would like to know what I have been up to, there are over 40 blog entries from last year to peruse! That said, I’m not one for making New Years Resolutions as such. I prefer a 90 day plan. A year is a long time and there will be plenty to distract me. Test of Honour is a great example. I had never planned to model and paint Samurai or come to that anything Japanese. My focus was very much on building a Napoleonic Army with Saga Dark Age warbands as a happy distraction from churning out battalions of Brits.

My latest additon to my Warband

My latest addition to my Warband

But along came Test of Honour, and I was hooked. I think I know why and bear with me whilst I explain.

Now, first of all, I had been stocking and selling the original Wargames Factory Samurai kits since their release. I had always been a fan of their sets long before they moved across to Warlord Games. I thought that in terms of value for money they were excellent and the sculpts were improving all the time. For those that doubt me here’s a couple of links to earlier blogs written in 2010 and 2011 respectively:

WARGAMES FACTORY DARK AGE MODELS

WELCOME BACK WARGAMES FACTORY

Despite my enthusiasm for Wargames factory, the Samurai kits didn’t really appeal, I was too involved in Napoleonics to consider them as a hobby project. Just to further name drop and show how I missed the early boat, Andrew Chesney, who was working at Warlord at the time, mentioned that he was playing a Samurai game with a couple of other guys from Warlord, a certain Andy Hobday and Graham Davey, did I fancy joining him in a game? At the time, I was again, too wrapped up in my own agenda and politely declined, although I did sell him some nice Japanese buildings that were being produced by Sarissa….

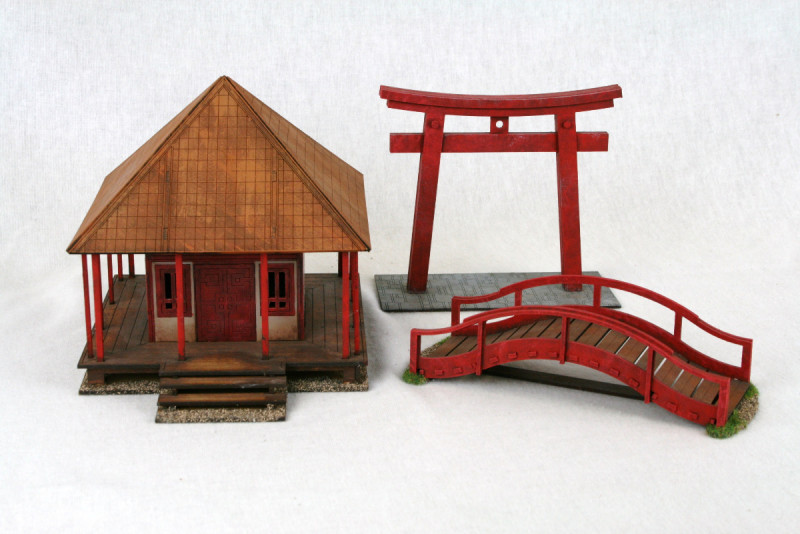
The rather Superb Sarissa Buildings

The rather Superb Sarissa Buildings

I nearly got hooked on the Samurai vibe when Zvezda released their 1/72nd range but 1/72nd is really not my preferred scale and although we commissioned some Japanese scenery in this scale, it didn’t take off either as a game or a range. Zvezda seem to lose interest quite early on as well and although some of the sets are still available, as far as I can see the range is not included in their latest catalogue and is disappearing fast.

The release of Ronin by North Star and Osprey books was also tempting. The miniatures are lovely but the rules didn’t quite capture my interest, nor more importantly, that of my gaming buddies, who like me were focusing elsewhere.  So, no Samurai for me then…until Test of Honour was released last year.

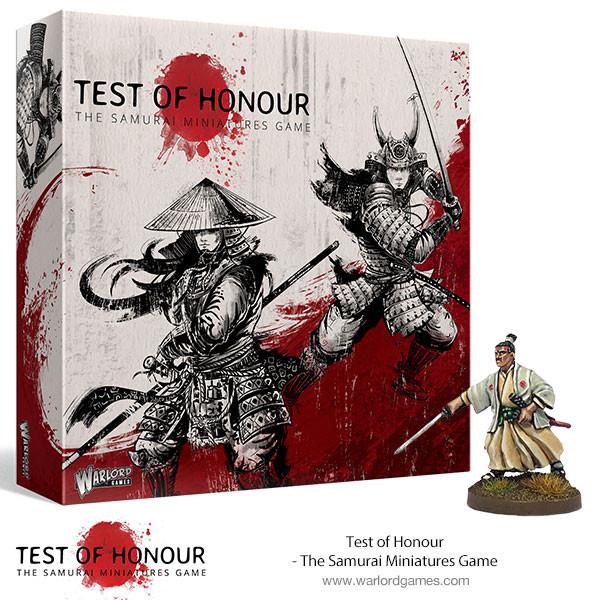
New from Warlord Games, Test of Honour

New from Warlord Games, Test of Honour

I wrote about the initial release in my blog here:

A TEST OF WILL POWER

and my conversion to the game here:

TURNING JAPANESE

It would appear that I am hooked. The appeal for me is the simple game mechanics that expand with each supplement that you buy. This results in the game having collectability as well as allowing you to field all sorts of variations in your warband. Of course, this also means that there is depth to the game. As you build your warband, more tactical options are available. The game doesn’t take itself too seriously. It’s not designed to be an accurate historical recreation of Samurai Warfare and this is quite liberating for a Napoleonic Wargamer. It’s simply a game using Samurai figures with just enough flavour to make it feel authentic. You can get through a game in an hour or less. This seems to ensure that nobody takes winning or losing too seriously – you can always have another chance to win if a game goes against you.

My own take on the Widow Takeda - Black seemed appropriate to me.

My own take on the Widow Takeda – Black seemed appropriate to me.

As you are encouraged to build your own retinue, you can either research a historical clan or simply design your own – again, a very liberating process for a historical wargamer. I guess as my collection grows, so will my very limited knowledge of the period but for now I am happy to focus on the modelling and painting and enjoy the freedom of creating my own collection of both models and scenery.

So no New Years Resolution for me as such. Don’t get me wrong, I do have a list of Projects to get on with but filling a year would be silly. I know what’s coming later in the year and it’s going to be brilliant… and I’m not just talking about Samurai!

So watch this space, or even better, follow us on Facebook. We will let you know what’s coming as soon as we can but for now, just leave a bit of space in your modelling schedule. As for those of you yet to try Test Of Honour, if you have a like minded gaming buddy, give it a go. The boxed set has pretty much everything that you will need for two players to get started for just £35.00 and we ship post free worldwide. But, don’t blame me if you get hooked!

TEST OF HONOUR

SAMURAI CATEGORY IN SHOP FOR OUR RANGE

LIKE US ON FACEBOOK!