You may have seen a number of blog posts and post to the Bill Hooks Facebook group regarding our new venture ‘Never Mind the Boat Hooks’, a set of wargames rules based on Medieval naval warfare. Many of the boats that we are using are models made from the Sarissa Precision medieval Cog. My ‘fleet’ currently includes two, so I thought that it would be useful to give a brief review of building the kit and show readers some of the modifications.
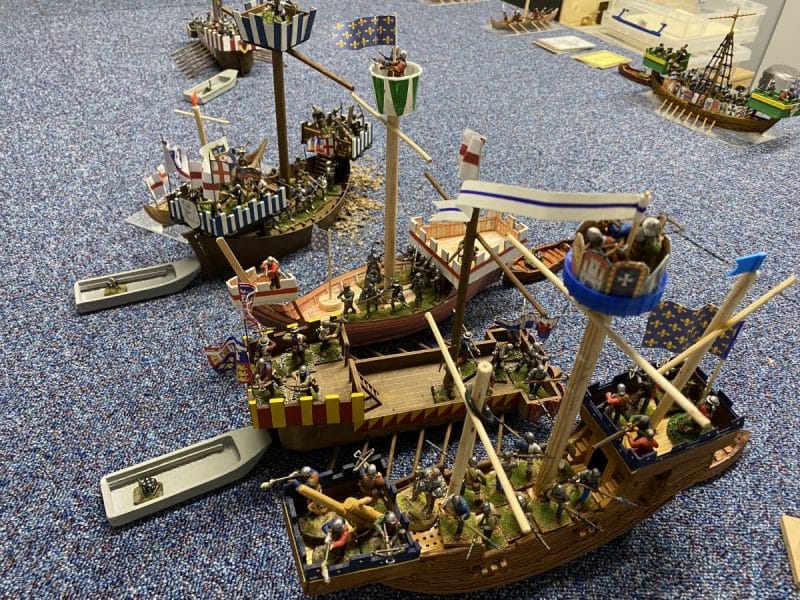
First of all, a couple of disclaimers. The kit is a representation of a typical medieval cog rather than a precise scale model. It’s a very good representation and designed for 28mm wargames figures, so it is very practical and robust for table top use. If you are looking for a more accurate model there are some very nice ones out there – the Zvezda Cog in plastic, for example. However, you will find that they are far more expensive and less robust or practical when it comes to gaming. That said, from what I have read in the limited research that I have done, there are no plans based on actual designs that survive. Most of what we know is based on contemporary pictures and descriptions rather than actual plans. There are a few surviving ships that have been recovered but I think that it’s fair to say that our knowledge is limited.
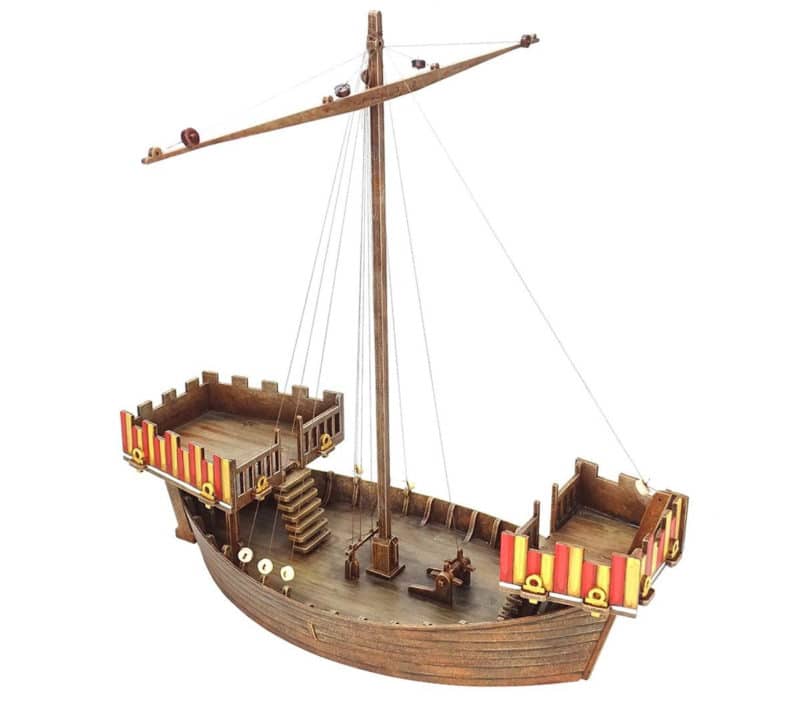
The Sarissa Cog comes with full building instructions and I recommend that you read them first and familiarise yourself with the pieces before you start to build the model. I found that the model went together very well and in some places the pieces were such a snug fit, glueing wasn’t required! However, to be on the safe side you should assemble with glue. I used Expo thick Cyanoacrylic super glue. A good white PVA would also be suitable but I was impatient and the thicker super glue glue gave me sufficient working time. A quick blast with an accelerant made things even faster, once I was happy that the pieces were in place.
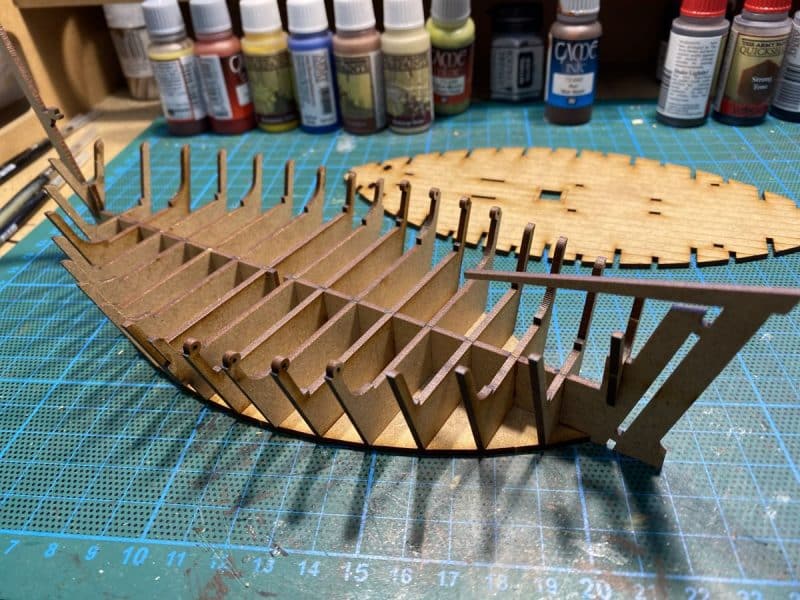
A word of caution when building. It is worth checking and then double checking that the ‘ribs’ that will support the grey board sides are assembled in the correct sequence and that you are clear as to which ones are on the stern end of the boat and which ones fit to the front or bow. The same goes when you fit the deck – ensure that you are clear which is the bow and which is the stern! Otherwise, I found the assembly very straight forward. A bit of patience and care is required when fitting the greyboard sides. This is where I found that super glue was better than PVA due to the fast grab and set time.
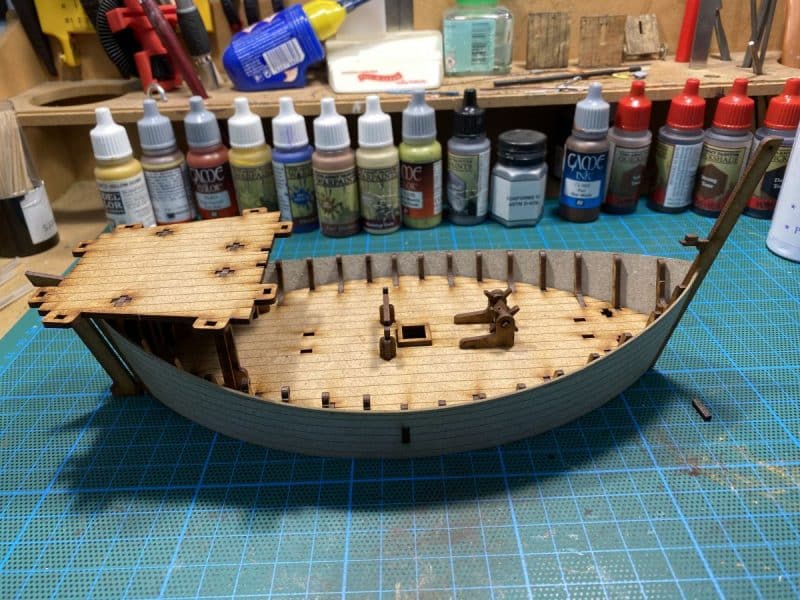
I assembled the mast but did not glue it in place as I intended to replace it with a ‘fighting top’ for my archers. The mast is snug enough to slide in and out as required.
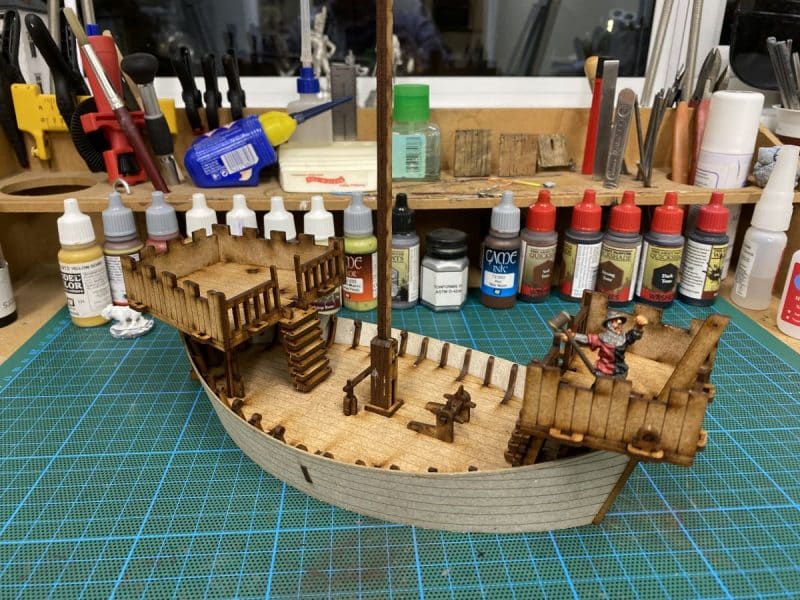
Full rigging instructions are included but I decided that the rigging would restrict access to the deck and get in the way when gaming so I went for a simpler solution. I made a replacement mast with a fighting top from a piece of 10mm dowel. You can pick this up from your local hardware store for about £3.00 for a 3 metre length so you will have plenty spare! Using a saw I cut a slot in the bottom of the new mast so that it would fit into the existing mast hole. Next, I needed to make a fighting top.
I’ve used two different methods of making a fighting top. I have a square one for the ‘White Hart’ ( see above) and I have a round one for the ‘White Lion’ – see below.
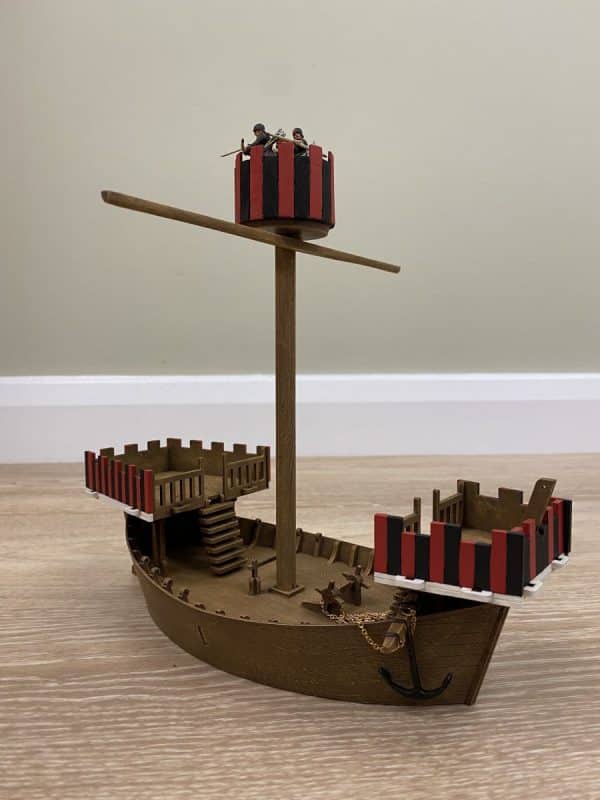
Both of these fighting tops are made using 40mm bases ( round or square as you prefer). I’ve then made the sides with coffee stirrers cut to size and attached to the bases.
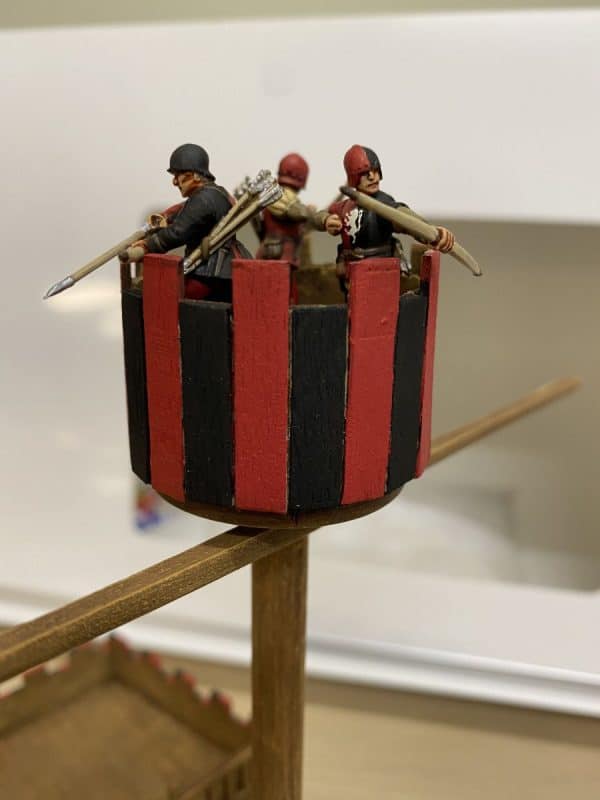
If you look at the top picture you can see that there are some very simple ways of making a fighting top – look carefully and you might just identify a certain fast food outlets’ sauce container!
With the new mast and fighting top completed, my Cog was ready for gaming. However, I wanted to use the original mast with a sail for display purposes. To make the sail, I simply cut a piece of old sheet to size. I then asked for some help from my next door neighbor, Carole, who is an expert with a sewing machine to run some panels into the sail. To get the design of the lion onto the sail, I printed off a picture from the internet and taped the sail over the picture onto my patio window! I could then trace the design onto the flag.
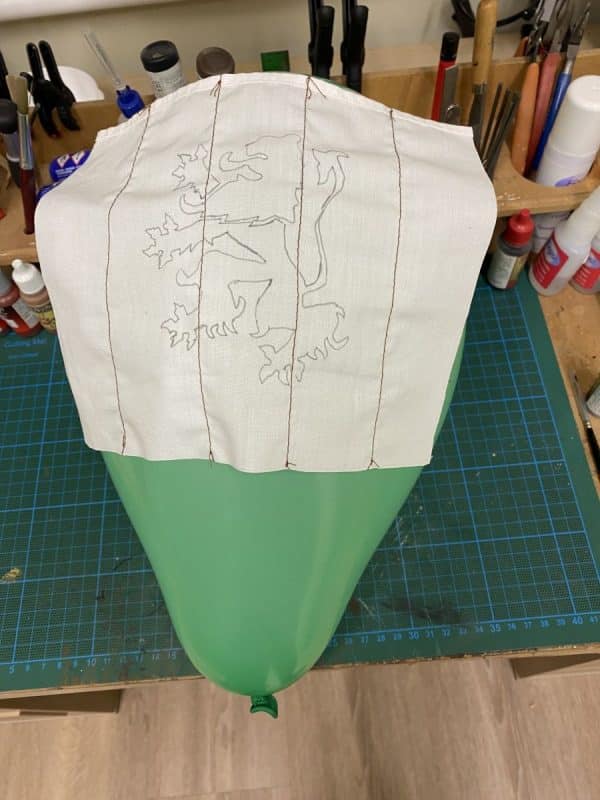
As you can see, I then placed the sail over a balloon and liberally coated it in PVA. Once dry, it was easy to peel the sail off of the balloon and it would now keep it’s shape with a bit of ‘belly’ in it!
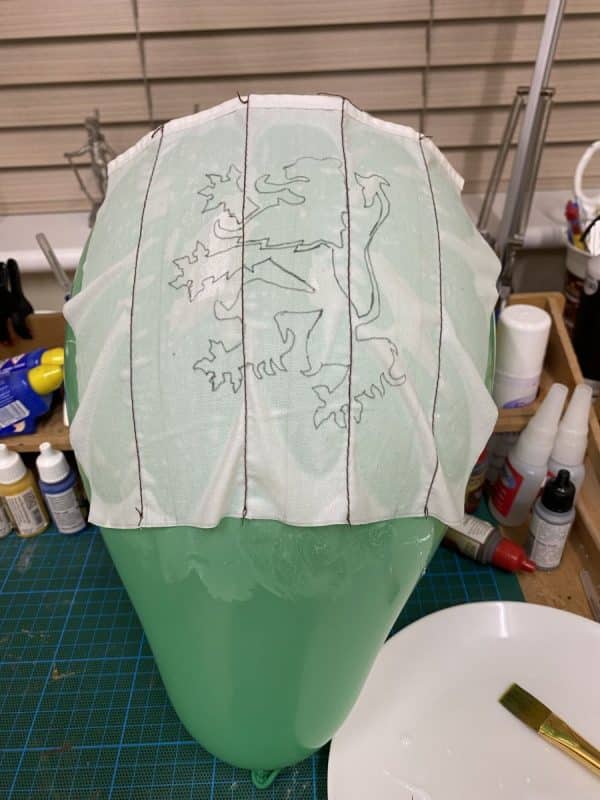
It was then just a case of carefully painting the sail. I used standard Vallejo paints but I ensued that each coat/colour was very dry before completing the next one.
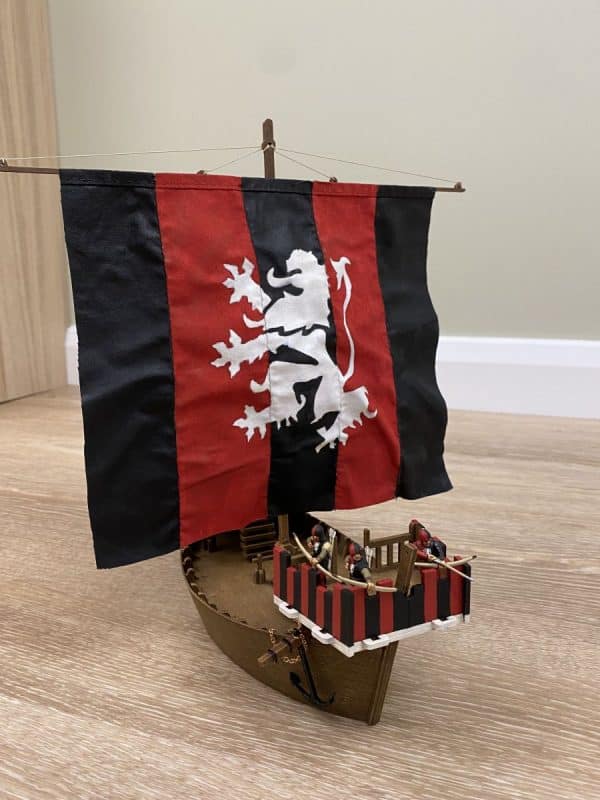
The anchor that you can see was from Expo – we usually have these in stock, as well as the chain, although as I write this I am waiting for more stock as I have used them all for my projects!
So my cog is ready to take to the table. I will publish a follow up blog, where I will detail how I have painted the model – although if you have followed my blog, you will be aware of my preferred method of painting to simulate wood. If you are able to attend Partizan in Newark on May 22nd, I will be there with Andy Callan and we will be running a game of ‘Never Mind The Boat Hooks’ – you are welcome to come and join in and if you have any questions regarding the construction of the boats, I will be pleased to answer them.
THE COMMERCIAL BIT
I hope that you all enjoy your hobby as much as I do – remember that our web site will have much of what you need! Click here to see our shop:
If you would like to purchase the Sarissa Precision Cog you can see it here:
We also have a category devoted to Never Mind the Bill Hooks:
To see our range of Naval accessories, click here:
To see our range of glues, click here:
You can find all the Vallejo Model colour paints here. If you don’t want to browse, just enter the paint number into the shop search bar;
Happy Modelling!
