Hussar! (Part 1)

Long term readers of our blog will know that I am gradually building a Napoleonic army, and with the release of the Perry’s  British Napoleonic Hussars set, I have the opportunity to add some cavalry to my army, and of course a chance to extend my painting experience. The following article is a step by step guide to how I paint these figures.
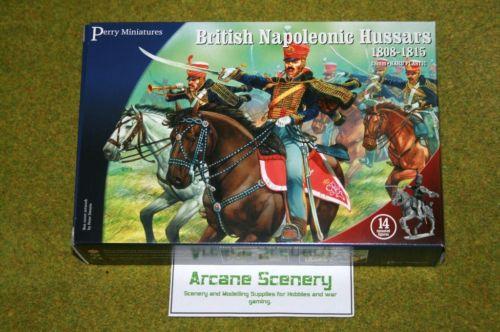

I have already assembled the Hussars, apart from the officer and trumpeter, which I will leave  for the time being. I just wanted to get on and get the 12 troopers done, which will allow me to field them in our club Sharp practice games. 

As with all  Perry figures, they are beautifully moulded, although there were a couple of challenges: the horses did not quite go together as neatly as I would have liked and also on the hussars themselves,  the fur caps had a bit of a sink hole from the moulding process,  which I had to fill.

This gives me the opportunity to talk about the fillers that we carry at Arcane Scenery. Now, most people reach for the green stuff  to fill blemishes,  but for filling plastic models, a much better solution is to use  Squadron White Putty. The beauty of this product is that its based on a plastic solvent, so it bonds very well to the plastic and it dries really quickly and smoothly, so you can get on with your model without having to wait for green stuff to set.
Now other than that, the moulding is very, very good and the actual cast lines in the figures are very light,  they need the merest of scrapes with a file or a scalpel. So  just another quick plug… we’ve recently started stocking Albion Alloys’ Flexible Files, which I suppose you could say look like glorified nail files, but they do the job brilliantly. By all means carry on using the wife’s or girl friends nail files, if you can get away with it, but I have found the flexible file to be much better.

With prep done, I continued by assembling the horses , undercoating and painting them, and then setting them aside whlst I built the Hussar riders. I’m not going to cover painting the horses in this article – painting horses will get it’s very own section!

So this means that I’ve chosen to paint the horses and riders separately, and thats not to everybody’s taste – some modellers say that the best way to deal with them is to glue the rider onto the horse and paint them as one, but I thought  that given the Hussars are quite complicated it would be better to paint them separately.

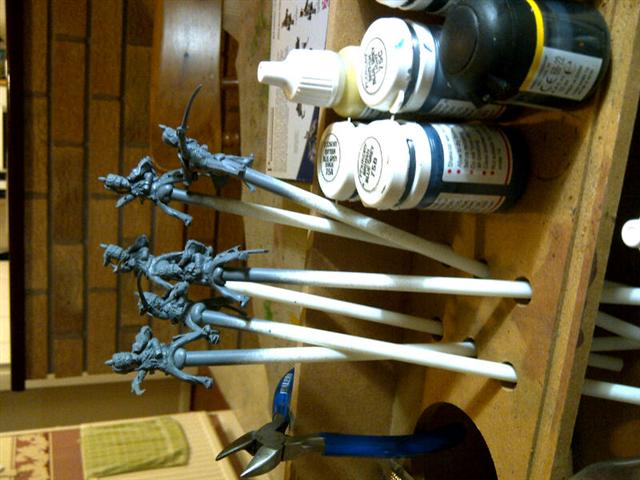
Now on with the painting…I’ve undercoated them with Army Painter grey spray paint. The hussars are difficult to handle, as they have no bases. To make this easier I have some plastic straws, that were holders for balloons  and the riders are blu-tacked to the straw  at the groin (and that doesn’t really matter because we want that clear to attach to the horse). So just to show you how that looks on my workbench we have them all lined up…

[Steve likes to live life at an angle…]


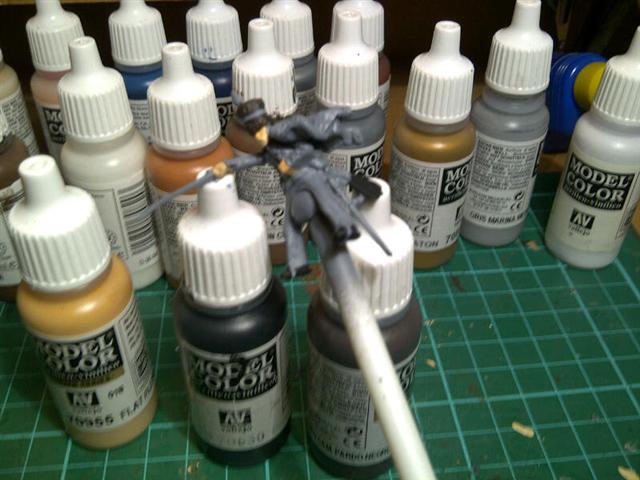
First 3 lots of paint on the figure as you can see from the photograph (apologies for quality I am using a phone camera)

I always start my figures with flesh, I think if you start painting the face and hands, it gives the figure some personality and its pretty clear where the colour goes (955 Vallejo). The next is Vallejo 950 black, for the boots and satchel and cartridge case, and again its a nice easy paint to use, and as you start to work on your figure you get an idea of whats to come and the sequence in which you will paint the figure. The next colour is for the hat, which is 822 German Camouflage Black Brown. The interesting thing is I am using several references,  Mont Saint Jean which is a superb website, and gives the colours for all of the troops uniforms at Waterloo . I have also got the Perry’s colour painting sheet, which is supplied with the set (and I applaud the Perry’s for doing so- it’s a rarity in the business), it shows all of the Hussar regiments in great detail;  and the final reference is from an Osprey book, Wellingtons Light Cavalry, which shows the regiment I have selected, the 18th Hussars in the 1815 period. All the pictures show the hat in a very different colour. The Osprey book: black, Mont saint Jean: a light brown (which may be due to the screen limits) and the Perry’s: a dark brown. Since two out of three are brown I am using Vallejo Camouflage Black Brown(822) which gives me the opportunity  to bring out the texture on the fur by dry brushing with a lighter brown later on.

So three colours on and its taken me about an hour, and as usual I paint six figures at a time, which means I change colours every twenty minutes or so.

The next part of the figure to paint was the Pelisse, (the slung jacket) and the dolman, (the tight fitting under jacket) and I’ve used Vallejo 899 Dark Prussian Blue.  But for now it’s time for a break…….

[Join Steve after his coffee for more painting]

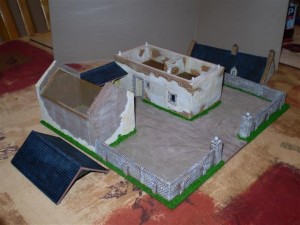
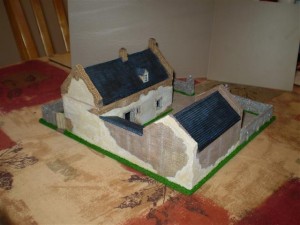
Napoleonic Farmstead by Pete Harris

We’re always pleased to hear of other modellers projects, this post comes from modeller Pete Harris…

If like me, you are interested in the Napoleonic period, and specifically Waterloo, you will know the significance of La Haye Sainte and Hugomont. These buildings were pivotal during the battle and I was keen to have something similar for my war gaming table. Obviously, it’s possible to buy the exact replicas, but there are two drawbacks :

  • They are relatively expensive.
  • They take up a lot of space.

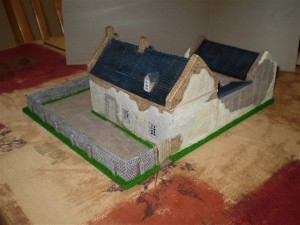
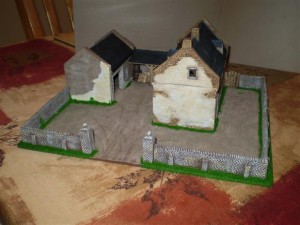
So I decided to produce something that had a similar look to La Haye Sainte, but with a smaller footprint. I started with the main farmhouse building and for this I purchased the Hugomont Farmhouse from Hovels, together with their 20mm wall sections and pillars. I chose 20mm sections instead of 25/28mm because the height is just right for a firing line to stand behind without a need for a firing step.

The rest of the farmstead is scratch built using an old Hornby station building, plasticard, Wills tiled roof sheets and Milliput. The base is two pieces of thin hardboard,  laminated together and then covered with PVA  and sprinkled with sand. All the structures were base coated in coffee coloured acrylic paint and then dry brushed in various shades to achieve the finished effect.

During construction I noticed the Hovel’s building, although stated as 25/28mm scale, had small doorways. So I cut out the stone framework to enlarge them and then used  Milliput around the new openings to replace the stonework. The doors and gateway were made from strips of balsa, and green scatter was added around the base of the walls and buildings. Finally, I added some Renedra barrels and sacks made from Milliput under the lean to shed.

If you’d like to share your work with us, then leave us a comment or drop an email to arcanescenery@gmail.com. 

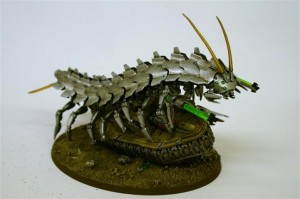
Tomb Stalker

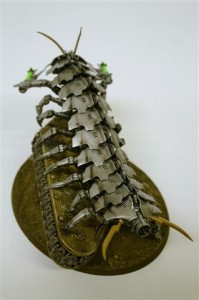
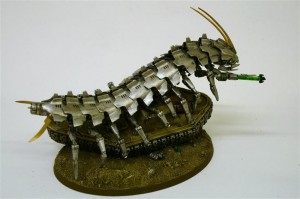
Too much of a good thing can get to you and after weeks and weeks of Napoleonics, Steve decided he needed a break. Having for many years been a devoted necron fan, he still had plenty of necron stuff around the house, so decided to break out and complete the Tomb Stalker…

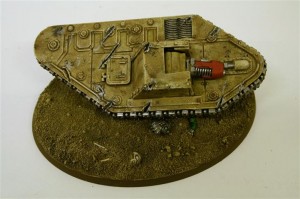
I started with the base and had decided I wanted the stalker clambering over a tank and so went to my bits box, and found an old Leman Russ model that I bought from eBay sometime ago. To make it fit to the base I chopped it in half very roughly, using a junior hacksaw and sprue cutters, and then attached it to the base with polystyrene glue. To hide the joins and to provide some groundwork I used standard milliput to cover the base, and blend in the tank hull. At this point I also added a few skulls and bones from the bits box to represent the remains of the crew.

I then coated the base in PVA and covered it in sand, and set it aside to dry. The next stage was to assemble the tomb stalker. The instructions supplied are a bit sparse, so it is important to take your time and make sure you know the difference between the various legs, antennae and other appendages. As the model is in resin a certain amount of cleaning up was necessary, but there was nothing too demanding as the moulding was very good.

I first assembled the model using bluetac so that I could pose it over the tank, and then piece by piece superglued it together, checking the positioning as I went. When I had completed the Tomb stalker I added some more damage to the tank to simulate where the Stalker’s claws had damaged the tank’s armour, this was done by heating a scalpel blade and chopping into the plastic. Once everything was assembled it was onto painting. The groundwork on the base was simple enough, in brown, and then highlighted with Iraq Sand from Vallejo.

The tank was painted in Desert Yellow, and then dirtied down with washes of Devlan Mud and then dry brushed with Desert Yellow/White mix. I also used the stipple brush technique to add scratches using boltgun metal and black. There’s no scientific method to this just keep going until you are happy with the result. I then picked out a few details on the tank, the tracks being in gun metal and the gun on sponson in red. A final light wash of Devlan Mud tied everything together.

The Tomb Stalker was sprayed with gun metal and then silver. I then gave it a wash of black ink, followed by a dry brush with Mithril Silver. Again it is sometimes necessary to repeat this process until you are happy with the effect. I then picked out the eyes, and the detail on the guns with a bright green. The antennae were picked out in gold.


The final stage was to glue the green rods into the guns.

Et voila a Tomb Stalker.

Friday Round Up

Well howdy there boys and girls…this week’s round up is very make and do focussed, but we have some models and rules first of all…

We have in stock now the Crusader Rules which cover 1740-1900, Napoleonic period and the American Civil war, with a supplement available for the American period.

New from Airfix the 1:72 Aichi D3a1 aeroplane, which is probably most well known for Pearl Harbour, and is a rather stumpy nosed looking little aeroplane…I have to say (sorry beloved American readers) it is a kind of cute little thing…also we have a lovely T34/85 because we can never have too many Russian tanks.

From our favourite Italians, Italeri we have a 1:72 scale station, which is perfect for World War 2 European skirmishes…your table will be massively improved by the inclusion of the greatest piece of technology ever, the train…more on that in a paragraph or two…

In Steve’s ever growing desire to stock every kind of glue ever we now have a growing range of Deluxe products which include some incredibly specialist items such as the rust kit…

On our webshop you can now find our range of resin bases in all kinds from cracked ground and gravestones, to a pile of skulls…should you wish to stand on a pile of skulls.

More prosaically from Expo we can now offer the poly cutter with its battery…which is for cutting polystyrene not parrots. We do also sell the battery and replacement wires if you already have the cutter.

Also, we have catalogues…you can buy the Pocketbond catalogue from the store now (ignore that it’s the old picture, we will beat Rob soundly for not updating it)…but we also have the Expo catalogue…which you can have for free…if you email the bossman at steve@arcanesceneryandmodels.co.uk and title your email “I would really like a free Expo catalogue pretty please”…and if y’all want to mention how the webfairy needs supplying with more (lactose free) chocolate I shan’t object.

I mentioned the glory of trains…and glorious all train things are and our final new item this week celebrates one of the things that railway modellers do with finesse. Scenery. Now here in the office, we have something of a divide. Rob, master of straight talking, doesn’t see what the point of the time railway modellers spend on scenery because “THEY DON’T LET YOU TOUCH IT!” (and yes he really does yell)…I, unsurprisingly as a woman who would rather like a train set in every room of her house, am a big fan of a fine model railway…and the master of all things Arcane sits somewhere between the two. What we now have, so you can see where you fall on the spectrum, is  a book Creating Realistic Landscapes …it shows how railway folk make spectacularly realistic landscapes, and whilst you may feel that some of it will be a lot of work that is going to get mussed up when playing, there are, we’re sure, tips and tricks you might want to incorporate. Plus if at anytime you wanted to make a diorama or something for display rather than play there’s plenty of information in here for you.

Till next week folks.