So here’s the next article tracking my progress in painting my first Napoleonic 28mm wargaming army. It’s designed to help beginners to the hobby or those like me who have decided to move from Science fiction to real history.
There is a bewildering choice of 28mm Napoleonic wargaming figures available, so before you dive in and buy some troops there are some fairly simple questions to answer. Firstly, do you want to have a British, French or other European army? I decided to start with the British. After all, I had been brought up on tales of Wellingtons victory at Waterloo and the heroics of Bernard Cornwell’s Richard Sharpe. And of course, although the French Army at the time was undoubtedly a fine fighting force and contained some of the finest troops ever seen, as well as a vast range of superb units and uniforms, it’s one draw back was that it was French….. :0)
Next, do you have a preference for plastic figures or metal? Plastic figures are usually cheaper, lighter and easier to transport. Metal figures are usually one piece and so do not need assembly, they ‘feel’ more substantial and the detail can be better although the new plastics are catching up. I have no strong feelings either way. I like working with plastic and I enjoy the process of putting the models together. I also like the infinite variety of poses that you can get when assembling your army. Plastic also tends to be less expensive so buying the Troops in plastic & the character and specialist models in metal is a good compromise.
So if you are happy to be building a British Napoleonic army that will be made up of plastic and metal figures read on!
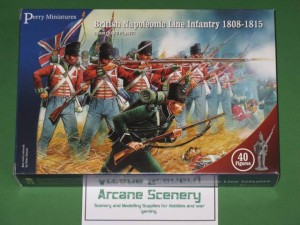
The next decision was to chose the box set. Would it be the Perry set or Victrix….If you have read my previous blogs, you will know that I am a great fan of the Perry Miniatures sets. The quality and sculpting are superb and they have cleverly put together a set that makes up into a British Battalion formed up as a firing line and includes 4 British 95th riflemen. That said, the Victrix sets are also nicely sculpted and although they are split into Flank and Centre Company sets ( the Perry’s include parts for both) you get 52 figures in a Victrix set and just 40 in the Perry set.
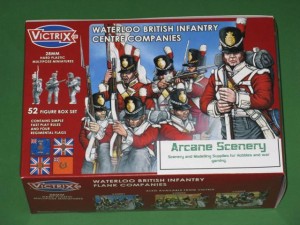 I chose the Victrix set to start with…I just wanted more men to start with and I figured that if I started with Victrix I would have to buy the Perry set at a later date so that I could add another regiment to my army. I know, it doesn’t really make sense but remember at this stage I didn’t have a firm plan but just wanted to build an army and start painting Napoleonics.
Having chosen the Victirx, lets have a look in the box . There are 8 sprues in the box. Four of these:
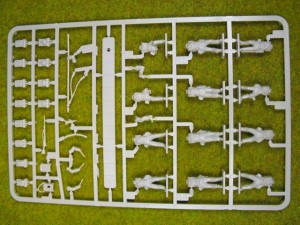 These sprues contain most of the soldiers torso’s. The top two bodies on the far right are for the Sergeant and drummer, the rest being normal Waterloo Centre Company troops. The rest of the sprue contains the drum for the drummer, back packs for the infantry and the ensigns or flag bearers flag.
You also get four of these:
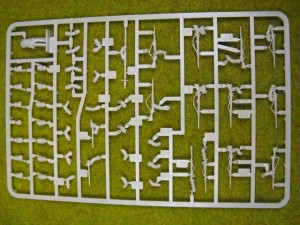 The one torso on this sprue is for the Officer and also doubles for the Ensign or flag bearer. There are also 14 different heads and lots of different arms. Fortunately, the instruction sheet is fairly clear and you should have no difficulty in putting the figures together, with a minimum of ‘cleaning up’ required.
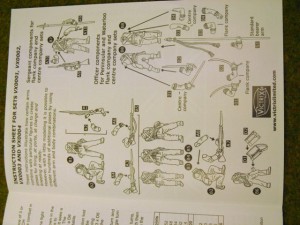 The only issue that I had with the set was that some of the pieces on the sprues aren’t numbered very well or not at all. That said, assembly is straight forward and mixing and matching the different heads & arms is the fun bit!
If you take a close look at the heads, some are clearly Veteran Campaigners and some are more suited to the Drummer and Officer figures. Also some of the Hats ( or Belgiac Shakos to be precise!) have covers. I dont think that it matters whether you use the covered ones but I prefered to have all of my troops with the plume showing.
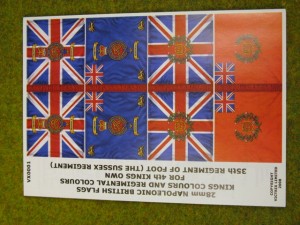
Also included with the instructions is a small flag sheet. Although there are four flags, you actually have just two regiments to choose form, this is because each Battalion carried two flags. One was the Union flag or Kings colours, the other the Regimental flag. The colour of the Regimental Flag usually determined the colour of the facings on the Troops uniforms. Or to put it more simply, a blue regimental flag meant that the collars and cuff of the troops’ uniforms would be blue. For my first regiment, I choose the 4th Kings Own, with the blue flag.
So that’s enough to be going on with now. In the next installment, I’ll have a look at the differences between Centre & Flank Companys and Waterloo and Pennisular Uniforms as well as showing you some pictures of my own version of the 4th Kings Own Regiment.

