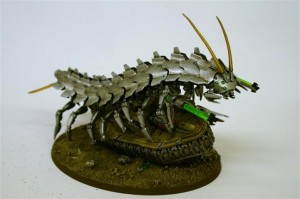
Too much of a good thing can get to you and after weeks and weeks of Napoleonics, Steve decided he needed a break. Having for many years been a devoted necron fan, he still had plenty of necron stuff around the house, so decided to break out and complete the Tomb Stalker…
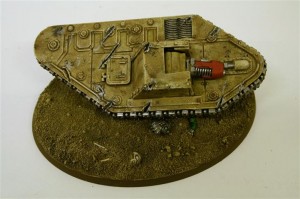
I started with the base and had decided I wanted the stalker clambering over a tank and so went to my bits box, and found an old Leman Russ model that I bought from eBay sometime ago. To make it fit to the base I chopped it in half very roughly, using a junior hacksaw and sprue cutters, and then attached it to the base with polystyrene glue. To hide the joins and to provide some groundwork I used standard milliput to cover the base, and blend in the tank hull. At this point I also added a few skulls and bones from the bits box to represent the remains of the crew.
I then coated the base in PVA and covered it in sand, and set it aside to dry. The next stage was to assemble the tomb stalker. The instructions supplied are a bit sparse, so it is important to take your time and make sure you know the difference between the various legs, antennae and other appendages. As the model is in resin a certain amount of cleaning up was necessary, but there was nothing too demanding as the moulding was very good.
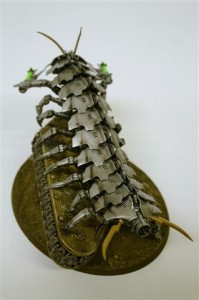
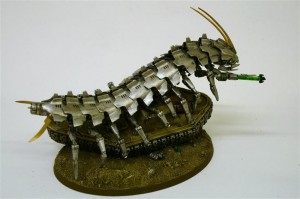
I first assembled the model using bluetac so that I could pose it over the tank, and then piece by piece superglued it together, checking the positioning as I went. When I had completed the Tomb stalker I added some more damage to the tank to simulate where the Stalker’s claws had damaged the tank’s armour, this was done by heating a scalpel blade and chopping into the plastic. Once everything was assembled it was onto painting. The groundwork on the base was simple enough, in brown, and then highlighted with Iraq Sand from Vallejo.
The tank was painted in Desert Yellow, and then dirtied down with washes of Devlan Mud and then dry brushed with Desert Yellow/White mix. I also used the stipple brush technique to add scratches using boltgun metal and black. There’s no scientific method to this just keep going until you are happy with the result. I then picked out a few details on the tank, the tracks being in gun metal and the gun on sponson in red. A final light wash of Devlan Mud tied everything together.
The Tomb Stalker was sprayed with gun metal and then silver. I then gave it a wash of black ink, followed by a dry brush with Mithril Silver. Again it is sometimes necessary to repeat this process until you are happy with the effect. I then picked out the eyes, and the detail on the guns with a bright green. The antennae were picked out in gold.
The final stage was to glue the green rods into the guns.
Et voila a Tomb Stalker.


