A somewhat different subject to my Samurai collection this week! I needed a break from painting Samurai figures and so switched to another of my interests, building 1/48th scale kits. I intend to build a collection of both 1/48th scale tanks and AFV’s that have served in the British army, primarily to go with my wargaming collection. Although my wargames figures are 28mm and in theory, 1/56th scale, once based, they look more at home with 1/48th vehicles in my opinion. Of course, once I had built and painted a few tanks, I soon became attracted to the other possibilities available. I have now got a number of aircraft kits in my stash to be built one day – Spitfire, Lancaster, Fockewulfe and Beaufighter for starters! As well as these subjects I have also been long fascinated by the Nazi Super weapons of World War two. I have already built the Tamiya 1/48th scale V1 and I had in my stash a Pegasus 1/48th scale V2.
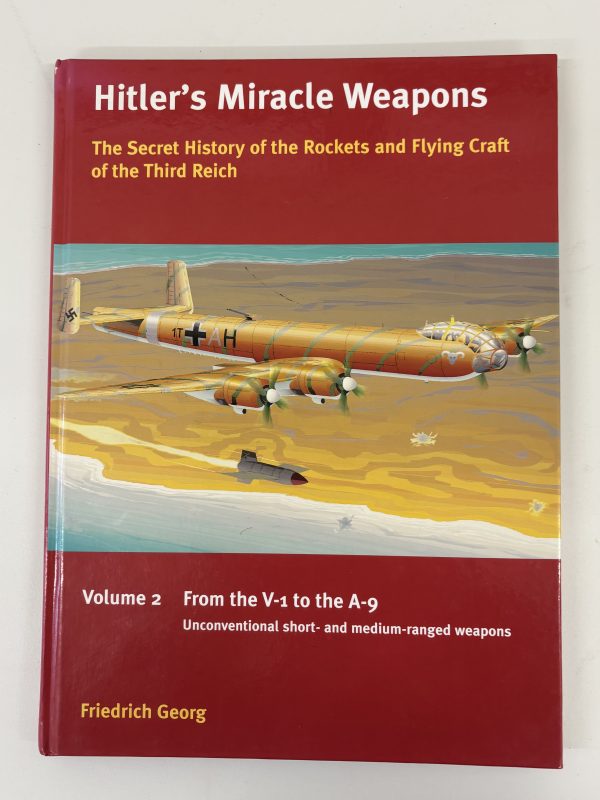
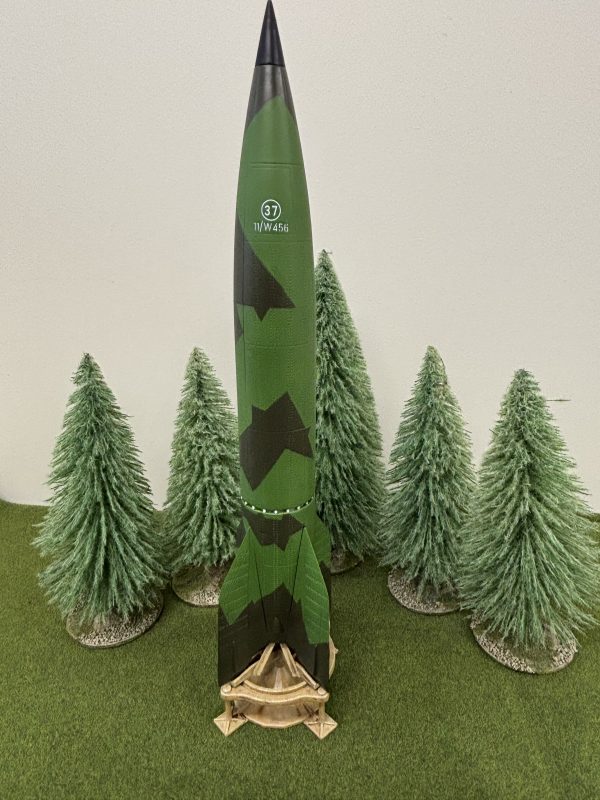
The Pegasus kit of the German V2 rocket
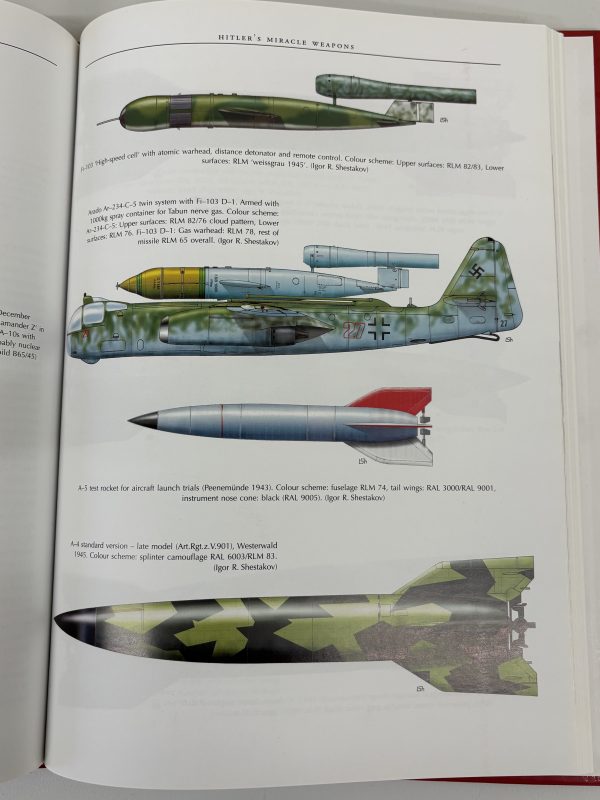
The kit was actually a clip together model and I wasn’t sure how it would go together. In the event, it was a joy to snap together, everything seemed to fit without a problem and there was very little scraping or filling that was required. The next stage was to paint it. I didn’t like the scheme shown on the box but instead went for a colour scheme that I had seen in one of my reference books. The image on the bottom right is the one that I based my colour scheme on.
I used this book as research.
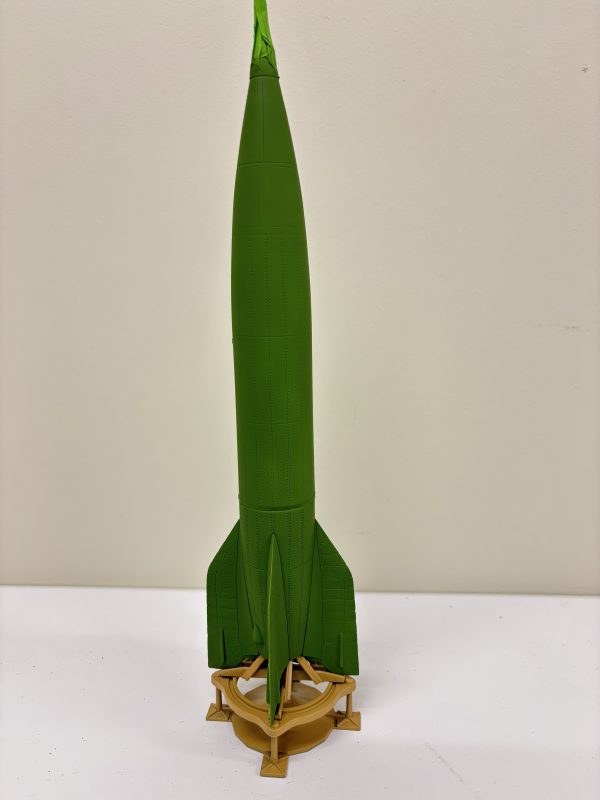
Once I had primed the model, I then used my airbrush to spray it in Vallejo 70922 uniform green for the base coat.
Base coat sprayed on. Note launching pad painted with German yellow.
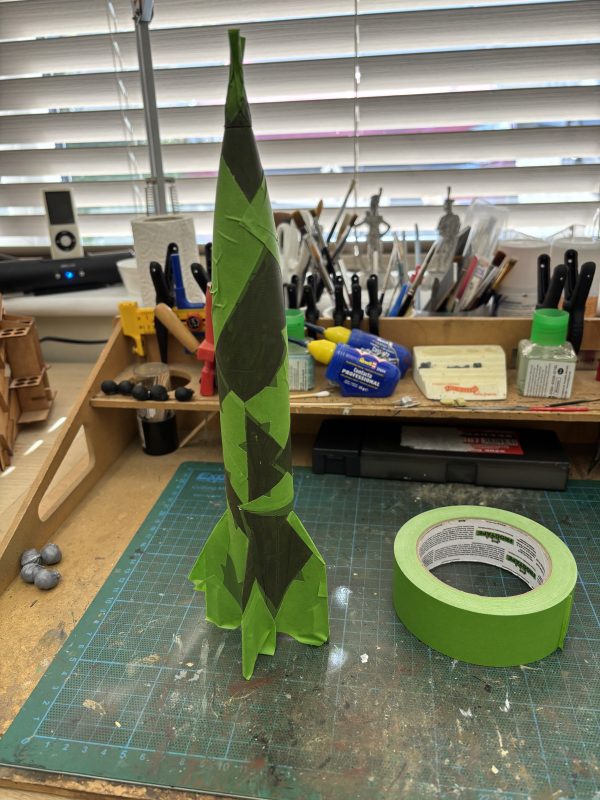
My first attempt at masking the base coat off to get the splinter pattern camouflage ended in disaster! I used Tamiya thin flexible masking tape to ‘draw’ the camouflage design onto the model and the attempted to brush paint it with the contrasting colour, Model Air 71011 Dark green. What a mess! After some thought I resorted to using Frog tape to mask off larger areas so that I could re spray the Dark Green.
V2 now masked off with frog tape – note the cut outs
The frog tape was excellent for the purpose and I used a scalpel to make some cut outs to add to the detail of the splinter camouflage pattern. Once I was happy with the result, I sprayed the nose cone matt black, added the decals and then gave the model a coat of satin varnish
The finished model
It’s fair to say that the decal is probably incorrect but looks good on the finished model. These days I am only interested in making a good representation of the subject rather than an IPMS standard model! I’m not entirely happy with the launch pad. I initially sprayed it in a desert yellow but I have then weathered it to a lighter colour. I’m not sure whether the launch pad was reused or was a one off item and I ended up with neither a pristine new pad or a well used one! Oh well! It looks good enough!
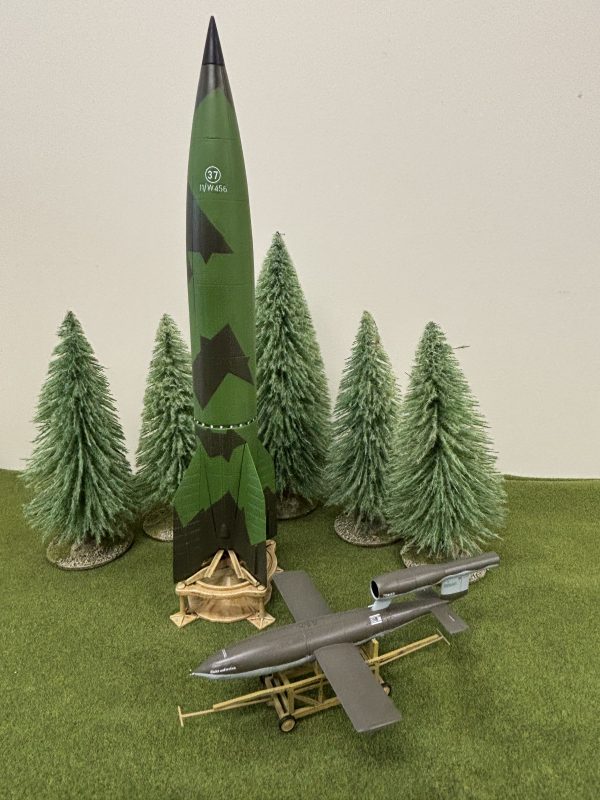
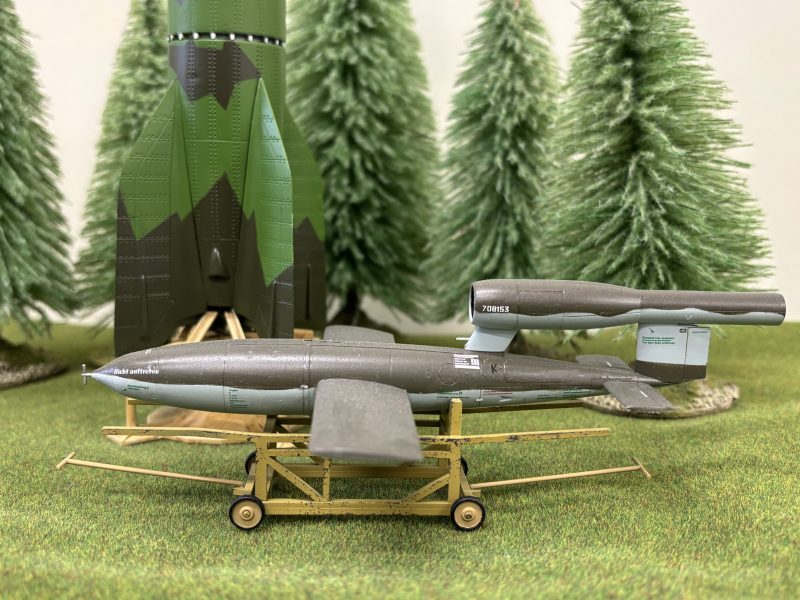
Here is the V2 along with a V1
I now have both of the main V weapons in my cabinet. I would love to add some of the German Rocket fighters and Jets at some stage but they will have to wait in the queue!
Another shot of the V1 with the V2 in the background.
So now it’s back to Samurai – I have 11 cavalry models to make and paint!
I have been promising to publish a battle report featuring the scenery that I have made for my Samurai collection. I did actually publish such a report, but on Facebook rather than on my blog. I thought that it might be useful to put a slightly expanded battle report into my blog featuring the details of the scenario and forces involved. So this is a slightly more ‘wordy’ blog than usual as I will publish the scenario over view as well as the two briefing documents for the players. I hope that you find these useful.
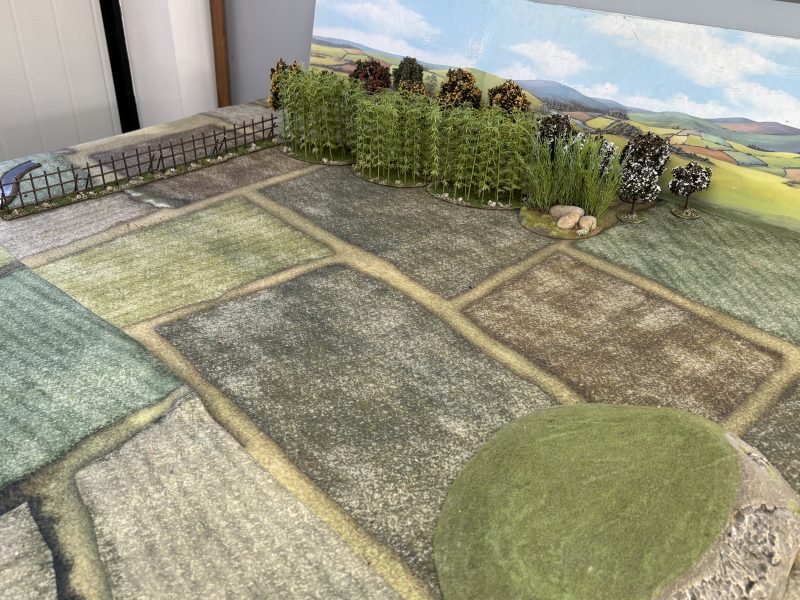
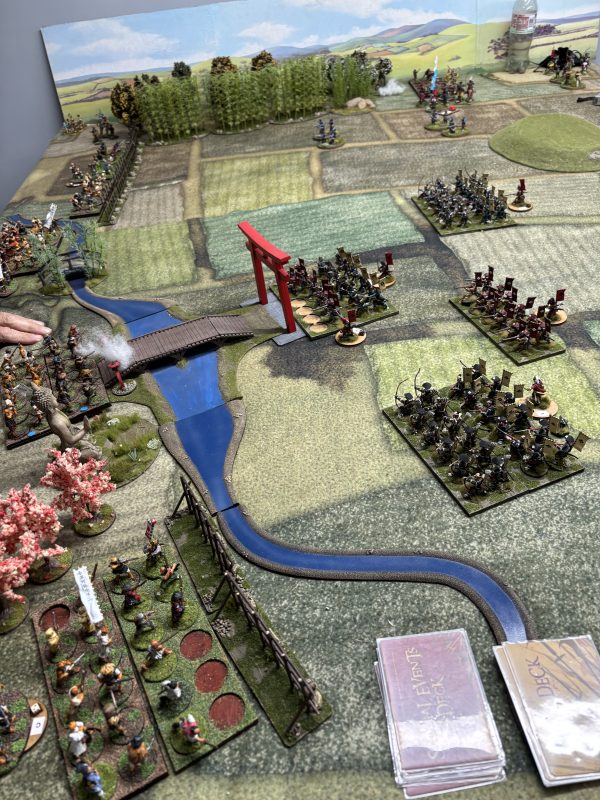
The left flank of the Ikko-Ikki side of the table. Note the Bamboo and woods to the side and the placement of the hill.
Temple Dogs
Scenario notes for both players
Both attackers and defenders may cross the large bridge without penalty or disorder if they can clear the bridge in one turn (2 actions). They may charge on the second move if permitted to do so ( Samurai and Sohei).
Neither side can cross the wide areas of the river.
Only skirmishers can use the small footbridge.
Units may cross the narrow lengths of the stream but will become disarrayed as per our usual games.
Artillery may fire over the heads of units that are 9 inches away from the gun and 9 inches away from the target without penalty provided that the gun is on a hill.
If artillery roll 2 or more sixes in a turn, it will destroy a section of the bamboo barricade as well as inflicting the normal casualties on the sheltering unit.
The Bamboo barricades confer a+1 save for any troops sheltering behind them ( except for artillery!). All charge bonuses are lost when attacking units immediately behind this barrier. In melee, both sides hit on a 5+ from the start. There is no additional armour save in melee. It’s harder to hit someone behind a fence but if you do it is assumed to be just as effective! You can’t cross a fixed bamboo fence but will have to fight through it. Or go around it!
A an attacking unit that moves up to a barricade may attempt to hack their way through it. It will take one full turn to do so and during this turn the unit may not take any other action. They will benefit from cover from the barricade if shot at but if engaged in melee before the end of the turn, they will fail to breach the barricade and instead fight the melee as detailed above.
You may not spot or shoot at a target that is inside the bamboo thickets unless they have moved to the edge and shot at one of the attacking units outside of the thicket.
The range for shooting and spotting inside the thicket is 4 inches. All units benefit from a +1 cover save.
The Samurai have no interest in taking Ikko-Ikki heads as trophies and the Ikko-Ikki player may refuse all single combat with leaders without penalty. So it is unlikely that additional morale tokens to be won in this way. The Ikko- Ikki player could attempt to initiate single combat if they choose to.
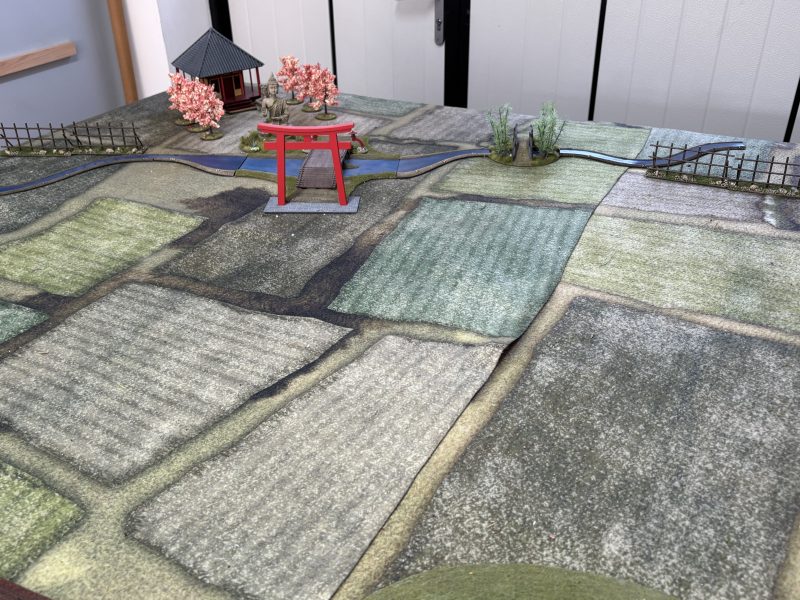
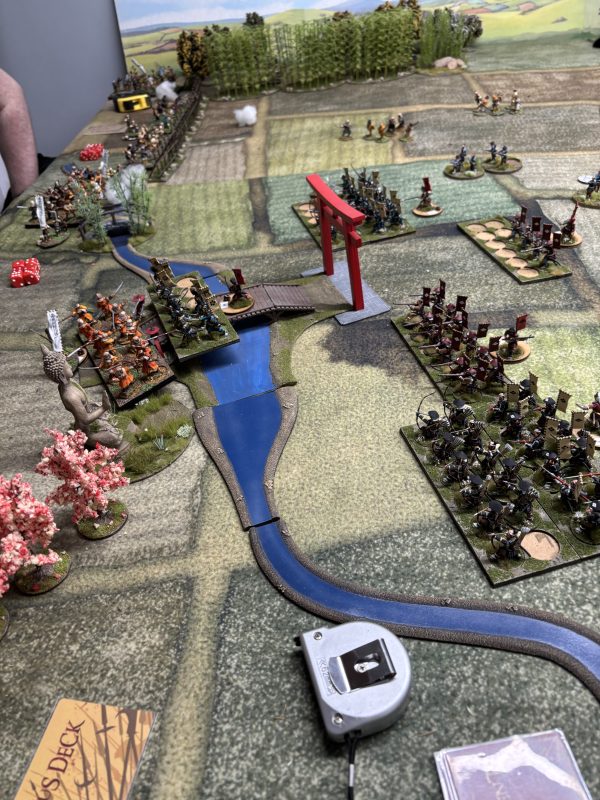
The right side of the Battlefield with the large bridge behind the Tori gate, the small footbridge and the temple tucked away at the back.
Ikko- Ikki Player
Troops
1 unit of Sohei Monks (armoured) 24 points
4 units of armoured Ikko-ikki 48 points
6 units of Unarmoured Ikko-Ikki (pointed as levy) 54 points
2 units of skirmishers 12 points
Bamboo Barricades 18 points
Total 156 points
Note that you have one samurai leader for the Sohei Monks that you must roll for his leadership – he cannot be a dolt! You have five leaders for the Ikko-Ikki units. Roll for leadership as normal but note that you may refuse single combat in melee without penalty.
You may deploy and arm your Ikko-Ikki units as you choose, either as blocks, lines or single units. Normal command distances apply.
You have NO Daimyo card.
You may deploy any unit up to halfway across the table and you may deploy hidden units in the Bamboo thickets using a marker to indicate the position of the lead unit.
The Sohei Monks may be concealed in the temple shrine. They may not be deployed in the Bamboo and will become disarrayed if they move into it.
Your formed Ikko-Ikki units may move and attack as normal through the bamboo thickets and wood and will not be disarayed.
You must hold the Temple for at least 6 turns. If you loose the Temple, you loose the game regardless of morale tokens lost.
The challenge for the Ikko-Ikki player is of course to hold out for 6 turns. Half of their army is unarmoured levy. However, they have the advantage of being able to move freely through the wooded terrain and have protection from the barricades.
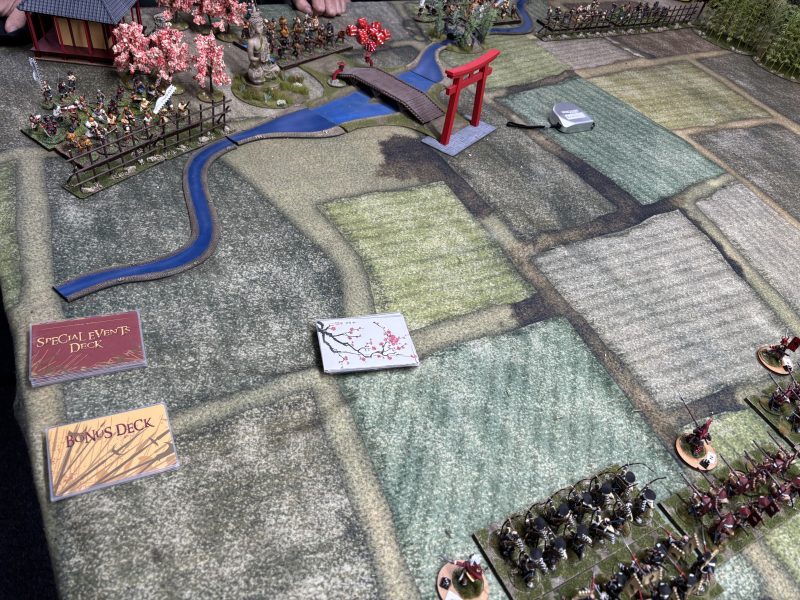
You can see some of the Ikko-Ikki deployment here – bear in mind some units are concealed!
Samurai Player
Troops
1 unit of mounted Samurai Archers 24 points
1 unit of Samurai Foot 24 points
2 blocks of Ashigaru Bows & Naginatas 48 points
2 units of Ashigaru teppo 24 points
2 Cannon 18 points
2 skirmishing teppo 12 points
1 unit skirmishing Ronin 6 points
Total 156 points
Notes
If your guns roll 2 or more sixes in a turn, you will destroy a section of the bamboo barricade as well as inflicting the normal casualties on the sheltering unit.
Your formed units may enter the bamboo thickets and woods but will immediately become double disarrayed and stay as such without being able to remove the disarray until they leave the cover. They may only move at half speed inside the thicket and may not charge or counter charge.
You may not fire your artillery at the temple shrine!
Capturing the Temple will win the game regardless of morale tokens claimed. You must capture the temple within 6 turns or lose the game.
You can see that the Samurai have a much stronger force but are under time pressure to capture the temple. They cannot afford to hold back and try to out shoot the enemy. They are also hindered by the terrain and of course, the risk that their guns may self destruct when firing! The Daimyo card gives them a bit more flexibility when issuing orders as well as an extra morale token
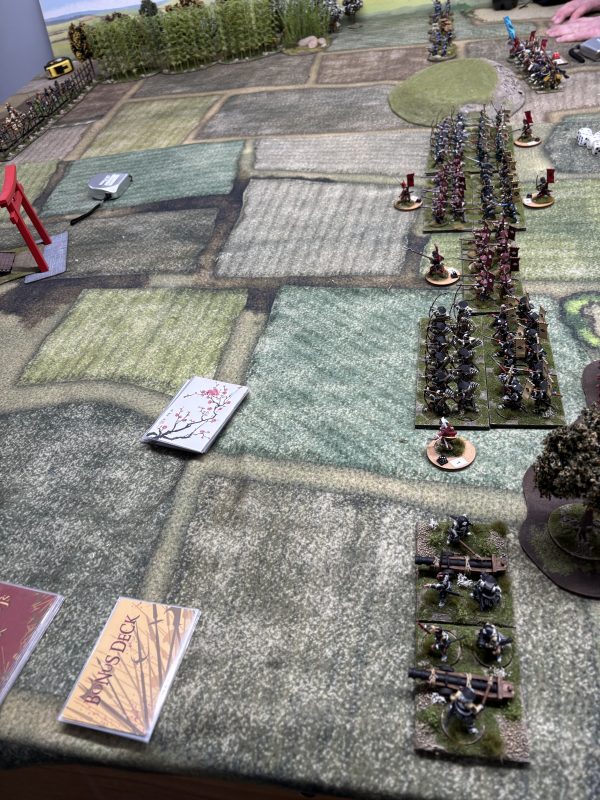
The Samurai deployment. They avoided using the hill for the artillery and stayed well clear of the bamboo thicket! However, the woods, just visible behind the guns were to prove a danger!
Here is a brief battle report from the game:
Last night we played through a scenario for Never Mind the Naganitas with Ikko-Ikki defending a shrine from a local Samurai Warlord. Ian Callan and Austen Kime were the defending Ikko-Ikki commanders, with Andy Callan, Robert Andrew Kime and Wayne Ellington as the attacking Samurai. The scenario had a few traps built into it to challenge the players and to add to the pressure on the Samurai, they had six turns to achieve their objective and capture the shrine.
The Samurai wasted no time and went straight for the Temple. The Artillery eventually managing to knock down the barricades just as the attacking Samurai reached them. You can see the Ikko-Ikki defending the bridge with volleys of gunfire!
The game started badly for the defenders with an early foray by their hidden troops and skirmishers chased off and daunted. Add to that, the initial bombardment by samurai artillery was taking its toll, inflicting casualties on the Ikko-Ikki teppo men lining the barricades. The Samurai advance was focused and relentless! Add to that, Wayne, managed to win Six bonus cards in a row by rolling six sixes!
Of course, no Bill Hooks (or for that matter, Naginata) game follows a script and the game began to turn when the Ikko-Ikki pulled a special event card that enabled them to deploy a band of Ninja, who made swift work of destroying the Samurai artillery. However, the artillery had done its job and brought down two sections of barricades leaving the way to the shrine nearly open- a stream being the only barrier. Meanwhile, over at the bamboo, the Ikko-Ikki skirmishers brought down the Samurai cavalry with incessant gunfire. The Ikko-Ikki were feeling there was a chance as the turn count moved up!
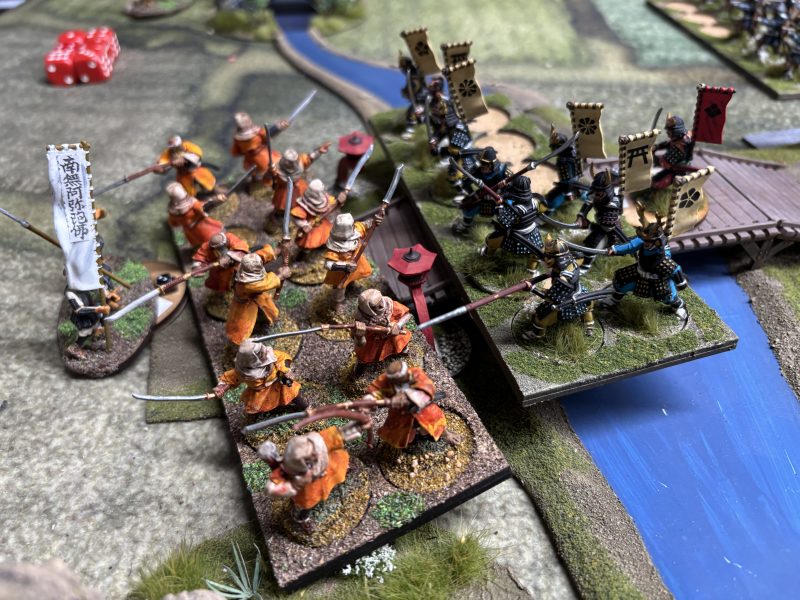
The Samurai on foot charge across the bridge, brushing aside the Ikko-Ikki defenders
By now Wayne’s Samurai were in a position to assault the main bridge to the temple and successfully charged and routed the defending block of Ikko-Ikki. The response was a furious charge from the Sohei Monks that were concealed in the shrine that resulted in almost wiping out the Samurai and they retreated utterly daunted with just one man remaining!
The concealed Sohei monks come charging out of the Temple. They are more than a match for the Samurai and eventually put them to flight after a brutal combat!
It was still going to the wire. The Ikko-Ikki were fast running out of morale tokens and Andy had methodically moved his troops into position to deliver the killing blow. It all came down to turn 6!
In the foreground, the barricades have been destroyed. It is just a case of crossing the stream to take possession of the temple and win the game!
Somehow, by clever use of a forfeit card to thwart the Samurai advance the Ikko-Ikki prevailed in a tense final turn. The Samurai warlord had run out of time and as night fell he was forced to acknowledge failure. Well done to Ian(Ikki) and Austen(Ikko). Victory was theirs!
The close games are always the best! Ian and Austen managed to hold the shrine when all appeared to be lost!
The plan is that the full adaptation of Never Mind the Naginata’s will be published as part of the next Bill Hooks redux book later this year. If you fancy playing a Samurai skirmish/battle then I hope that you will enjoy the rules. In the meantime, there is a few months for you to paint your army in preparation – the lists above will give you some idea of the troops that you will need!
It’s fairly self evident that I have been rather pre-occupied with painting Samurai troops for my collection. I am getting to the stage where I have built enough to satisfy my gaming requirements but still have a few painting goals to achieve before I can move onto the next big project – whatever that is!
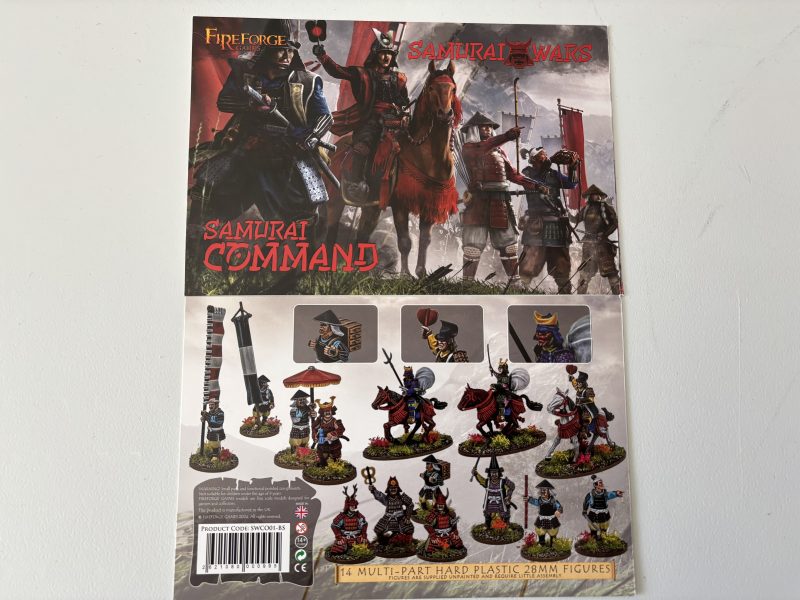
I picked up a box of the Fireforge command set at the recent Hammerhead show. The purpose being that I would have a nice Daimyo to lead the Fireforge faction of my army and give it a focal point. The three mounted commanders would also provide leaders for my Samurai cavalry contingent, thus satisfying my OCD requirement that all my units would be led by Fireforge models.
Front and back of the Fireforge command set
As you can see, the Fireforge set allows you to make 14 models ( although, confusingly, only 13 are shown on the rear of the box. My priority was to build the figures on foot, starting with the Officers.I also had decided to build three of the Ashigaru as musicians to compliment the banner bearers and the final model as an ammunition bearer for my Teppo Ashigaru. Although these options are not shown on the box, they are shown on the Fireforge website. I suppose I shouldn’t moan, but I will! I do wish that manufacturers would include a bit more in the way of instructions with their models or at least give a bit more help on their websites. To be fair, Warlord and Perry are very good at this, Fireforge are definitely not.
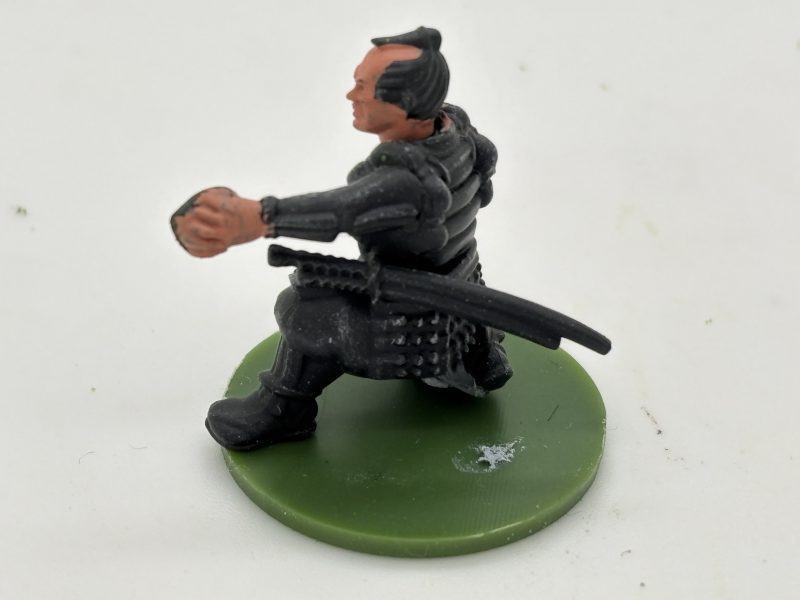
Spot the error!
As you can see, I managed to make the ammunition bearer with the arm attached to the wrong side! I only spotted this as I started to paint it. So unfortunately, he was relegated to the back of the work bench whilst I considered the best way to fix the error. Obviously, a arm removal and replacement is required but I may change his role from Teppo support to Yumi support!
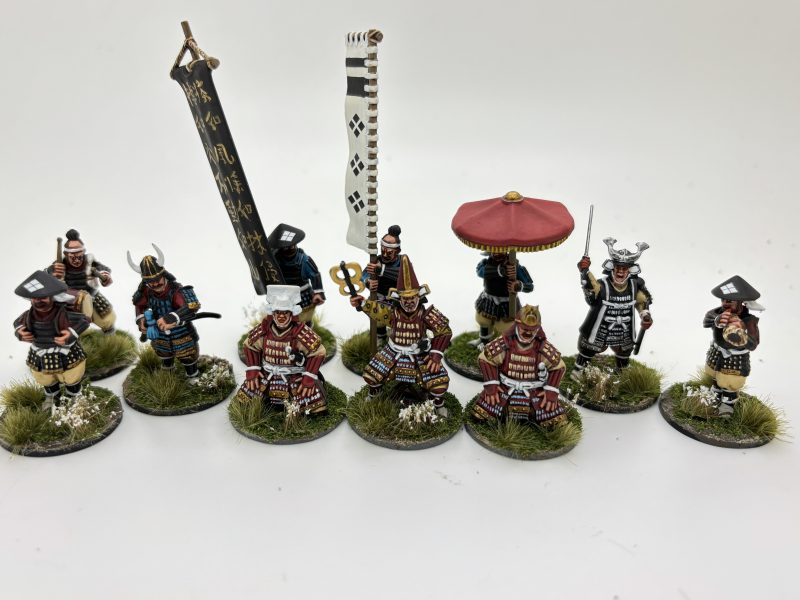
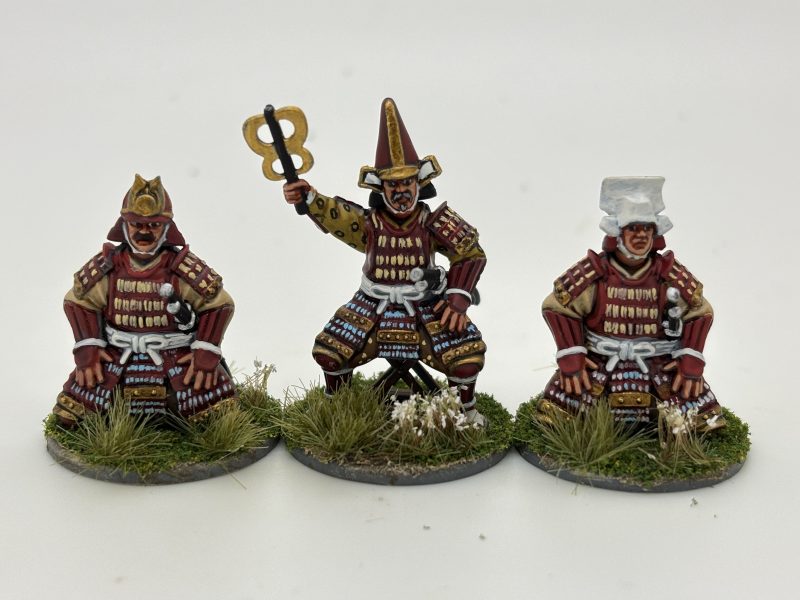
Daimyo!
Meanwhile, I continued to paint the rest of the figures. First up, the sitting command group. These are my favourite figures from the set. The Daimyo, looks particularly stern, sat on his chair! I went to town on the stitching for these models and also added a pattern to the Daimyos shirt. Painting circles that small can be difficult, I often end up with a spot! It is easy to correct any errors by placing a blob of the base colour in the middle of the spot to get a circle again!
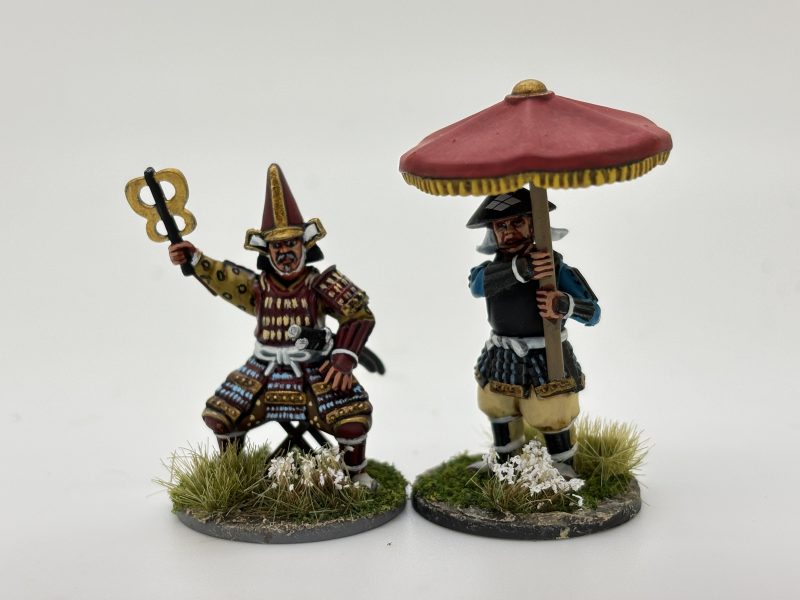
Give me some shade!
The Ashigaru holding the parasol is a nice characterful model. I did consider painting some sort of design on the brollie but decided to take the easy option and go for plain red!
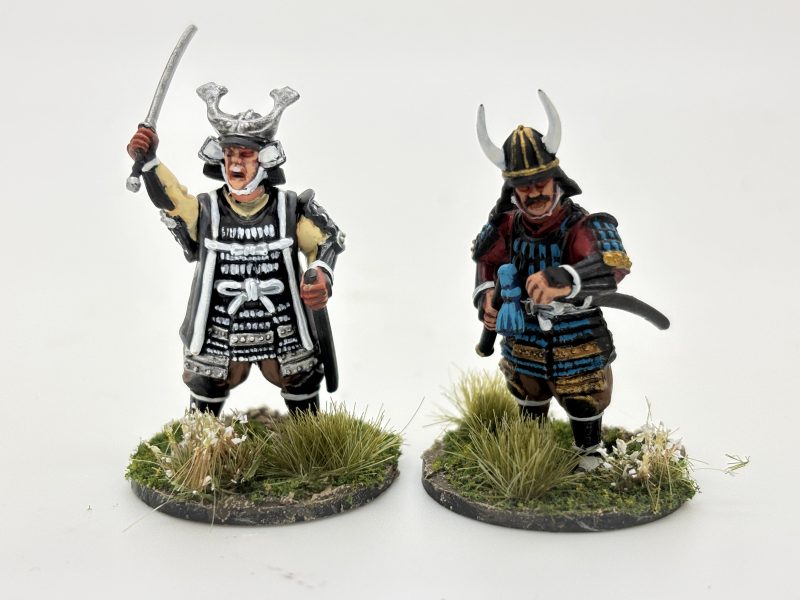
Two other samurai in the set
There are two other foot samurai in the set. These will be officers for my Samurai units. I actually quite like the one that I have finished in black, white and silver but confess that he looks better from a distance than close up!
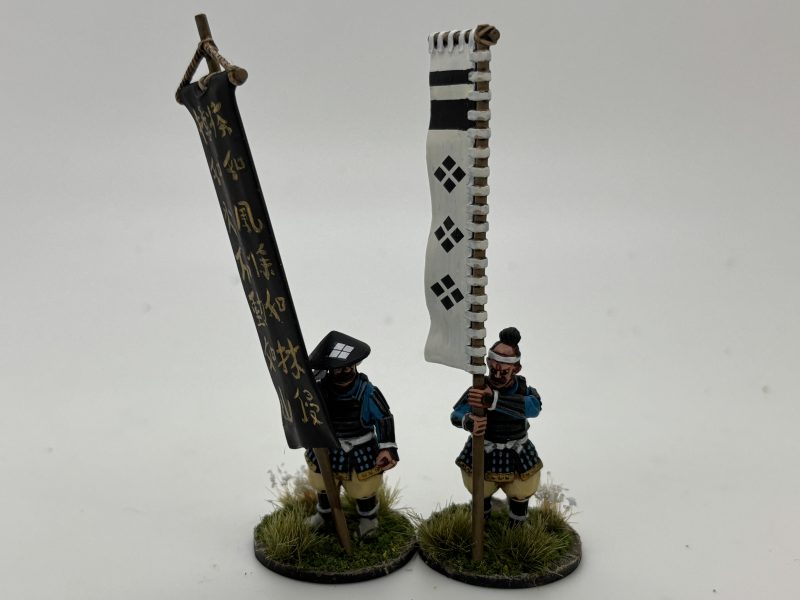
Banner men
Next up are the two banner men. The one with the black banner has a script that I copied from pinterest. I’ve no idea what it says! It could be something inspirational for the army but as my brush work isn’t the best, it could be closer to a shopping list! As for the Takeda banner, this also is entirely made up. I’m afraid that I can be a bit lazy when it comes to researching such things and to be truthful, the Takeka banners that I had seen, I didn’t like…As my armies tend to be fictional rather than an attempt to exactly recreate precisely an army at a specific battle, it doesn’t worry me too much. The Takeda mon are decals from Veni Vidi Vici.
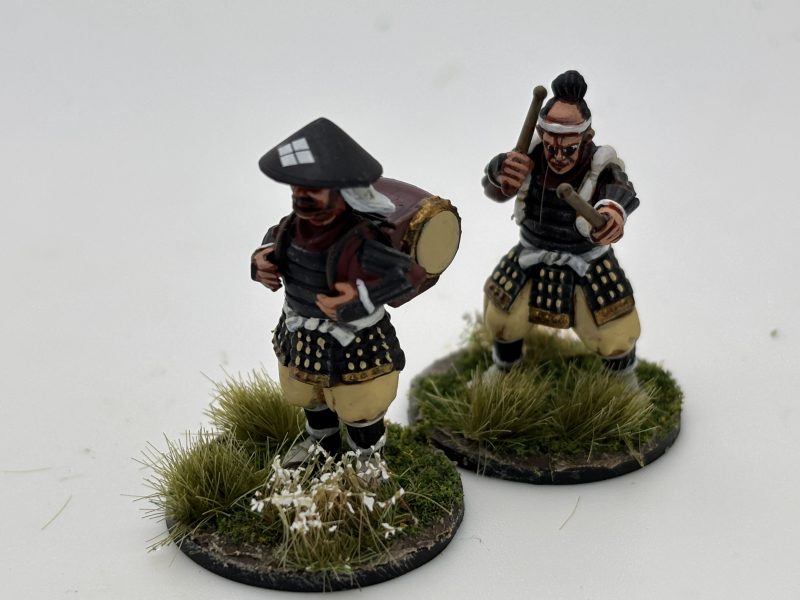
Ashigaru Drummers
I wanted some Ashigaru Musicians in my HQ set up and the drummer team was an obvious choice. I was pleased with the finish on the drum. I used a red tone ink over Vallejo burnt red to get a nice lacquered effect.
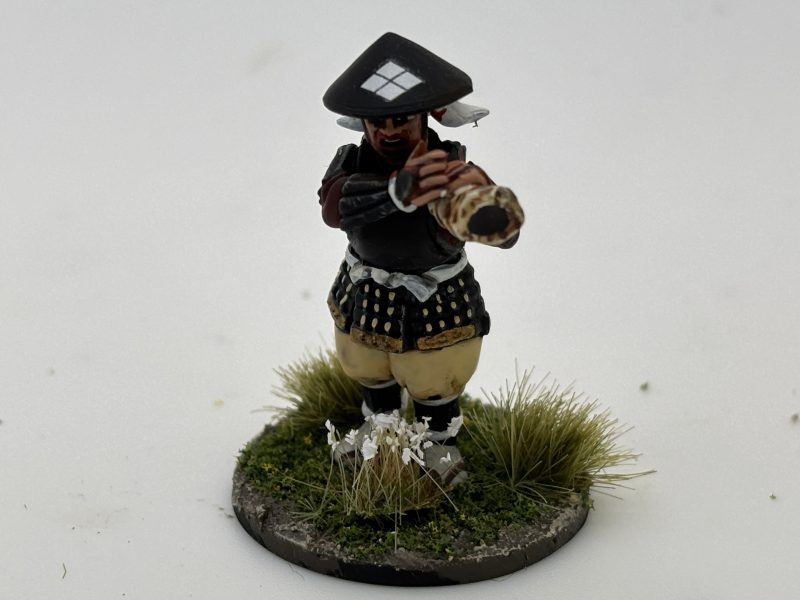
Conch horn blower.
To go with the drummers, an Ashigaru blowing a Conch horn. He completes my contingent of musicians for now. The mon symbol on his hat is from the warlord set of decals.
The complete Command Set.
And so with the foot figures now completed the next project is the mounted figures and another cavalry unit. However, I will take a short break from painting Samurai – all that lace is straining my eyes!
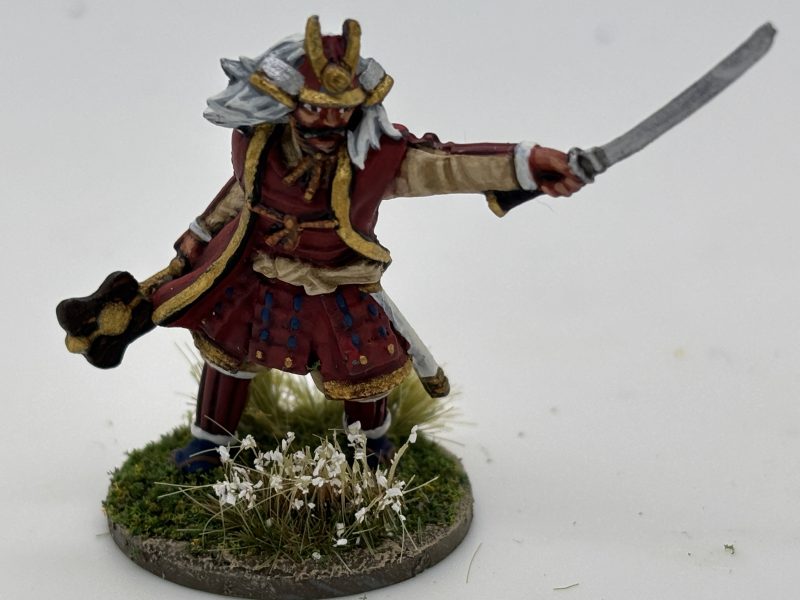
Takeda Shingen.
One final figure to make it off of the work bench was the lovely Giants in Miniature figure for Wargames Illustrated, Takeda Shingen. He will actually be another unit commander in my army, so a bit of a demotion for him!
I had been given a couple of 3d printed Samurai cannon and the crew by good friend and gaming buddy, John Grant. As I had no immediate use for artillery in my set up I had them put to one side for a future project. However, that all changed when I was asked to put together a scenario for ‘Never Mind the Naginata’s’ involving the Ikko-Ikki. If all goes well, I’ll detail the battle in a future blog.
So the cannon were promoted to the work bench and painting started. Just a quick word regarding 3d prints. I am in awe as to the detail that can be produced with 3D printing – the rope work on the cannon is superb. However, I have my concerns with both the robustness of the final models – they seem to be brittle, ( I have had two break badly when dropped) and the longevity of the models once they are painted. I’m sure that all will be fine, I guess that my sceptism is yet another sign that I getting old!
The two crew to the left are the 3D printed models, the one to the left is the Fireforge conversion.
Back to the figures themselves. As already mentioned, they are superbly molded and are compatible with the Fireforge models that the majority of my Samurai army is made up of. The guns come with two crew members but I needed three for NMTN’s rules, so I made two ‘gun captains’ from spare figures from the Fireforge command set.
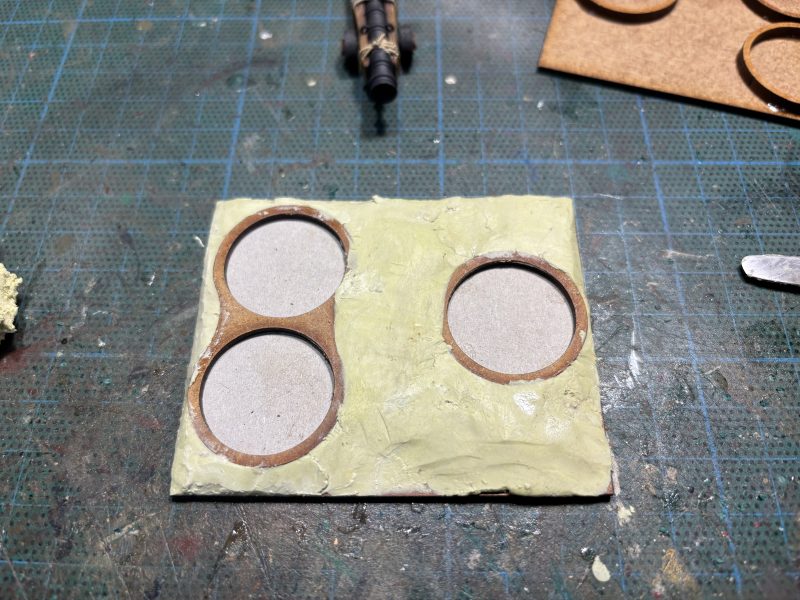
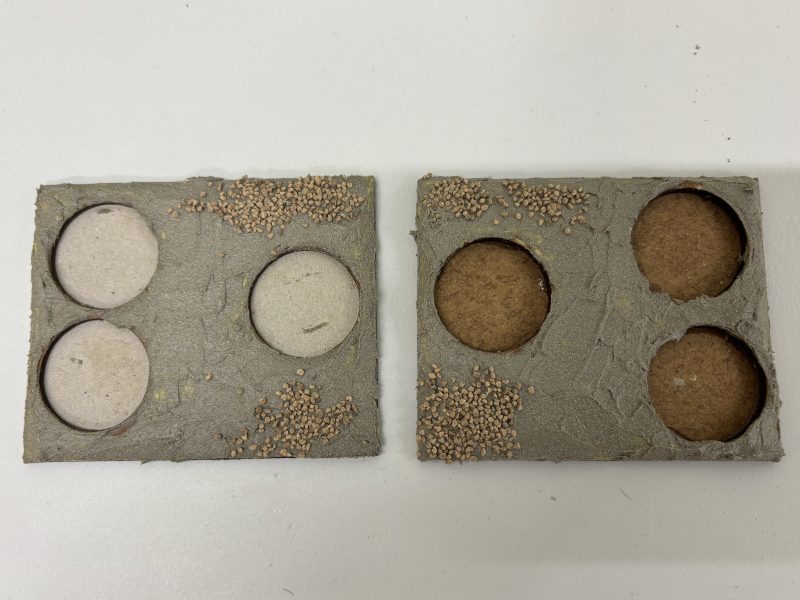
To make the bases for the guns, I used two 80mm x 60mm Mdf bases but as I wanted the gun crew to be removable in the event of taking casualties, I went for a sabot arrangement. I used some 32mm conversion rings to hold the crew. These were glued to the base, leaving a space for the cannon in the middle.
Base covered in milliput
The next task was to cover the base in Milliput, levelling everything off ready for the next stage.
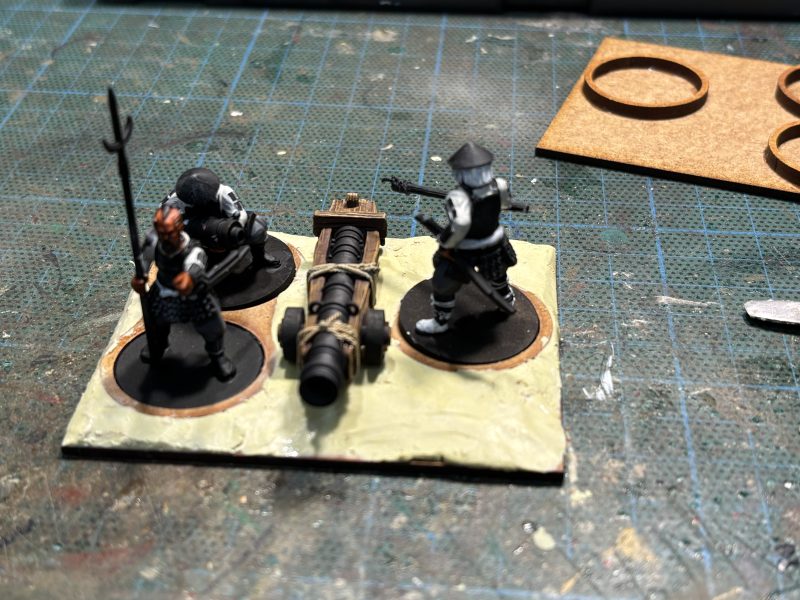
Trial fit to make sure everything is OK – figures are at the block paint stage.
I then covered the bases in Vallejo texture paste and added some fine talus for detail.
The bases are now ready for painting
When it came to painting the cannon, I used a tried and trusted technique to bring out the detail on the wooden carriage. You can see a step by step guide in an earlier blog by clicking here:
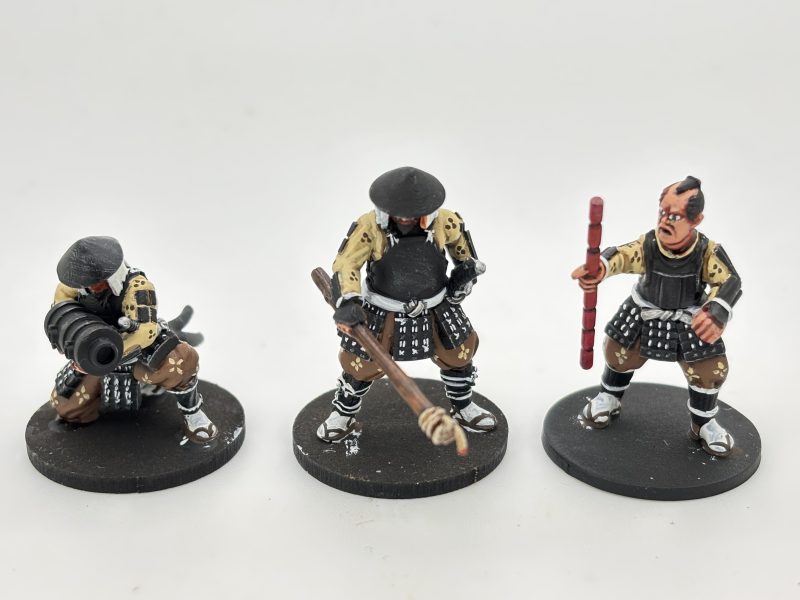
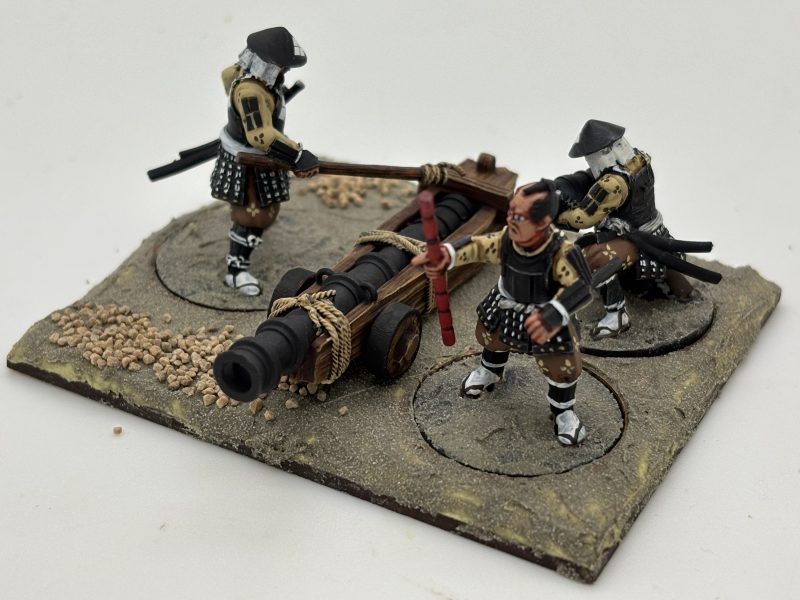
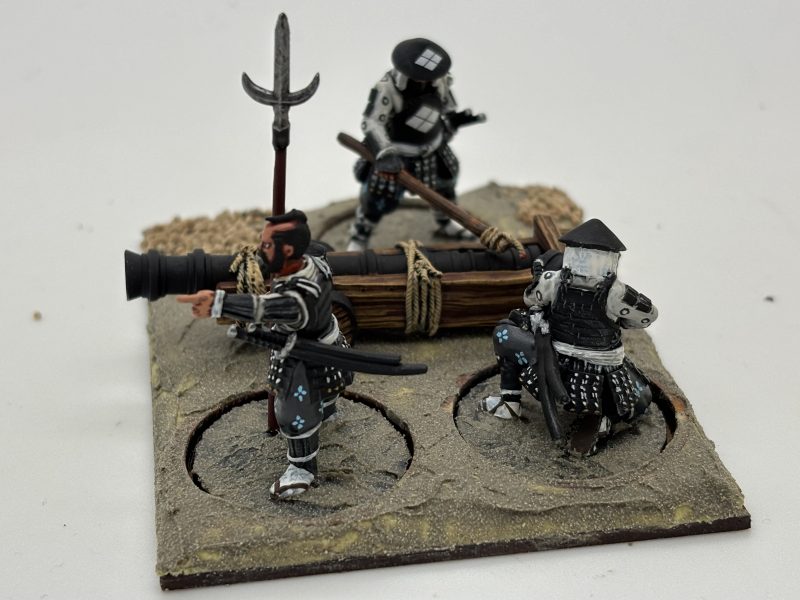
The barrel and iron work of the cannon was painted matt black, and the rope work painted with Iraqi Sand, washed with dark tone and re highlighted with Iraqi Sand. As for the crew, I went for two themes, based very loosely on James Clavells Shogun. That is one crew in browns, the other in greys.
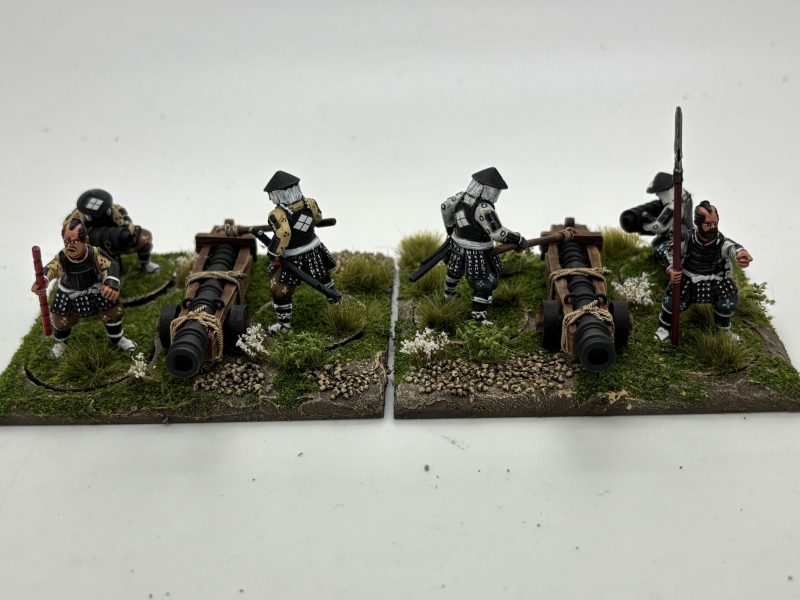
The Brown gun crew.The grey gun crew.
Rather than a step by step guide to painting the figures, if you check out my previous Samurai blogs, you can read about the method that I use to paint Samurai and Ashigaru. I usually start with a black undercoat and then give the figures a light dry brush in medium sea grey to show up the detail. After that, I use a block paint and wash process followed by a highlight of the original colour. I don’t always put a pattern on the clothing but as there were only six crew in total, I added some dots, circles and flowers. These look better from a distance! I also added some Warlord Games Takeda decals, which with hindsight perhaps was a bit OOT!
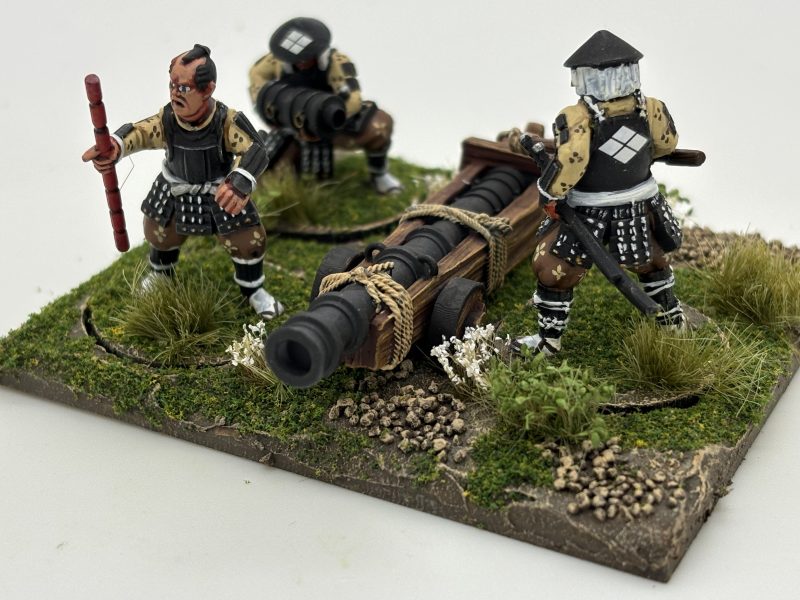
The ‘browns’ gun crew based
Once the figures were painted, I went back to the base and used my standard basing process to complete the models. This involves painting the bases with Delhi Bazaar ( a green/brown colour) emulsion and then dry brushing with lighter shades of the same colour mixed with Iraqi Sand. I used Woodlands scenic’s green blended turf and then a mixture of Gamers grass tufts to add detail.
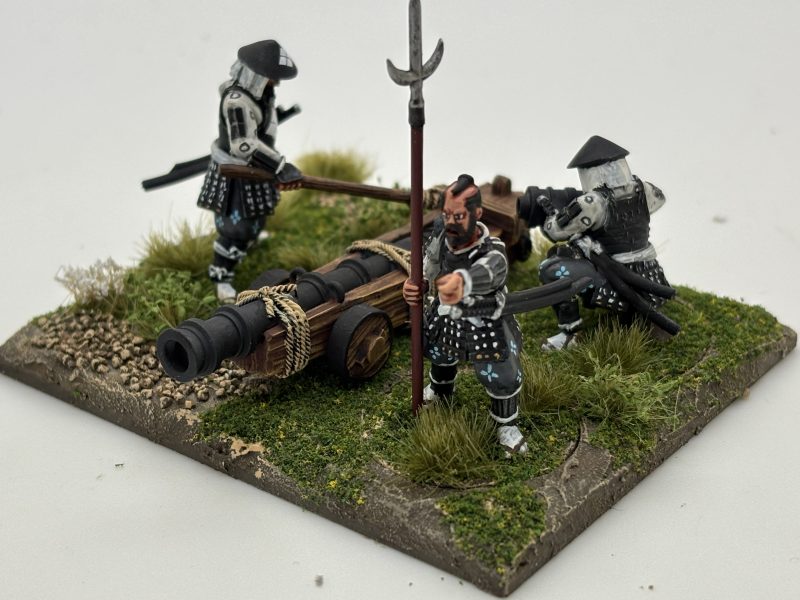
The ‘Greys’ gun crew ready for action.
So with both gun crews completed, I am ready for battle!
Fire!
So onto the next project – completing the rest of the Fireforge Command set!
Happy Modelling!
This website uses cookies to improve your experience. We'll assume you're ok with this, but you can opt-out if you wish.AcceptRead More
Privacy & Cookies Policy
Privacy Overview
This website uses cookies to improve your experience while you navigate through the website. Out of these cookies, the cookies that are categorized as necessary are stored on your browser as they are as essential for the working of basic functionalities of the website. We also use third-party cookies that help us analyze and understand how you use this website. These cookies will be stored in your browser only with your consent. You also have the option to opt-out of these cookies. But opting out of some of these cookies may have an effect on your browsing experience.
Necessary cookies are absolutely essential for the website to function properly. This category only includes cookies that ensures basic functionalities and security features of the website. These cookies do not store any personal information.