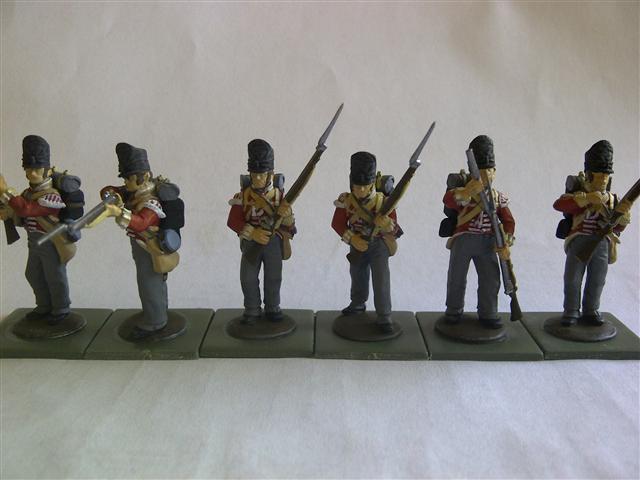
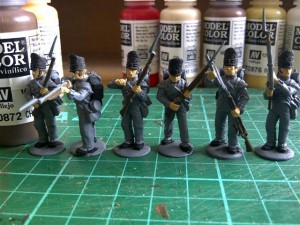
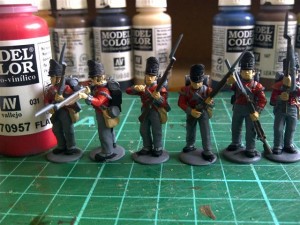
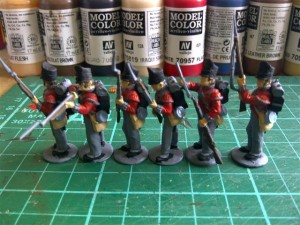
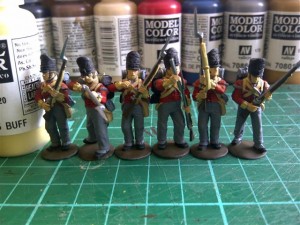
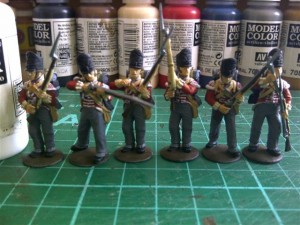
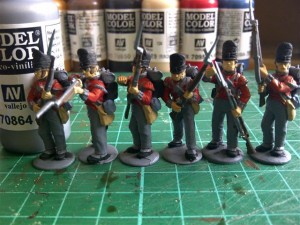
This is a painting project with 27th Enniskillens from the Waterloo period. I am painting a set of Perry Miniatures plastic models, building them straight from the box, using the different components to produce a British firing line.
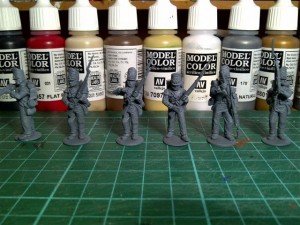
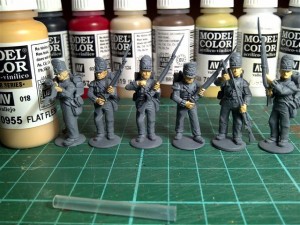
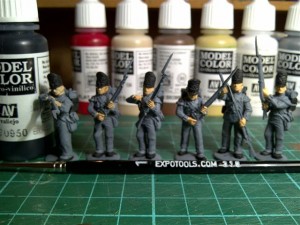
To build the models I’ve simply given them a good clean up, with a scrape of a scalpel and used a sanding board where necessary, and assembled them using my favourite glue, Revell Contacta Cement which comes with a the needle type applicator. Once they were all put together I have sprayed them with army painter grey paint,so they are prepped and ready for painting.
Just a few words about the colours I’m going to use. I intend to just produce a very basic finish for wargames standard. I’m not trying to produce the sort of standard you might see in a magazine, and certainly not the standard you might see in a millitary modelling magazine, where some of the painters are creating works of art. These are figures that are going to be used on the table, but I obviously want them to look good enough to sit in my cabinet when not in use!
I’m using basic colours and am not going to get too hung up on the exact shade of colour for a particular item, as long as they’re a reasonable approximation of what you might expect to see. So for example, I know that on some blogs and forums there is great debate about the actual colour of the British Redcoats; whether it was really a brick red, or a dark red, or was it really a pink because they were faded… I don’t really want to get into all that, because I just want my redcoats to have red coats. So when it comes to it I will use a red paint and the same principle goes for the other colours.
Because I am producing a regiment, I won’t paint in intricate detail. For instance I am using chocolate brown for the hair, every now and then I do use a different colour, to give a bit of variety but by and large they’ll all get the same brown colour hair. I’m not too worried about highlighting colours. I will do some highlighting later on, but basically I am just trying to paint the basic colours in block and will use army painter quickshade to provide the shading. Some people don’t particularly like quickshade, and some people think it is the best thing ever. I like it because it allows me to produce figures to a reasonable standard, relatively quickly, with the emphasis on trying to produce a wargaming unit rather than a piece that would go into a competition.
I tend to paint as neatly as I possibly can, and I work from the inside of the figure out. So that I know that the next colour I am going to apply will go over the colour that went before it. For example on the rifles, I’m not too fussy about how I paint the brown stocks, because I know that if I go over the barrels, when I come to the next colour, the gunmetal, I can correct any errors I have made. Where I do try to be careful is when I’m coming up against a colour I have already painted. So when I am coming up against the flesh of the hand on the barrel I try to be as neat as I can there.
I am not a fast painter. I do know people who can turn out figures very quickly, but for me it takes approximately, 20 to 30 minutes a colour for each six figures, depending on what colour I am painting. So bearing in mind I’ve got twelve colours we’re talking about six hours work to paint these six figures. A point I would make about painting, when it comes to painting units, obviously paint the number of figures you feel comfortable with. I like painting about six at a time, as it just about keeps my attention. I do get frustrated as we get towards the end and feel as though I’m not making any progress,but six figures I’m comfortable with. Some people paint more, and manage to knock out whole units of thirty.
So I started first of all with Vallejo 955 set flesh to paint their faces and hands.
Next up is vallejo 950 Matt Black and again very straight forwardly you paint the hats, the backpack, the cartouche and of course the bayonet scabbard under the bread bag.
So that’s the first two colours done and that’s about an hours work.
And we’re now about to start with a brown and we will use Chocolate Brown 872 to paint their rifles and also to paint their hair.
The next colour will be to do the bread bags which is Iraqui Sand colour 819. Once the breadbags are painted with the Iraqui sand, which is basically an off white colour next up is to paint the redcoats and the colour I have chosen is 957 Vallejo Flat Red.
Vallejo colours come in a very nice convenient bottle, all you need to do is pick it up and give it a good shake – it always helps to shake the bottle to make sure the pigment is mixed, and then squeeze out a little dob onto your palette. The palette can be almost anything. I use an old tea plate that I ‘stole’ from my wife when she wasn’t looking, and I’ve had it for about twenty years. Also, I always have a tub of water next to me and tend to dip my brush into the water almost every time I use the paint, so that the paint is nice and thin and goes on easily. The disadvantage is that you might need to do more than one coat – this is particularly true of red. I don’t know what it is about red but it doesn’t appear to be a particularly well pigmented colour, no matter who manufactures it. The Vallejo is one of the best, and goes on quite nicely, but I often feel a second coat makes it look a little bit better. So although I’m only telling you about one coat, I will go back at some point and do a second coat particularly on the sleeves and the bits that obviously show. The other thing about the painting the red is that I do tend to paint over the whole torso, even the parts where the lace and strapping will be. I can come back to those later and touch those up. Don’t be too worried if you go over the lace, because it’s very difficult to paint inbetween the lace or where the lace will eventually be.
Next up is the water canteens. From what I can see the British used a light blue and as it happens I don’t actually have a light blue on my paint selection at the moment, but it is not very difficult to mix. Take a bit of light grey, put a bit of prussian blue in it and if necessary lighten up with a bit of white. I know mixing colours can sound a bit daunting because you might not get the right colour, but on a figure of this size as long as you get a light blue it won’t really matter too much.
I mentioned painting the barrels of the guns in gunmetal, I think that historically speaking, if we were to be absolutely accurate, the barrels of the brown bess were a darker colour or even a dark brown, but I take artistic license and like to see that my gun barrels are gunmetal. It makes them stand out, adds a little life to the figure, and makes them look a little bit more pleasing on the gaming table. If you want to be strictly accurate you may have to research the colours more, but for me, seeing the gunmetal barrels glinting on the battle field just pleases my eye. I take the same liberty with other colours. For example when it came to painting my Kings Own Fourth Regiment, they have blue facings. Strictly speaking, that should be a very dark blue bordering on black, but I just wanted the facings to be obviously blue, so I tended to use a mid colour blue, which would make it clear that they had blue facings. Again that won’t be to everybodys taste but I want to be able to tell my regiment on the table even if they are not near the Ensign!
Having put the gunmetal on the barrels, the next colour I am going to use is brass and I’m going to put a bit of detail on the guns, the trigger guards the butt plates and also the brass belt plates on the figures. This will finish the metallics that I will use, which is a really good time to change the painting water. The reason we do that is that metallics can leave a little residue in the water, so I would always recommend changing the colours when you have used metallics.
The next colour is to do the facings. On the 27th Enniskillen regiment the facing colour was buff, so this also meant that the straps were usually buff as well. It depends where you look to see the colours, in some books I have seen the straps as white, but I have used British Napoleonic Uniforms: The First Complete Illustrated Guide to Uniforms, Facings and Lace: A Complete Illustrated Guide to Uniforms and Braids and the Mont St Jean website, and from what they show, it is buff all around.
The vallejo colour is 976 buff, and we’re going to paint the facings, the cuffs, the collars, the turnbacks on the redcoats and all the strapping, with the exception of the water canteen strap and some of the extra strapping on the haversacks.
The next colour that I will put on is the white, and that is obviously to do the lace. I will start at the top and edge the buff colours, we do the white epaulets and because this is the flank company, they have the larger ‘swallow’s nest’ type, then the lace on the cuffs, pick out the lace on the redcoats as best you can, pick out the lace on the bottom edge of the jacket and then edge round the facings on the turnbacks. The figures are now very close to being finished.
The final colour I will put on will be the brown strapping on the water canteen, and am just going to use Vallejo 871 Leather brown for those bits.
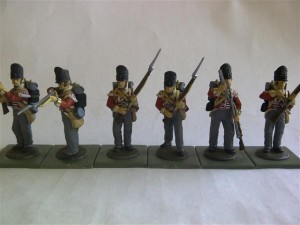
The last picture shows the figures pretty much finished. I will be to use Neutral Grey 992 to touch up the trousers and the napsacks (the dip will add texture and you will see that in later the pictures) and at that point we’ve nearly finished the block colours. For detail I will use a natural steel to paint the buttons on the cuffs.
I’m going to leave them overnight, to dry and also because you can spend so long looking at the figures that you miss the obvious. So tomorrow morning I will have a look at them and correct any obvious mistakes. I will go back to the red and give that another coat to make it a bit brighter, and then that’s the block painting finished.
I’ve given the hats a very light dry brushing with grey to bring out the detail. At this stage it is evident that when you get close up to the figures that there is a lack of shading and texture. Its the quickshade that is going to provide these shadows and it will smarten up the painting providing an ‘edge’ to the different areas of the figures.
In part two we will show you the finished figures…

