Tankfest 2017 Bovington

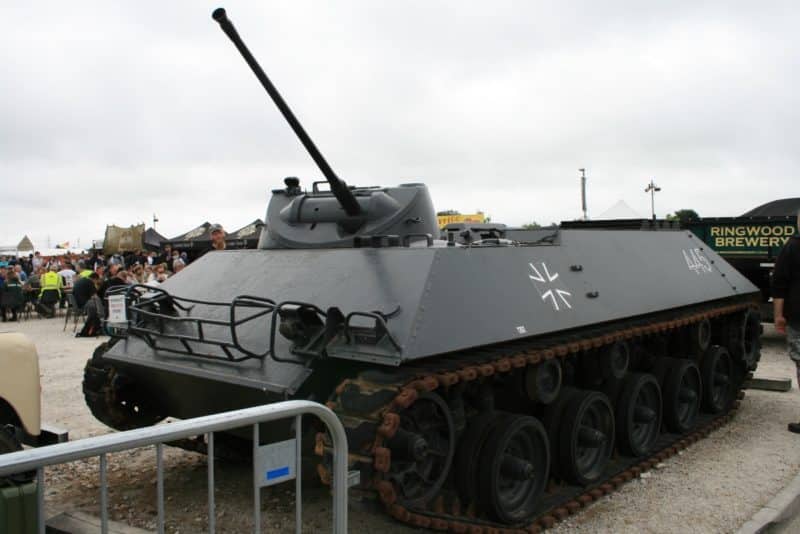
West German APC - Part of the Static display.

West German APC – Part of the Static display.

If you have been following Arcane Scenery on Facebook you will already know that I was fortunate enough to be able to get to Tankfest at Bovington this year. What a fantastic day out! If you are at all interested in tanks, either as a wargamer, modeller or just as an enthusiast, then this show is a must visit event. I am always somewhat wary of attending these big set piece shows, fretting that it will be too busy, parking will be an issue or it will be over priced. Tankfest suffered from none of these issues as far as I was concerned. Yes, it was sold out and there were thousands of people there. However, the organisation was superb. We arrived at 10.00am and were directed into one of the car parks without delay and from there it was a short walk to the entrance. There was a very long queue of spectators waiting to get in, but the queue was always on the move and as we were walking past parked up tanks and could see into the Live History exhibition, the queue was actually quite a pleasant experience, a phrase that I never thought that I would use.
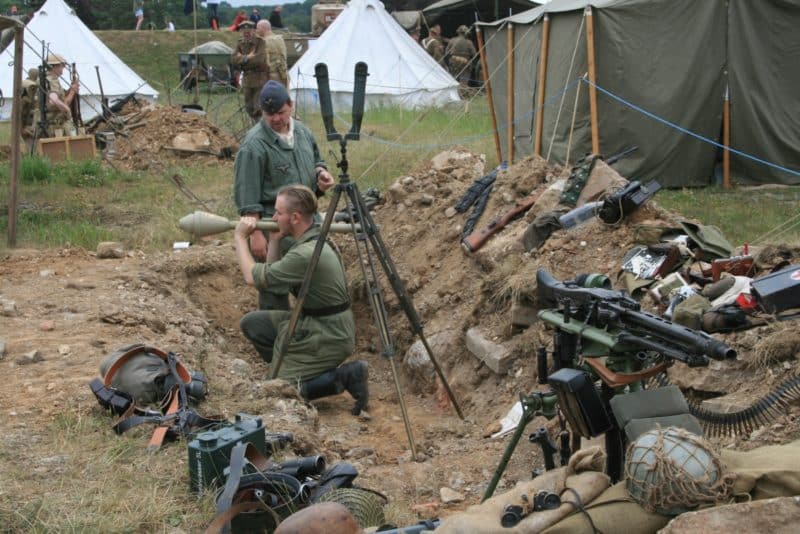
Just part of the Living History display

Just part of the Living History display

Security was quite tight, with armed Policemen keeping watch over proceedings. Mind you, I did have to supress a smile and a ‘smart alec’ answer when asked if I had any alcohol or knives in my rucksack. I understand that the beer concessions have to make their money – as for sharp knives, within a step of getting through the entrance, I was surrounded by enough military hardware to re take Iraq. If I’d forgotten to bring my bayonet there were plenty on show and plenty of Army surplus suppliers well stocked with all sorts of hardware. Ah! The joys of modern life, but I digress.
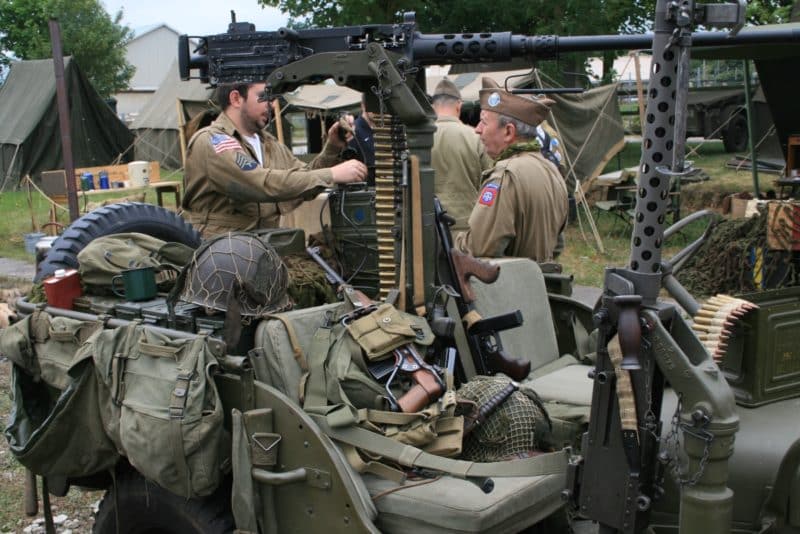
The Reenactots brought plenty of kit to look at!

The Reenactors brought plenty of kit to look at!

Once into the event enclosure, there was plenty to do and see. Your event ticket gives you access to all areas and the exhibition is split into the following sections: The Tank Museum, itself split into 6 or 7 halls and beautifully laid out; The workshops and conservation hall, where the ‘overstock’ of vehicles ready to be conserved or serviced are stored; The tank park, where the vehicles that were running were on display in between shows; the Living History encampment, full of re enactors and their vehicle and weapons; the traders tents, although some traders were housed in the museum itself; the hospitality tents and finally; the Arena, where the live action is taking place. To be honest at first I didn’t know which way to turn! There was just so much going on.
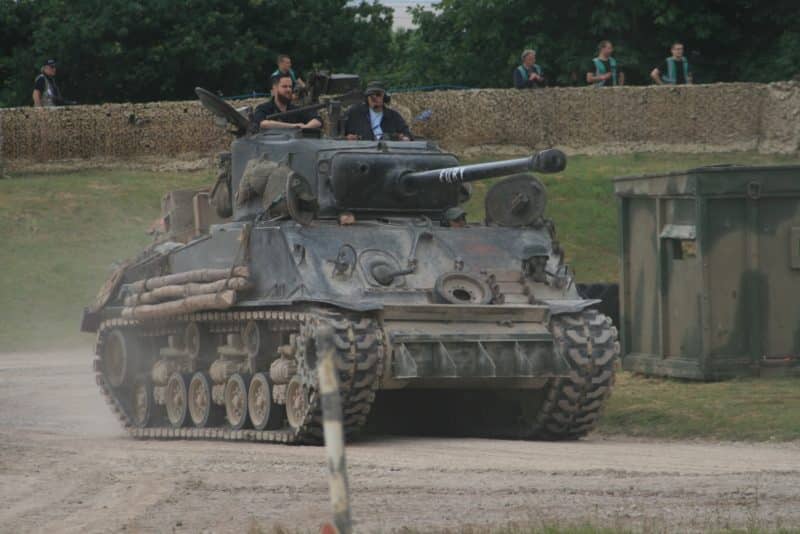
Sherman M4A2E8 'Fury' arrives in the arena

Sherman M4A2E8 ‘Fury’ arrives in the arena

Inevitably, we gravitated to the arena and despite the crowds, managed to find a spot to see the tanks in action. Having just missed the Leopards tearing up the arena, we watched the more sedate D-Day Embarkation Convoy parade. There were plenty of WW2 vehicles in the parade, including a few rare beasts. The highlight for me, being the ShermanM4A3E8 ‘Fury’ from the film of the same name. At this point, I realised that I was in trouble…Although I am a Tank enthusiast, I was struggling to recognise and remember the names of all of the vehicles that were being paraded. What with trying to video them on my phone, take pictures using my camera and actually watch the parade, it seemed impossible to take notes, so you will have to forgive me if some of my vehicle identification is a bit off in this early report!
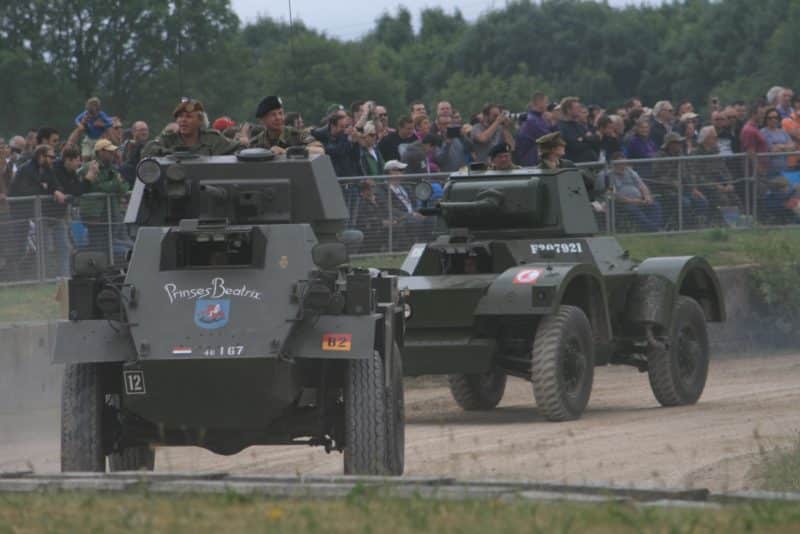
A Daimler and Morris Armoured Cars... or is it a Morris and a Daimler, ummmm, hang on, one might be a Humber...

Daimler and Morris Armoured Cars… or is it a Morris and a Daimler, ummmm, hang on, one might be a Humber…

So note to self, next time bring a note book! If I was a bit confused by the Armoured Cars, the WW1 tanks were a bit easier to spot. It was something else to see these running in the arena. OK, I realise that they are replica’s but nonetheless, we were treated to a fantastic parade of the French Saint-Chalmond:
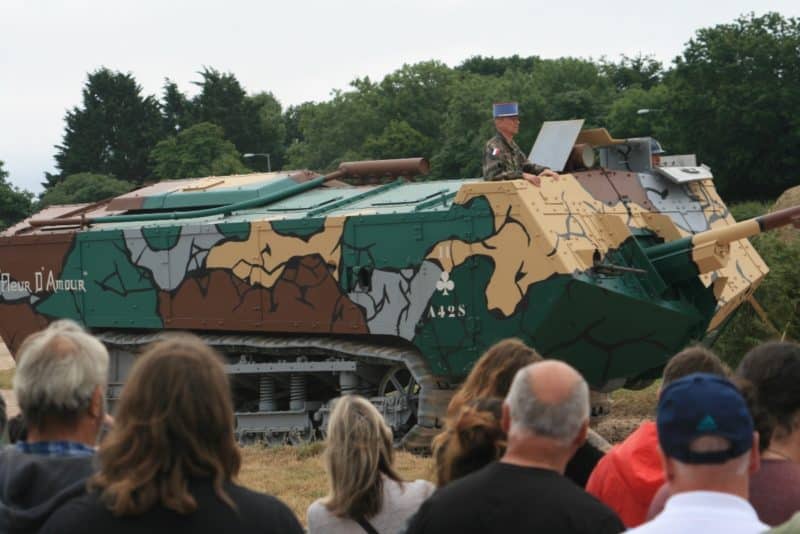
Saint-Chalmonde Tank

Saint-Chalmond Tank

Followed by the British Mark IV, as seen in the film ‘Warhorse’:
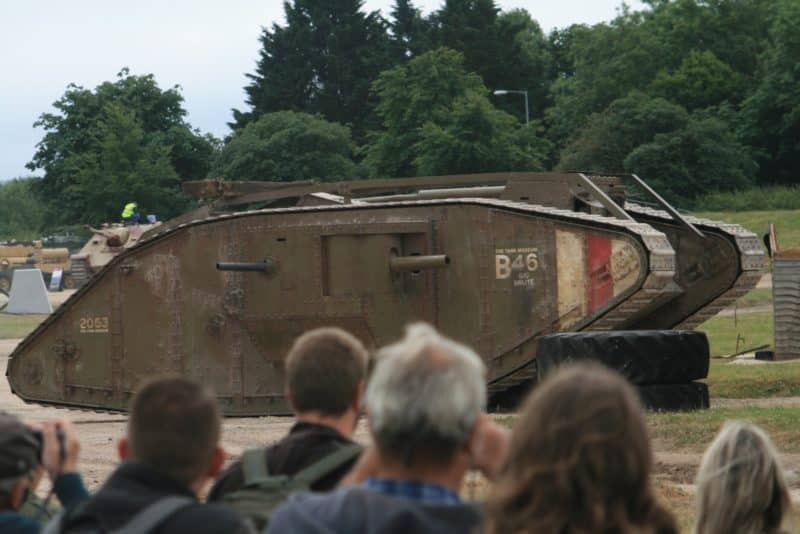
British Mark IV

British Mark IV

And finally, bringing up the rear, a German AV7!
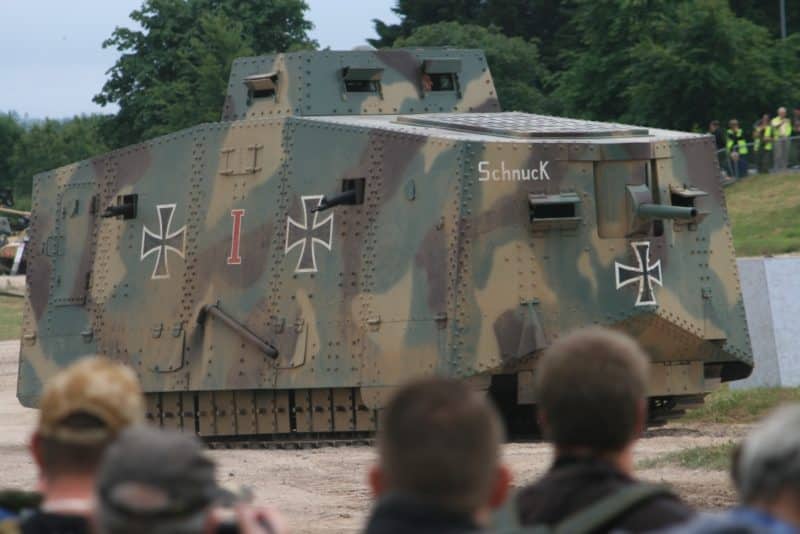
German AV7

German AV7

As an added bonus, there was a Rolls Royce armoured car from which the commentary was taking place:
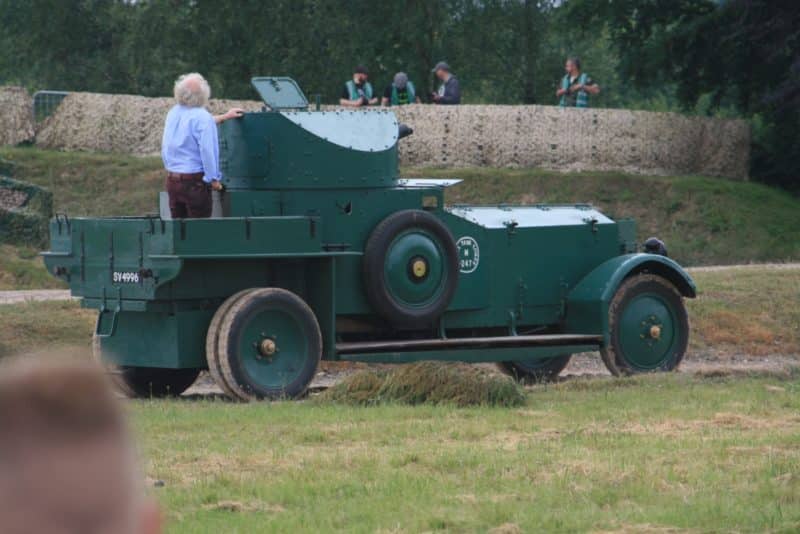
Rolls Royce Armoured Car

Rolls Royce Armoured Car

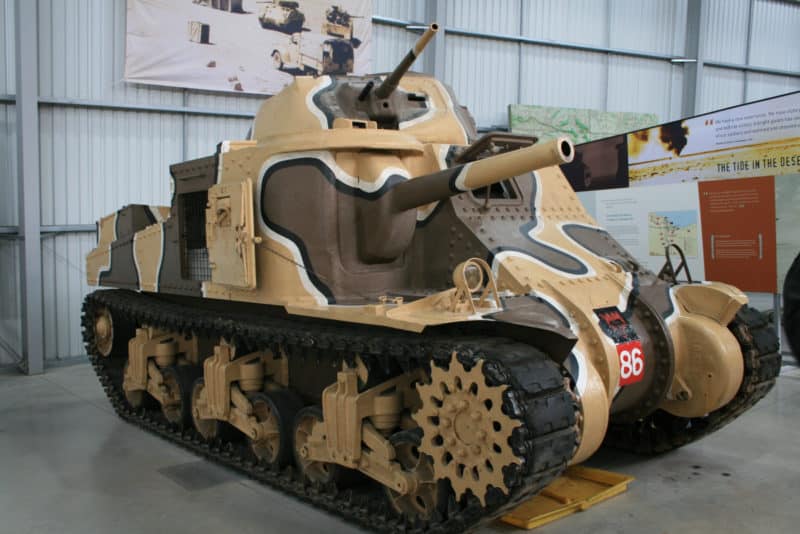
After the WW1 tanks there was a bit of a break, so it was off to grab a bite to eat (Giant hot dog and diet coke…oh the irony in that choice!) and then on to the Museum. Now at this point in my review, I will take a short break and leave you with a couple of pictures from the main hall in the Museum, ‘The Story of the Tank’. I actually took nearly 300 Photos at Tank Fest, as well as half a dozen videos and it would neither be practical or fair to expect a reader to plow through this lot. My plan is to edit them, caption them and upload them to a hosting site where interested parties can access them at their leisure. So watch out for Tankfest part 2 next week.
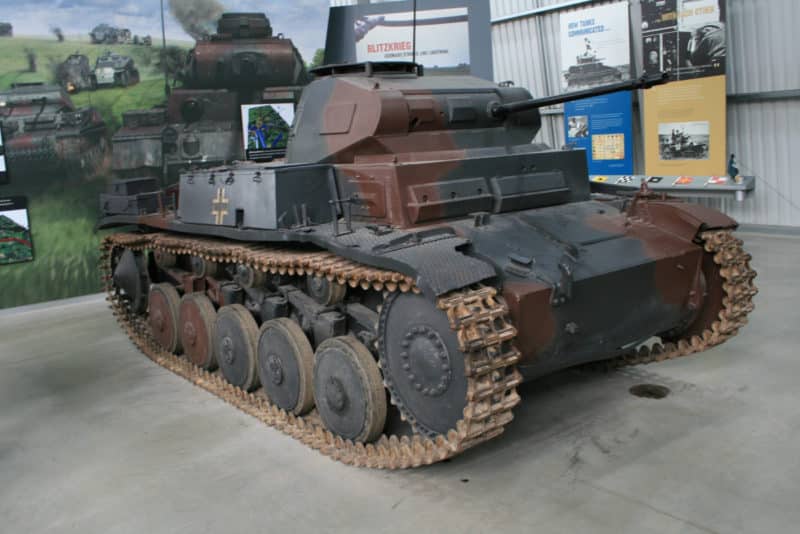
Panzer II
Panzer II

Grant Tank

Grant Tank

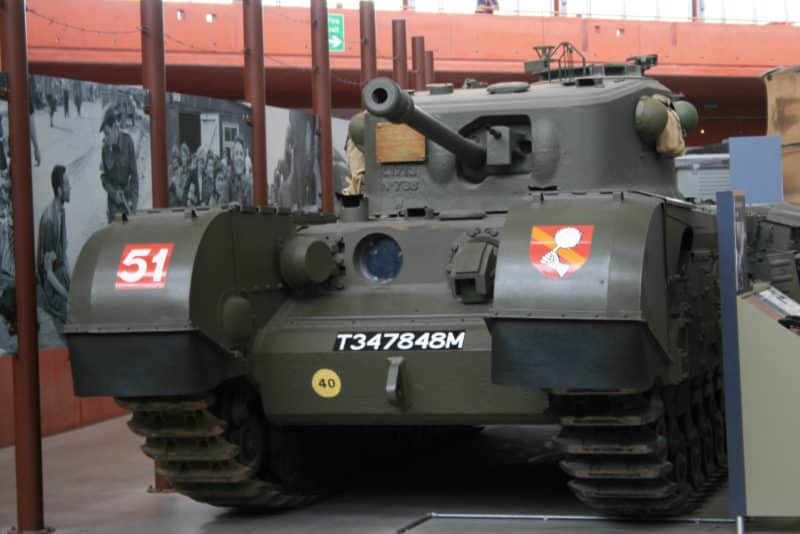
Churchill
Churchill
 

Wars Of the Roses Part 2 – Stokes Field

After the light hearted look at history at Warwick castle, my next outing was to Stokes Field, just South of Newark and only ten minutes up the A46 from my house! It was here that the last battle of the War of the Roses was fought, on 16th June 1487 some 2 years after Henry Tudors earlier victory at Bosworth Field. The occasion was the 530th anniversary of the battle and the event was hosted by Foundry Miniatures, who are themselves based at East Stoke village. The battle is somewhat of a footnote to the Wars of the Roses but was a major engagement, possibly involving more participants than Bosworth. The casualty count was certainly higher, due to the fierce, drawn out close combat and the ensuing rout where most of the Yorkist elite were slain. If you are unfamiliar with the battle, it is worth checking out the Wikipedia article here:

THE BATTLE OF STOKES FIELD

The Battlefield tour was led by Mike Ingram, an extremely knowledgeable and affable guide. Mike explained the background to the battle, who was involved and why. I was particularly impressed that Mike was happy to give more than one possible version of what had happened and why this should be. Events that occurred 530 years ago are never going to be completely documented and so I quite like the uncertainty being made clear.

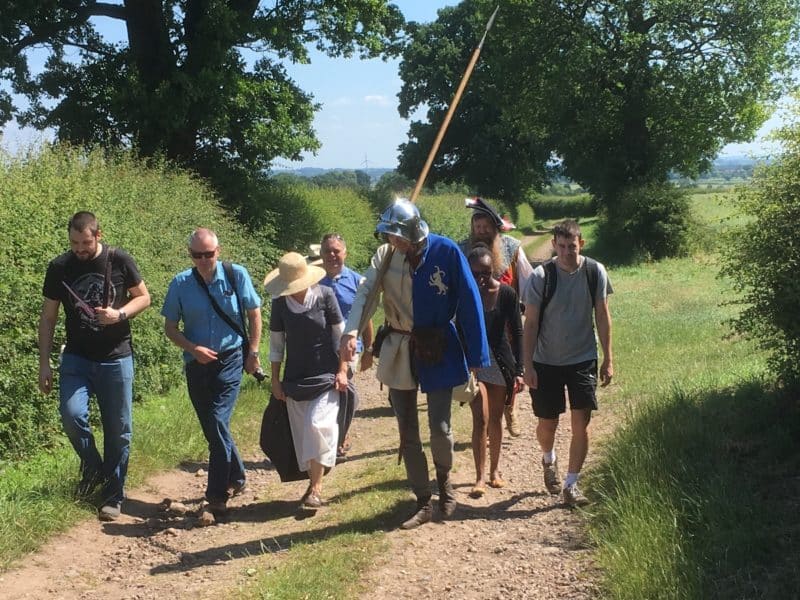
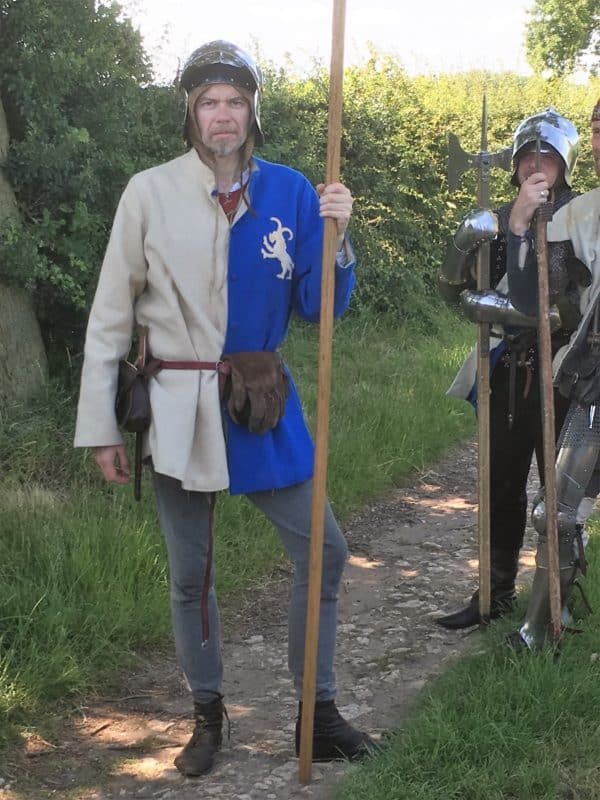
The march to Stokes Field

The march to Stokes Field

And so on a very hot Saturday, we set off to walk the Stokes Field battlefield, accompanied by some of the reenactors. It was sweltering just wearing jeans and a T-shirt. Quite how the guys in armour coped I’m not sure but they marched with us! Much of the battlefield is now on privately owned land so I felt privileged to be able to get access to the site. In fairness, you can understand the farmers reluctance to having Joe public trampling his crops but it is a shame that the site is not more accessible to the casual visitor.

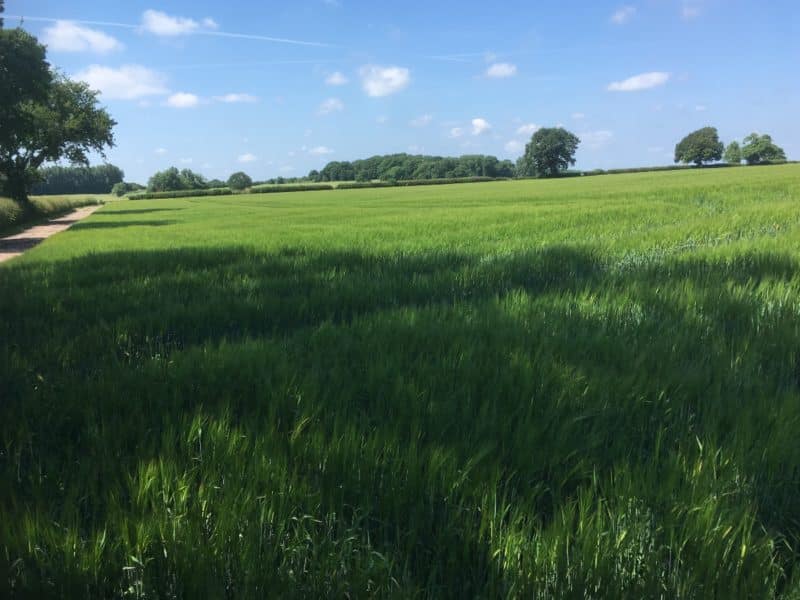
That said, there isn’t a great deal to see other than the beautiful countryside. You really needed a guide to help you imagine how the battle was fought

Stokes Field - The Kings men are coming over that hill!

Stokes Field – The Kings men are coming over that hill!

Hold the high ground boys

Hold the high ground boys – That’s the old A46 fosse way to the left of the picture.

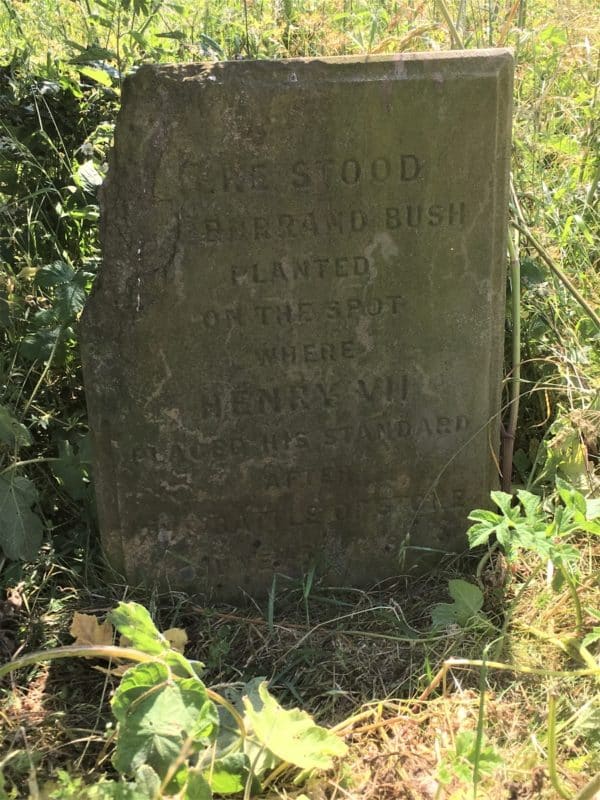
Having reached the top of the battlefield and surveyed the landscape, we walked back down the hill in the direction of the defeated Rebel army. Our first port of call was the stone that marked  where Henry VII planted his standard after the battle.
The stone that marks the place that Henry VII placed his standard.

The stone that marks the place that Henry VII placed his standard.

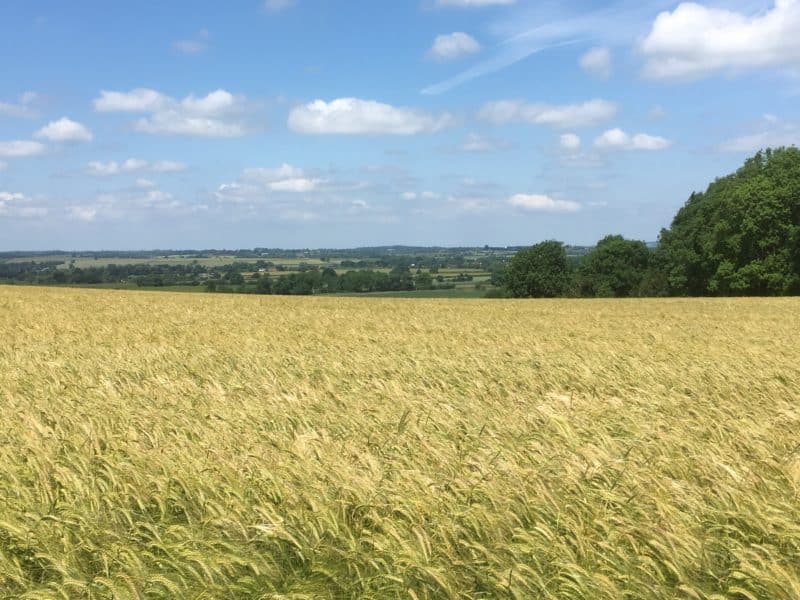
It was over this field that the rout and pursuit of the rebels took place as they tried to retreat back to the ford over the Trent.

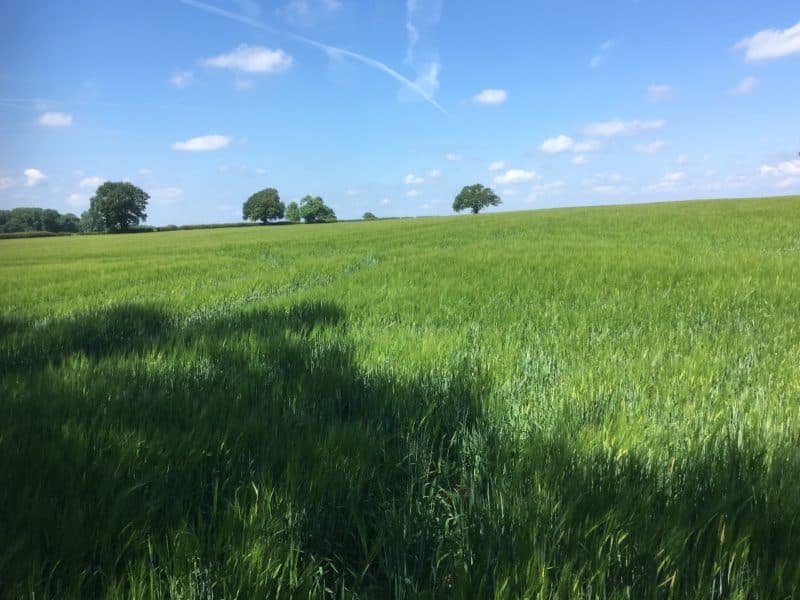
The view towards the Trent

The view towards the Trent – no rebels , just barley.

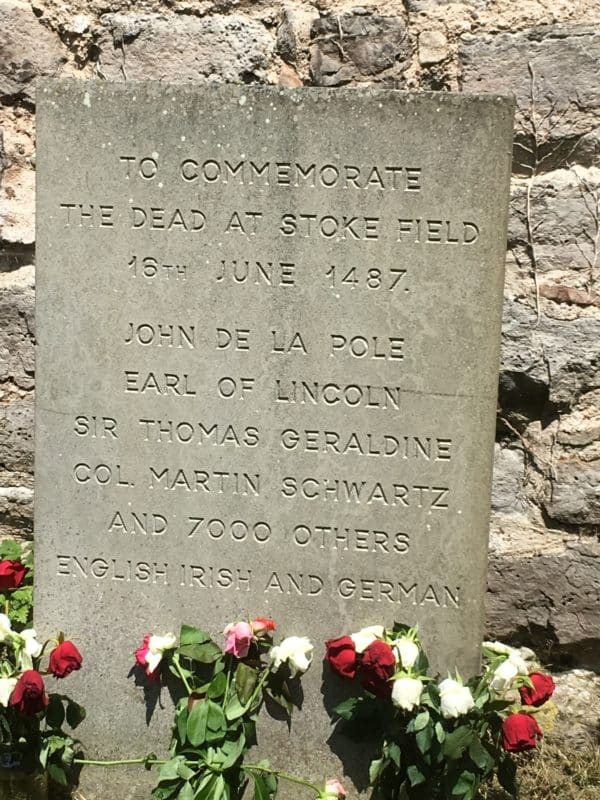
We made our way back to the Church at East stoke were the following memorial can be found.

Memorial stone at East stoke Church

Memorial stone at East stoke Church

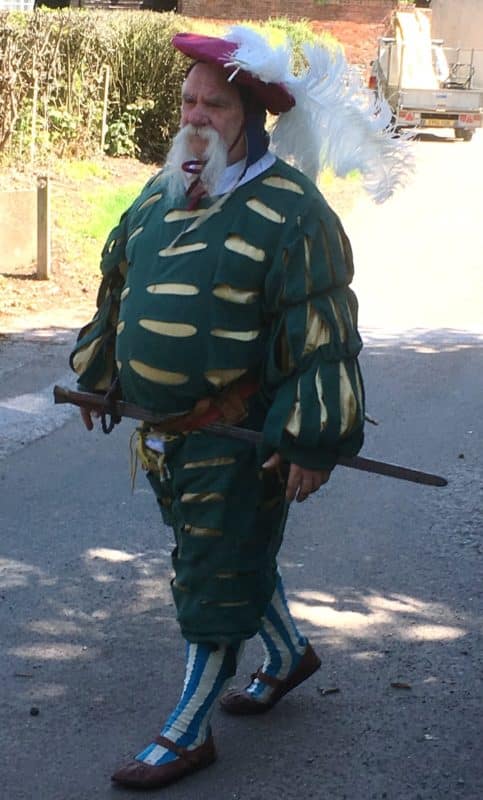
As you can see from the inscription, the rebel force comprised of a large contingent of both Irish fighters and German Landsknecht mercenaries as well as the English rebels. They must have made an interesting bunch on which to base a wargaming army. The Irish were very lightly armed in the main, referred to as Kerns, and would have looked somewhat like a Dark ages army. They suffered terribly at the battle from the concentrated archery of the Lancastrian  army. The Landsknechts would have cut a colourful sight, in their distinctive costumes. Although armed with pikes and the latest handguns, they too found it difficult to combat the trained archers that they were facing. Indeed, it is said that their bodies were ‘filled with arrows like hedgehogs’. Gunpowder had yet to dominate the battlefield.

Landesnecht re enactor

Landsknecht re enactor

The English Contingient

The English Contingent

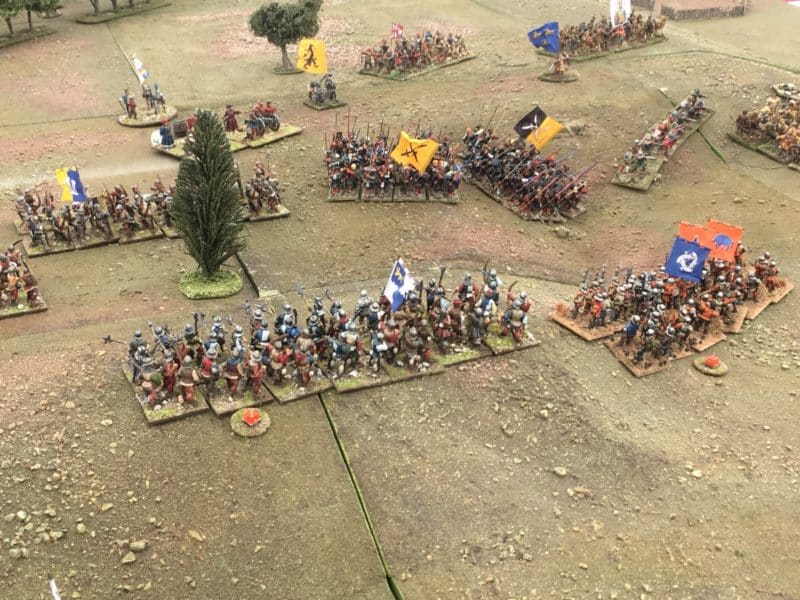
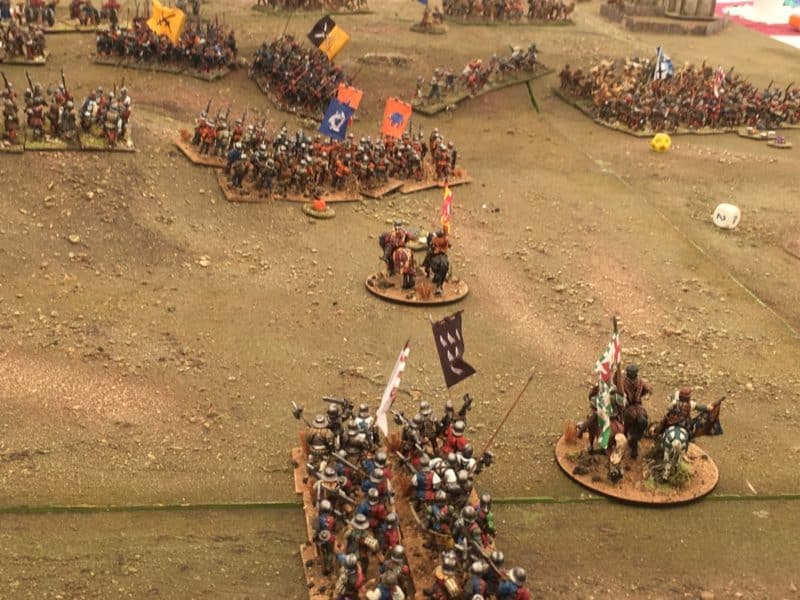
From East Stoke Church it was a short walk to inspect the ‘Red Gutter’, a cutting that leads down towards the River Trent, where hundreds of rebels stumbled into it and were slaughtered. From there it was back to Foundry HQ for well deserved refreshments. This also gave us an opportunity to take a look at the wargame that had been put on by the ‘Like a Stone Wall’ club.

The Battle of Stoke field

The Battle of Stoke field

Another view of the action.

Another view of the action.

We were also able to wander amongst the Reenactors encampment, once again, I found them to be very generous with their time and expertise. Unfortunately, I had run out of charge on my phone so I have no more pictures to show you. A quick walk around the stands at Foundry HQ and it was time to go. I now feel enthused to get on with my War of the Roses Army, so perhaps in between the next Napoleonic unit I’ll paint a few more pikemen.

If you would like to visit the battlefield, you are able to walk around the East Stoke Church and wander down to see the ‘Red Gutter’ and of course, I am sure that the guys at Foundry will be pleased to see you, the shop is open Monday to Saturday, details are here:
WARGAMES FOUNDRY 

You wont be able to get to the ridges on which the battle started but you will certainly get the ‘feel’ of the battlefield from the lanes below. I’ve put links to the local TV and Newspaper  coverage of the event that might be of interest – it might take a time to load but is worth the wait. I hope that you find the two blogs have been useful – perhaps they will inspire you to have a go at this fascinating period in history.
NOTTS TV NEWS COVERAGE

THE LOCAL PAPER REPORT – NEWARK ADVERTISER


Wars of the Roses Part 1 – Warwick Castle

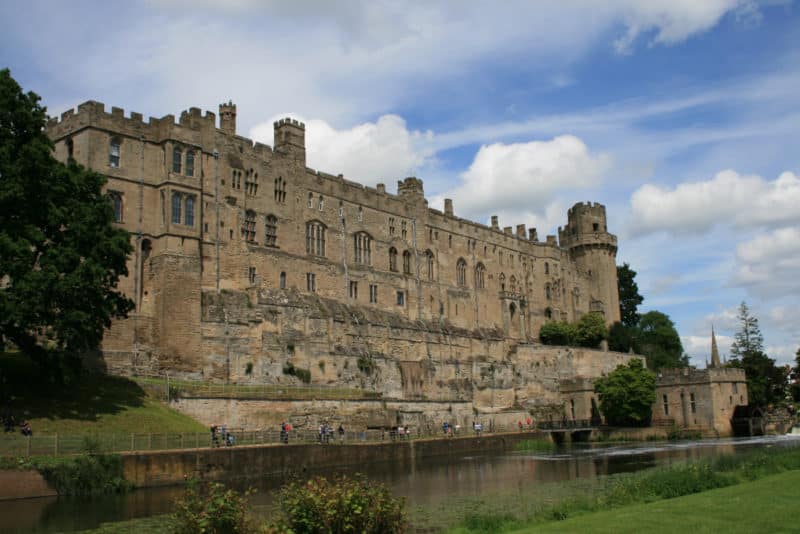
It’s been a busy June, with my weekends being taken up with one event after another. I’m not complaining, far from it, I know how fortunate that I am in being able to get the these events, so in an attempt to document my recent exploits, I’ve written this weeks blog in two seperate posts.  The first event that I attended was a visit to Warwick castle. This was a birthday treat from my wife, who had spotted the event and booked the tickets back in February. Warwick castle is certainly an imposing venue and looks just as you would expect a castle to look, if you know what I mean! There’s plenty to inspire a wargamer here.

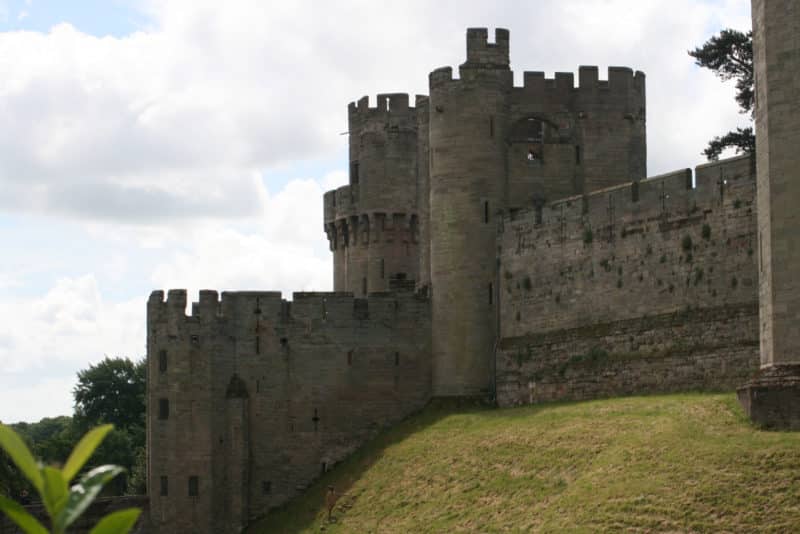
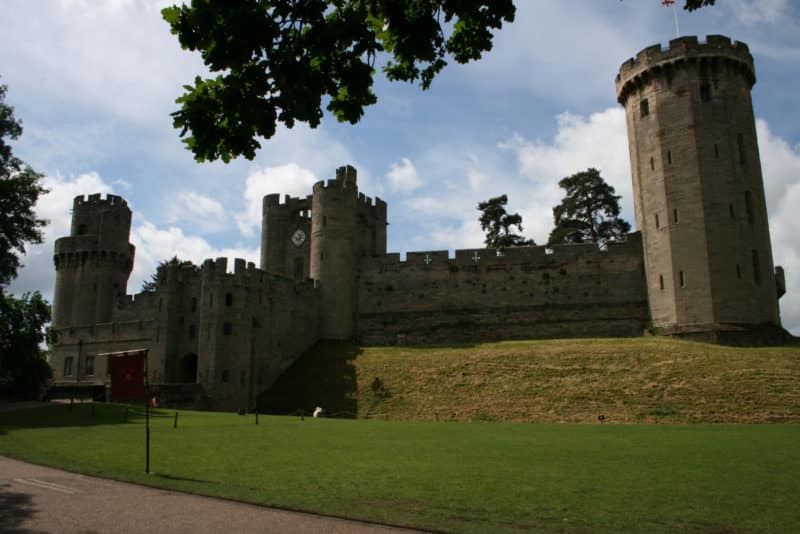
Approach to Warwick Castle

Approach to Warwick Castle

Warwick Castle gate house

Warwick Castle gate house

The rear of the Castle

The rear of the Castle

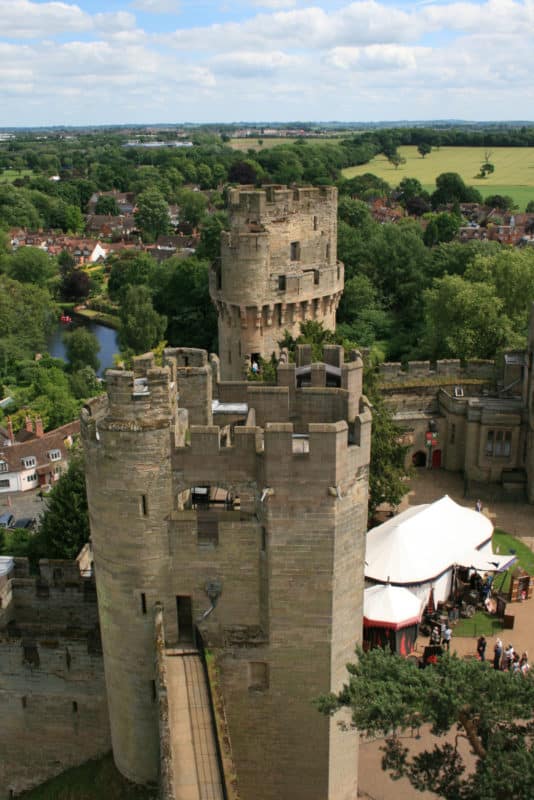
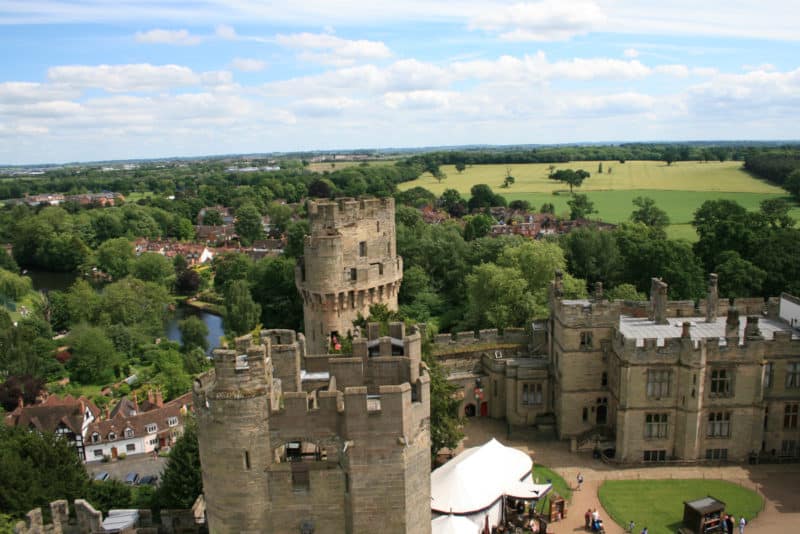
As you can see, it is an imposing structure and a trip to visit the castle is a great day out. The tour around the battlements  is at times a challenge for someone as unfit as I am these days but well worth the effort. The views of the surrounding countryside are amazing.

How many stairs did I just climb?

How many stairs did I just climb?

Lovely view of the countryside

Lovely view of the countryside

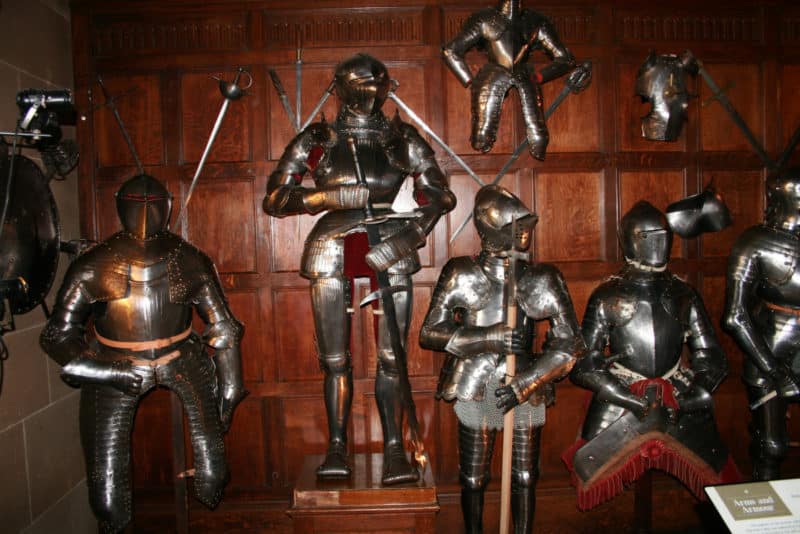
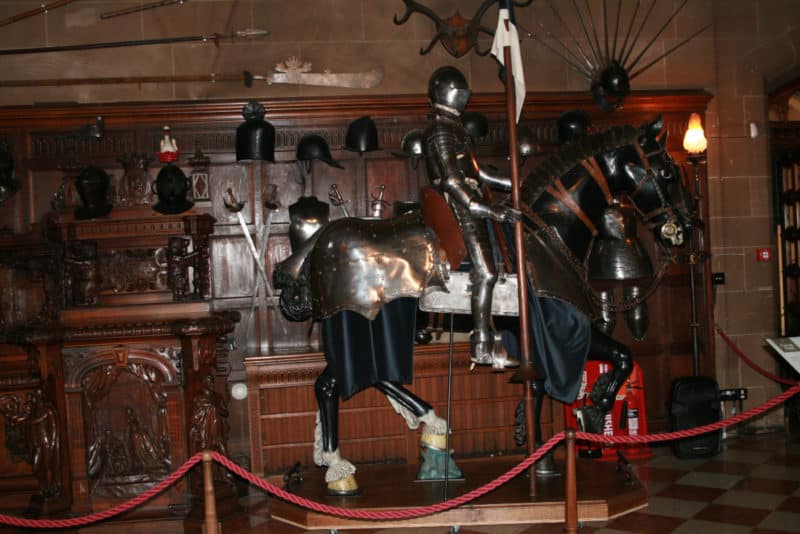
The main exhibition in the Castle is a recreation of a Royal weekend visit to the stately home at the turn of the century. It’s very well done, with a light touch as regards to the history but plenty to see and keep you involved. Of particular interest to me were the Armoury exhibits.

Armour on display in the Great Hall

Armour on display in the Great Hall

More Armour.

More Armour.

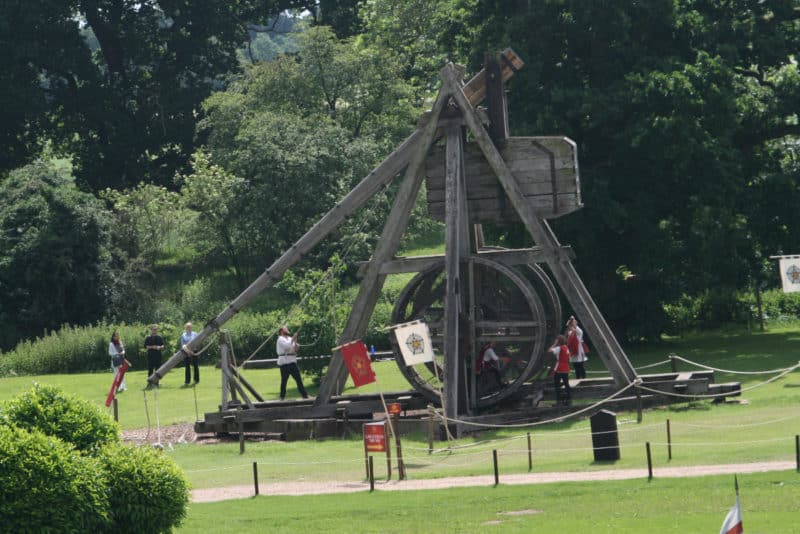
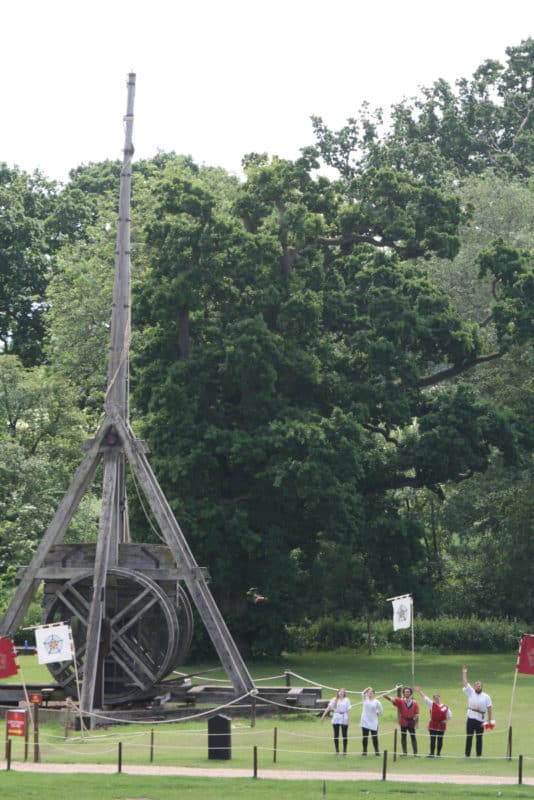
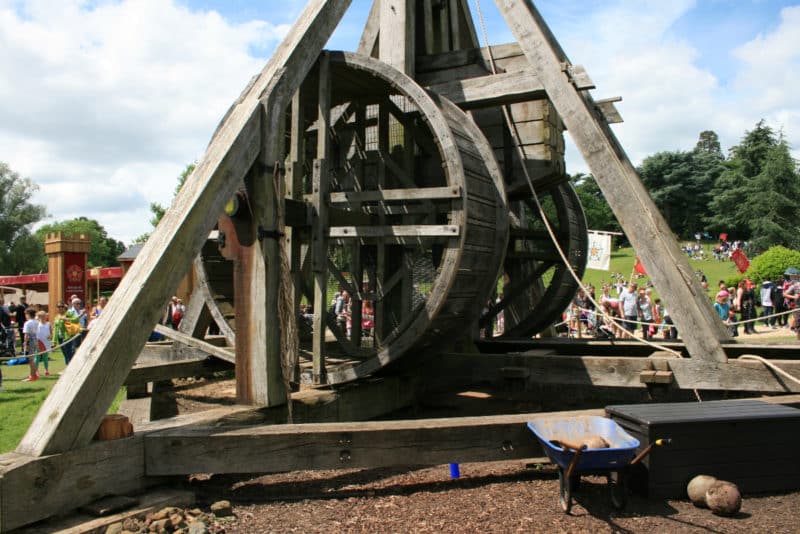
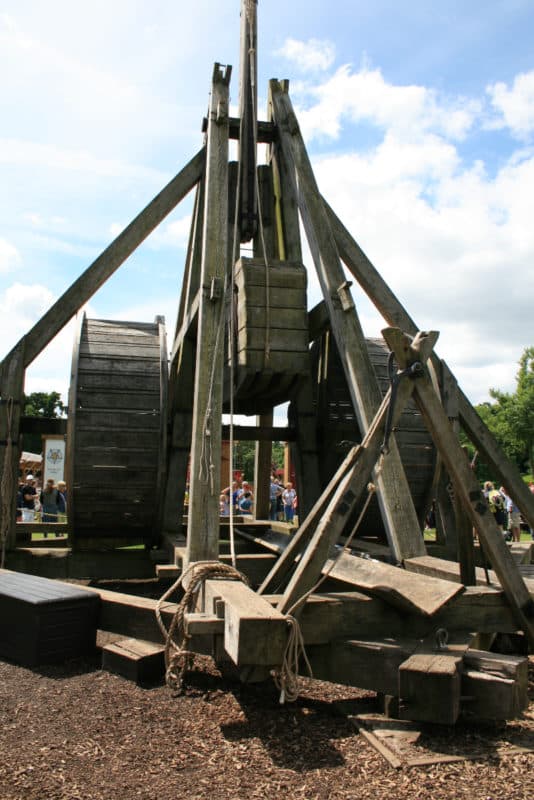
As a bonus though, the castle owners were running a ‘War of the Roses’ event, which although a bit fast and loose with the history, was superbly done and very entertaining.  The castle is now run by the same group that run Alton Towers and Madame Tussauds’ and so is a little prone to over commercialization. That aside, there’s plenty to keep you busy without having to fork out for extras and the venue has created a number of set piece events to entertain the guests. For example, outside is the mighty trebuchet which is demonstrated every couple of hours with a ‘live’ firing. It’s all done in good humour and full audience participation – the video gives you some idea of the action.

Once the trebuchet had been fired, we were able to inspect it – here are some closer shots.

Preparing to fire!

Preparing to fire!

Look closely and you can see the crew running in the side wheels ‘hamster style’ to hoist down the firing arm.

Good job team!

Good job team!

The winding gear

The winding gear – look at the size of the shot!

load ammo here!

load ammo here!

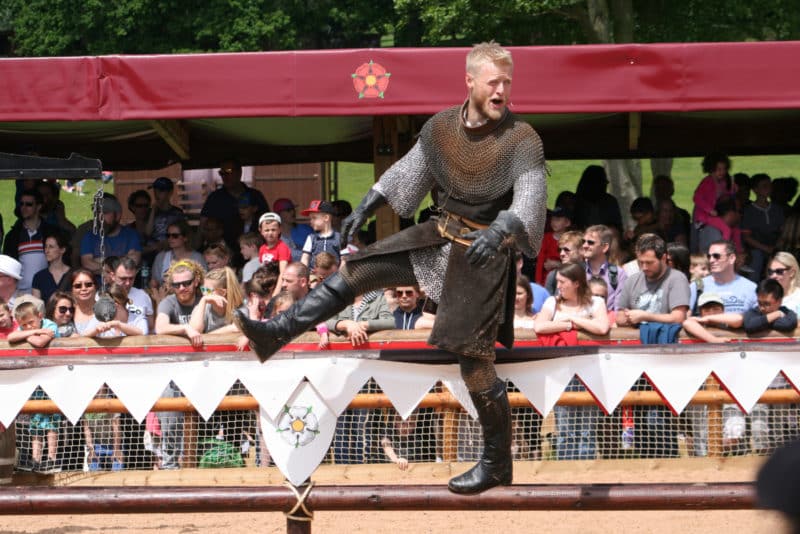
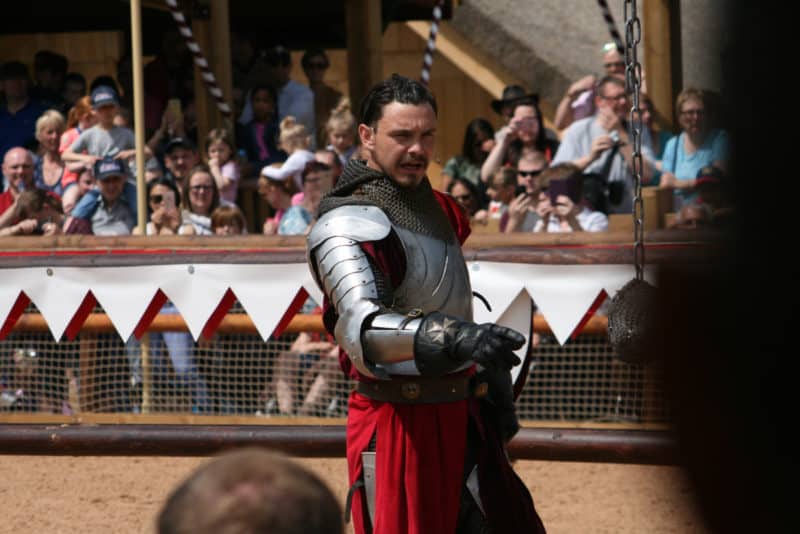
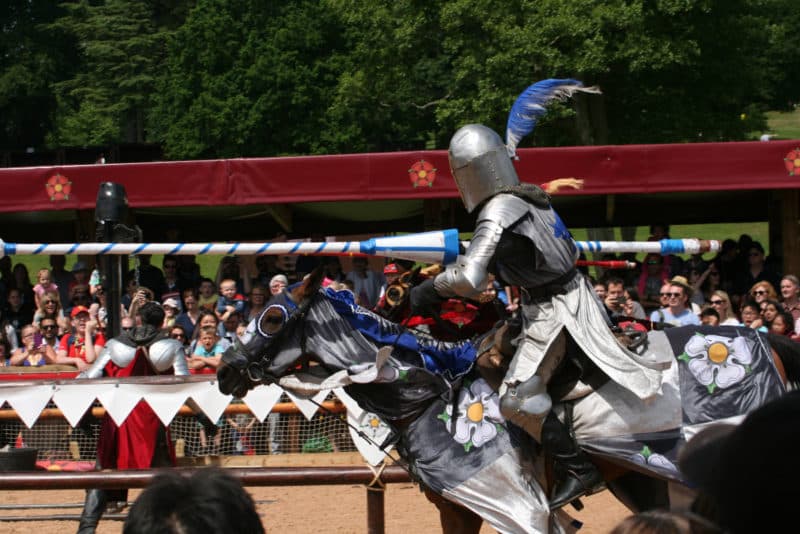
The highlight of the live events was the re-enactment of the War of the Roses. Essentially this was a jousting match with a bit of acting and audience participation but great fun to watch. Once again, here is the event in pictures.

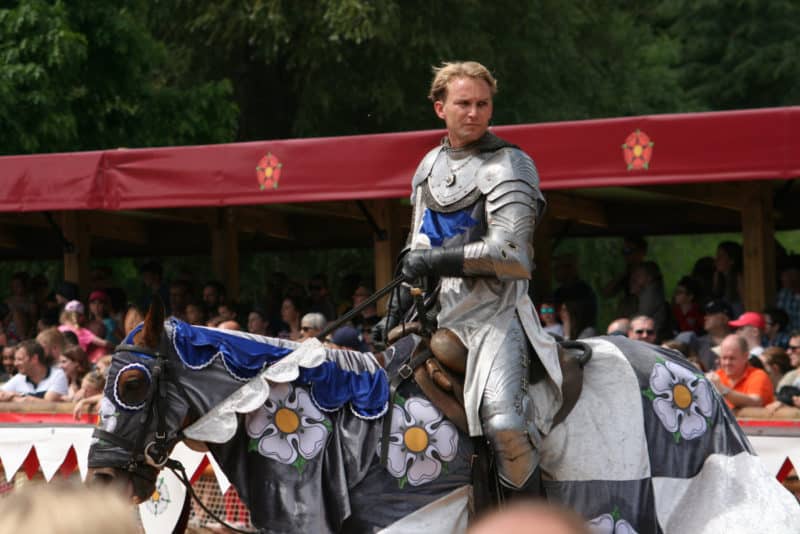
Eric Dier look alike provides the warm up for the Yorkists!

Eric Dier look alike provides the warm up for the Yorkists!

Henry Tudor takes charge!

Henry Tudor takes charge!

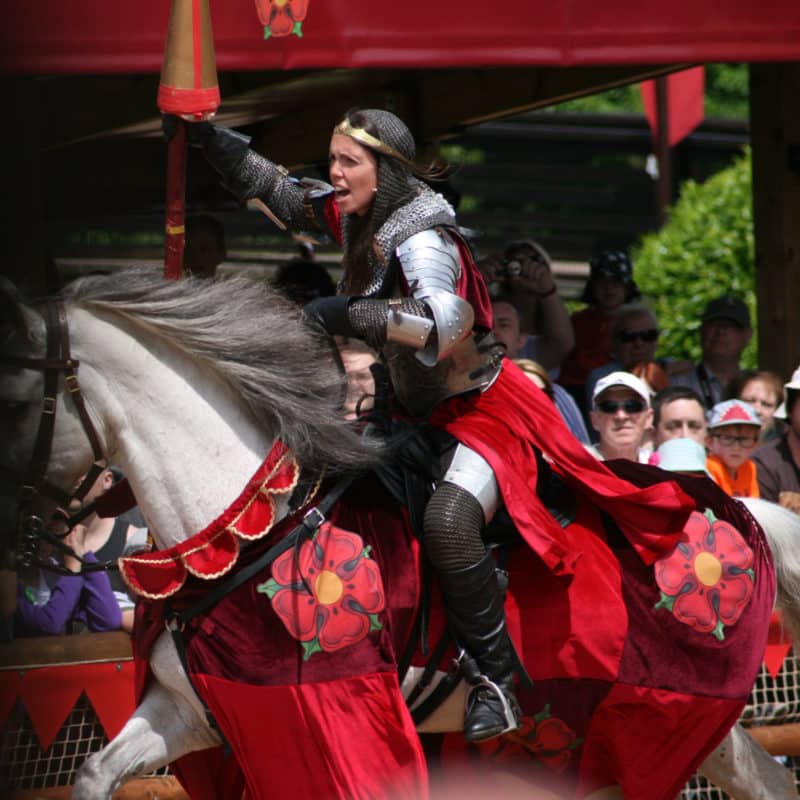
Margaret of Anjou take to the field

Margaret of Anjou takes to the field

Hurrah for Edward of York!

Hurrah for Edward of York!

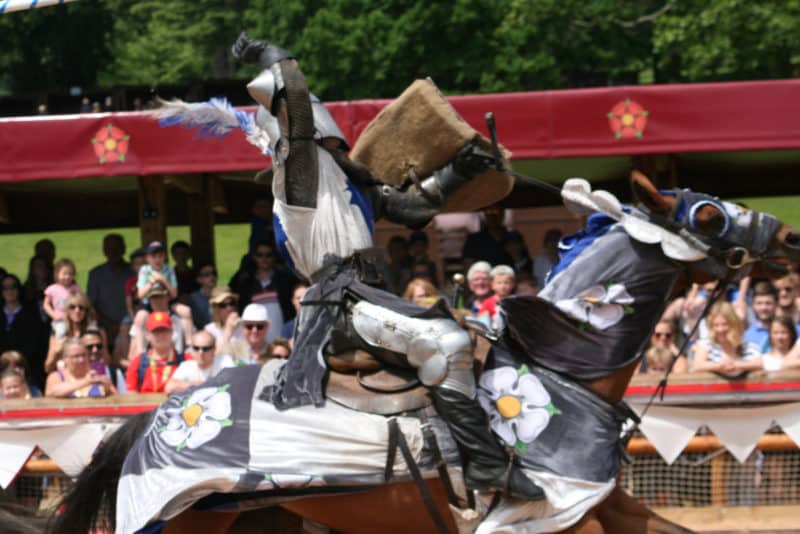
Things are not going to well for Richard.

Things are not going to well for Richard.

Richard unhorsed!

Richard unhorsed!

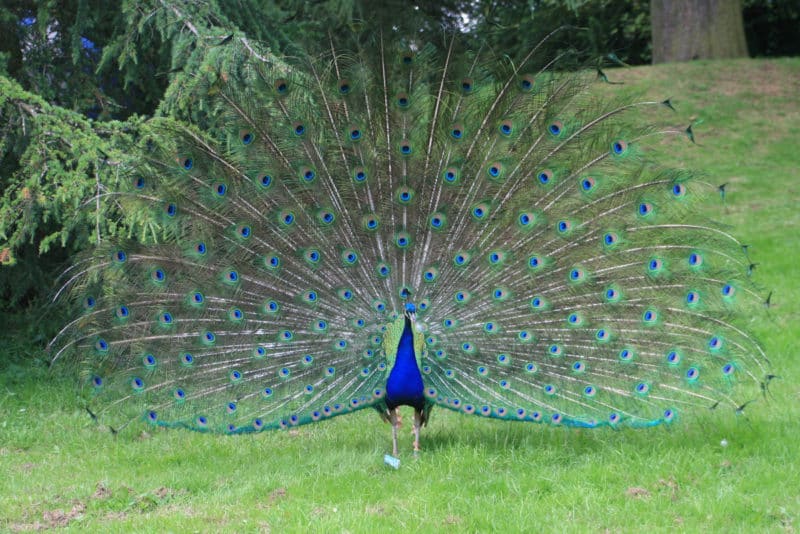
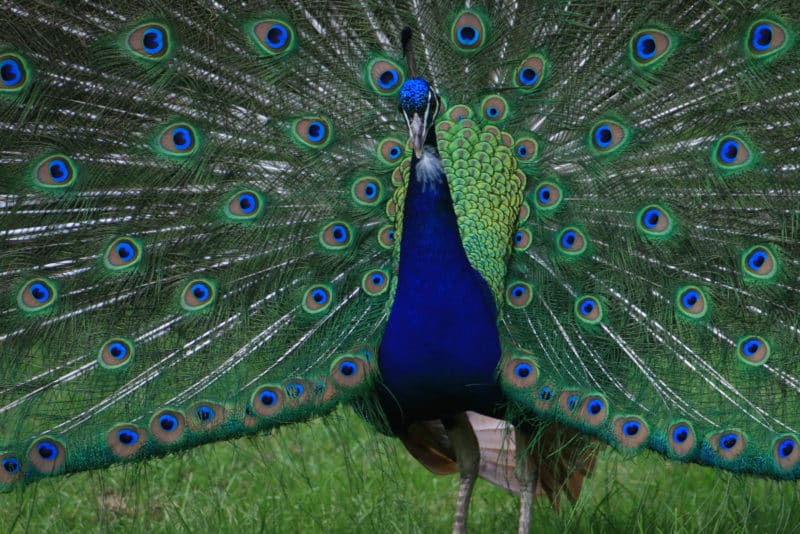
If the costumes lacked some historical authenticity, it was easily overlooked as the spectacle of live knights in combat is pretty amazing to watch. It certainly fired up my imagination and interest in this period. We spent a full day at the castle from opening amost up until closing time and still did not see everything. Finally, although unrelated to wargaming, it is worth reporting that the grounds of the castle were immaculate. There is a rather lovely tea house tucked away in the Orangery overlooking the gardens and it was here that we rested with a coffee and cake and were also entertained by the peacocks.

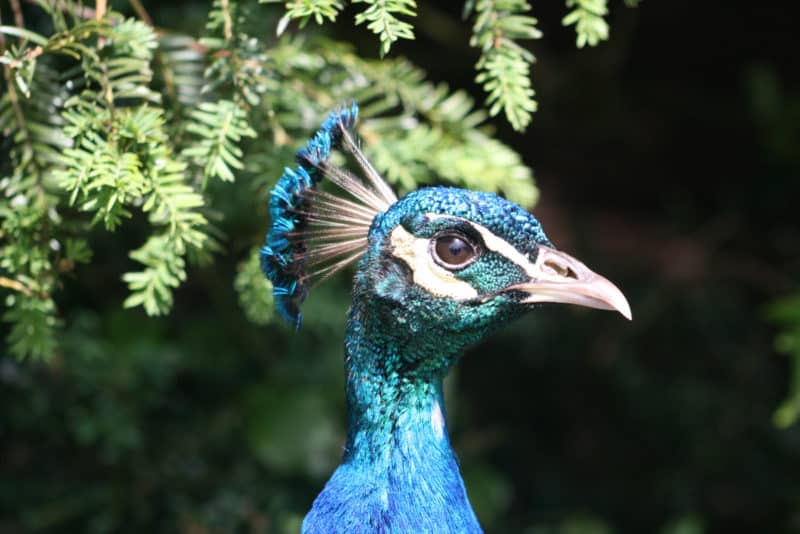
Beautiful plumage!

Beautiful plumage!

Peacock close up

Peacock close up

Closer!

Closer!

If you would like to visit Warwick Castle or find out more, here is the link to their site.

WARWICK CASTLE


The joys of sprue stretching

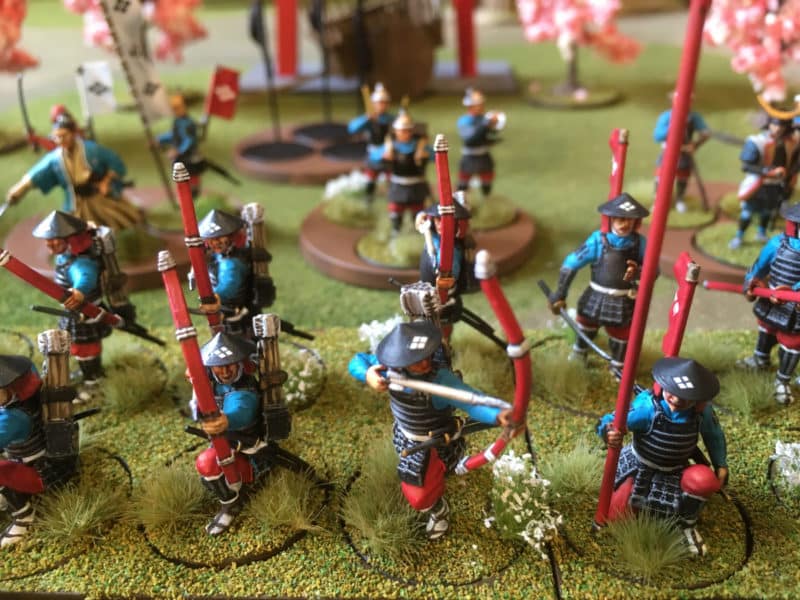
I’ve been gradually finishing off my Test of Honour war band and adding bits and pieces to them to get them to a ‘finished ‘state. This is the first time that I’ve played a game with unpainted figures. Usually, when trying a game, I either borrow a friends figures or wait until I have at least a painted unit of my own. Test of Honour was slightly different. It burst onto the gaming scene so quickly that most of my gaming buddies were in the same boat and as the game involved Samurai, nobody seemed to have any older figures in their collection that they could dust off and bring out to play. The upshot was that I was keen to get figures painted and on the table with out spending too much time planning the overall look of the army. I had quickly settled on a colour scheme for the figures but hadn’t really thought about basing other than to sprinkle some scatter over the painted bases. To make matters worse, I just picked up the nearest tub of scatter that I found, which with hindsight is a tad brighter than I would normally use.

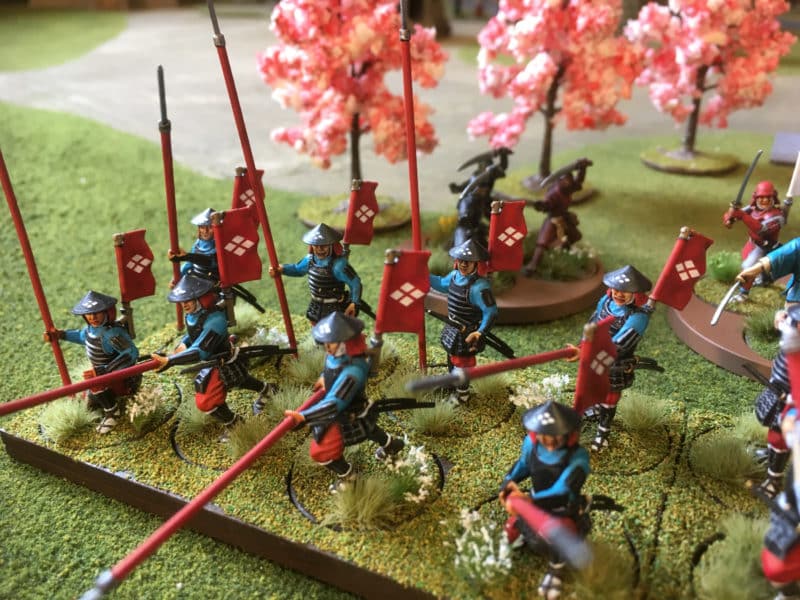
Samurai band with Mons added

Samurai band with Mons added

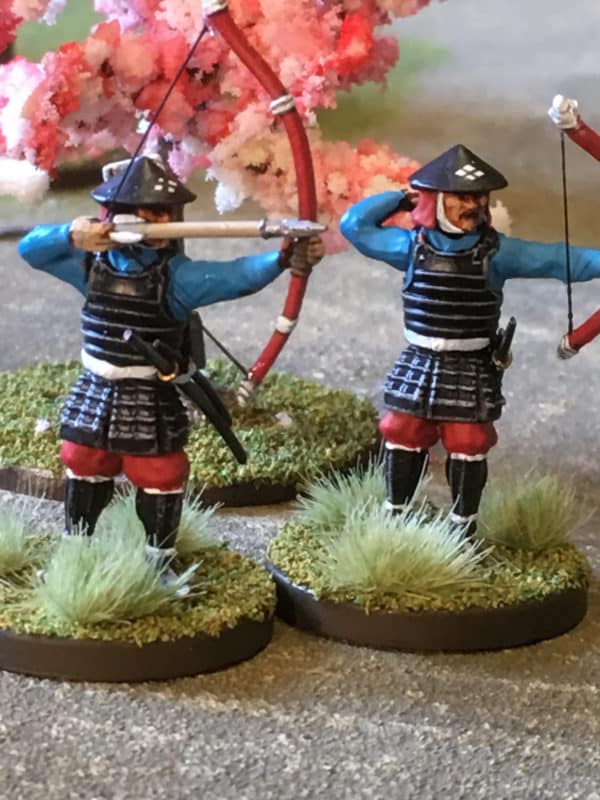
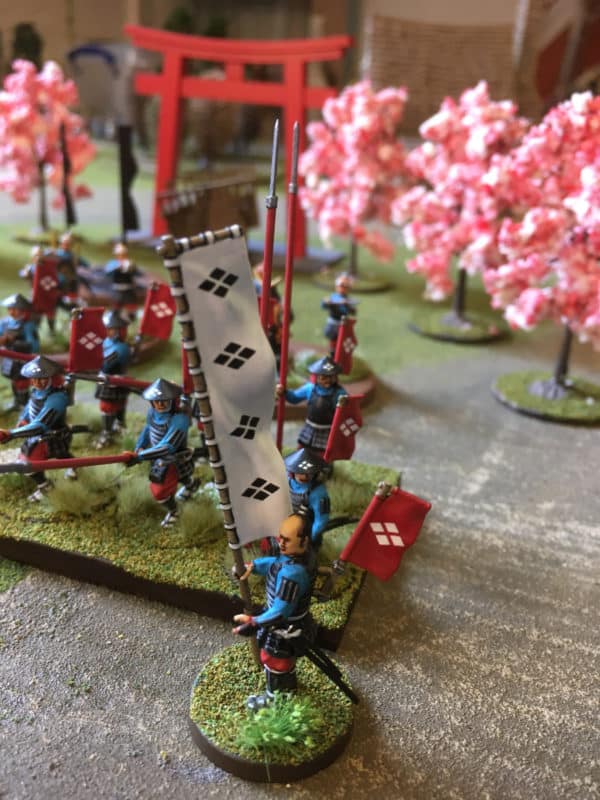
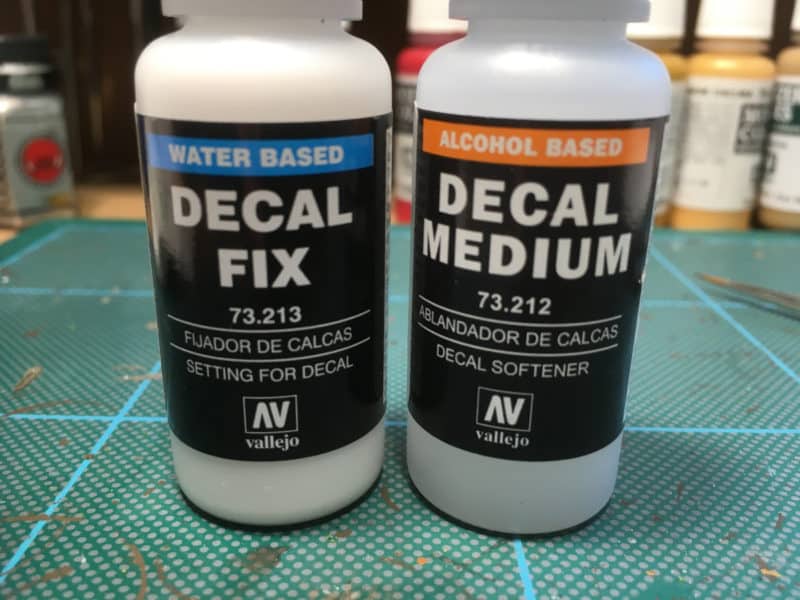
So in between gaming and other painting projects , I’ve gradually been adding detail to my warband. The first task was to add some decals to the flags and hats to show the clan mon. After a false start, I found a nice straight forward clan mon that I could use – the Takeda mon.  Even better, the supplier, Veni, Vidi, Vici printed the decals in white. The first batch that I ordered from another supplier required me to repaint the background on the figures to get a white clan motif, a faff too far for me. The mon on the flags are actually 15mm scale but fit quite nicely. I used Vallejo Decal Medium and Decal fix to ensure that they confirmed to the uneven surface. It’s a straight forward job. Just paint the decal medium over the flag, soak the decal in water for a few seconds, carefully apply the decal using a fine brush to help and use a paper towel to carefully soak up any excess water. I then gave the decal another coat of decal medium. When relatively dry, I then applied the decal fix. If it sounds complicated, it isn’t when you get into the swing of it. To get the smaller clan mon for the hats, I used a scalpel to cut original decal into four diamonds. I then applied the diamond to the hat using the same process with the decal medium & fix. Once dry, I then painted two lines to divide the diamond into the four sections. Again, it sounds tricky but didn’t actually take too long.

Vallejo Decal Fix and Decal Medium

Vallejo Decal Fix and Decal Medium

The picture below shows some of the figures with the decals added to the hats before I had painted the dividing lines and should help you to understand how straight forward, if some what fiddly the process is.

Decal fixing in progress!

Decal fixing in progress!

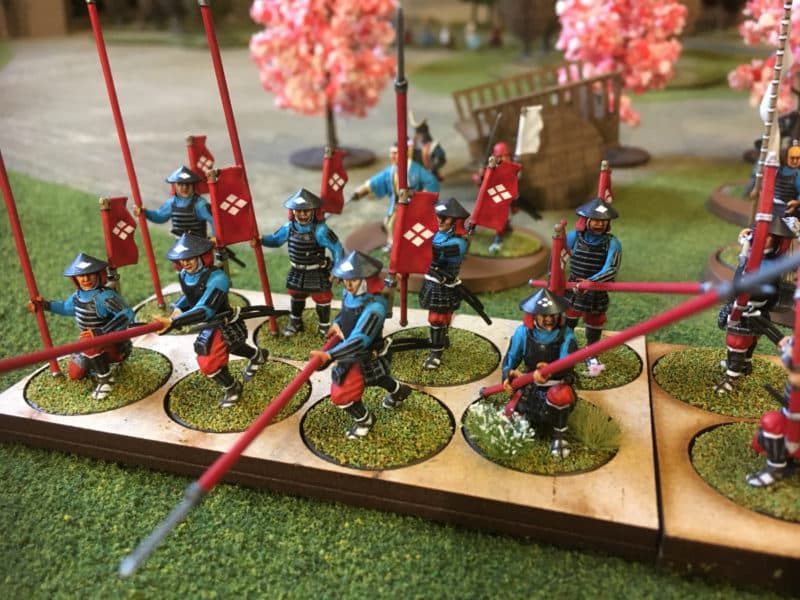
The next job that needed doing was to improve the basing. I did consider scraping the scatter off and starting again. I hadn’t used my favorite method of basing, using Vallejo paste, as the figures are attached directly to the plastic base and I was concerned that I would cover the feet of the men in mud. I decide to work with what I had and the obvious solution was to apply some Gamers Grass light green tufts and some Noch white flowers. I also decided to transport and store my archers and spearmen in movement trays, so I also added some scatter to these.

Movement tray and bases with detail added

Movement tray and bases with detail added

The figures are starting to look more as I had imagined them to be when I first started the project. As far as basing goes, I’m nearly there but I think that looking at the pictures, I will add a few patches of static grass just to give another layer of texture. I had also intended to add bowstrings to the bows. To do this I decided to use stretched sprue. When I mentioned this at the club, I was met with a few blank looks. It seems that this dark art has been lost in recent years – it was a technique that I used when rigging my Airfix World War One biplanes many years ago. It is a simple as this.

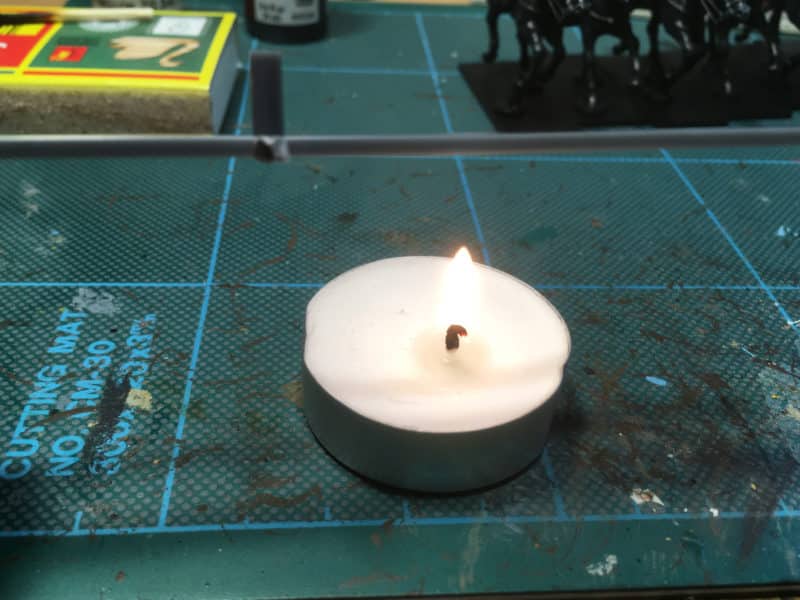
First you need a tea light or small candle and a piece of scrap plastic sprue. A piece of the frame that your Samurai came on is fine. Hold the sprue just above the candle, rotating it to gently warm it until it starts to melt. If it catches fire you are too close…so be careful!

Gently warm your sprue!

Gently warm your sprue!

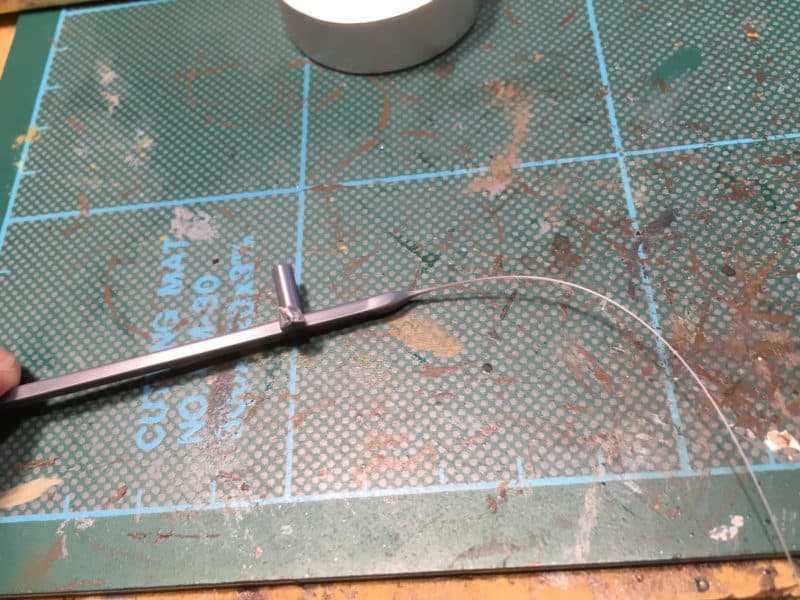
Once you see that the sprue is beginning to soften, take it away from the heat and pull it gently apart. The sprue will naturally stretch and as it goes cold, hardening off into a thread.

sprue stretched ready for use

sprue stretched ready for use

As with everything, practice makes perfect but the sprue is free, so it doesn’t matter if you get it wrong a couple of times. Just be careful with the hot sprue, if you touch it when it is still melting it will stick to you and burn – I can show you my scars. You can then cut the stretched sprue to the desired length and attach it to the bow. With hindsight, I should have done this before I had painted my troops as I had to use superglue, rather than polystyrene glue. So I actually managed to glue the bowman to my fingers a couple of times. Fortunately as I was on my own in the garage, nobody heard the tirade of bad language….

Bow strings attached

Bow strings attached

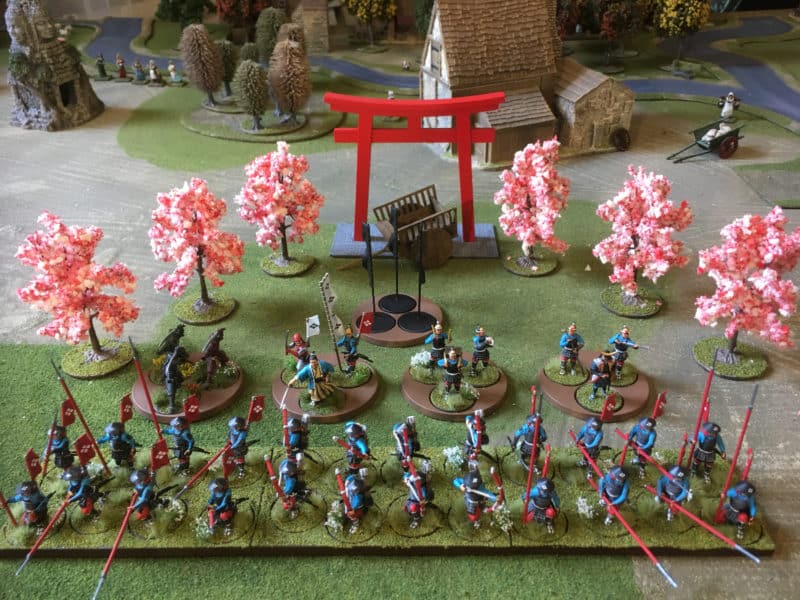
I am gradually getting to where I would like to be with my Samurai warband. I now have enough figures to play a reasonably sized game and I have most of the characters that I need.

Takeda Clan Bannerman

Takeda Clan Bannerman

I think that I will be revisiting the warband over the next couple of weeks but basing aside, I’m just about there with this batch of figures. The next part of the project is to complete four more samurai and paint the beautiful Geisha spy figure. Not forgetting the objective markers and some more scenery…it’s going to be a busy summer!

The warband takes shape

The warband takes shape

Most of the products that I use are available post free at the time of writing, in the Arcane Scenery shop. A good place to start is the Samurai section here:

SAMURAI

You can find plenty of basing products here:

Scatter, Static grass and bases

Vallejo Decal Medium

Vallejo Decal Fix

We don’t sell the decals but you can get them here – service was excellent.

Veni, Vidi, Vici


New British Heavy Cavalry from Warlord!

OK, the title is a bit of a tease. I don’t have any painted examples to show you other than the ones currently posted on the Warlord Games site but I do have some of the sprues! I have been asked to write a step by step painting painting guide for a forth coming issue of Wargames Illustrated so I have been given early access to the sprues as part of the project.

I’m not in a position to do a full review, as I don’t have the full boxed set and I have yet to start my research but here are my first impressions. Actually, I would further qualify that statement by saying I’m not the most objective when it comes to reviewing. I either like something or I don’t and I don’t get too hung up on the miniscule detail. If I don’t like something, then I don’t review it…so I guess by now you will know that I do very much like the look of these new additions to the Warlord Range.

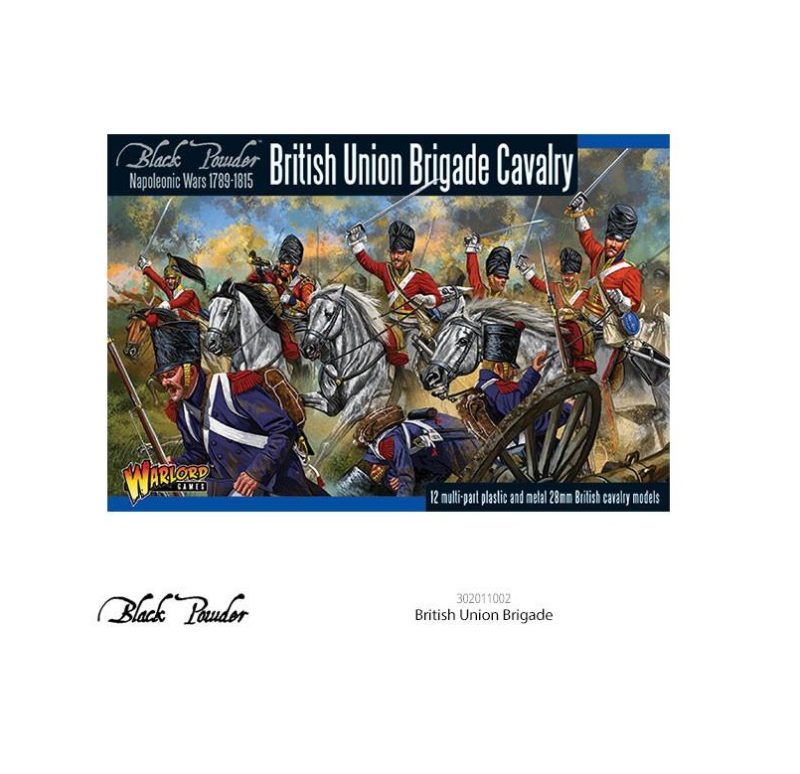
For £20 you will get a nice box of 12 plastic Cavalry figures ( 6 sprues), plus a metal Officer figure and a metal Buglers arm or in the Union box a metal bugler, so 13 or 14 figures in all in the set. I guess that for most of us, that will mean that we will have one or two bonus spare plastic figures as wargamers will tend to build their units for Black powder in 12’s. Also included in the box will be a leaflet explaining how the British heavy cavalry were organised and some basic painting hints to supplement the box art. I think that this is very good value. I particularly like the effort that Warlord Games have gone to in terms of the packaging and information leaflets that are enclosed with their sets. It is yet another example of how this company is making historical wargaming more accessible to the new entrant.

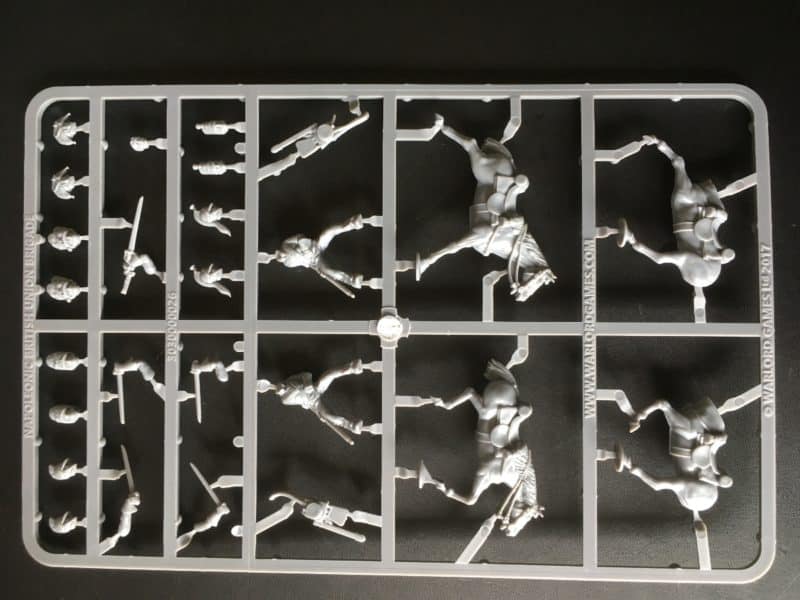
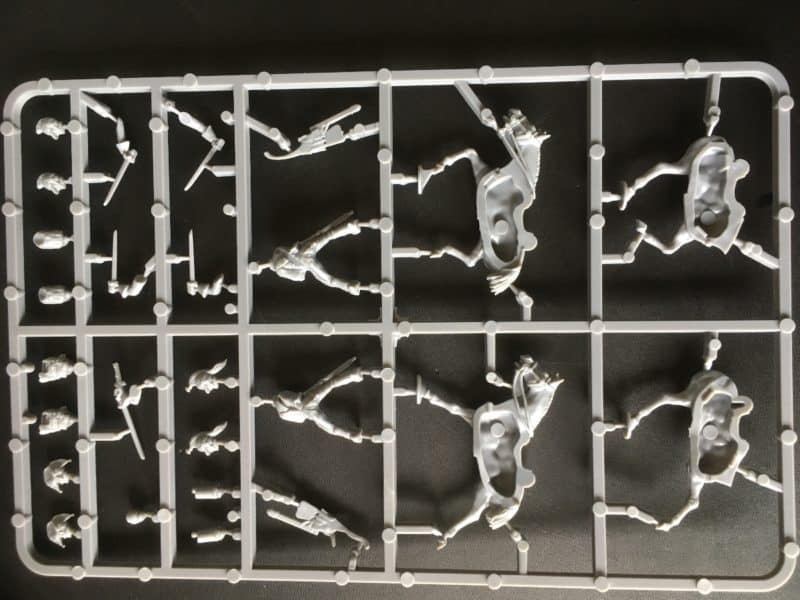
Union Brigade Sprue

Union Brigade Sprue Front

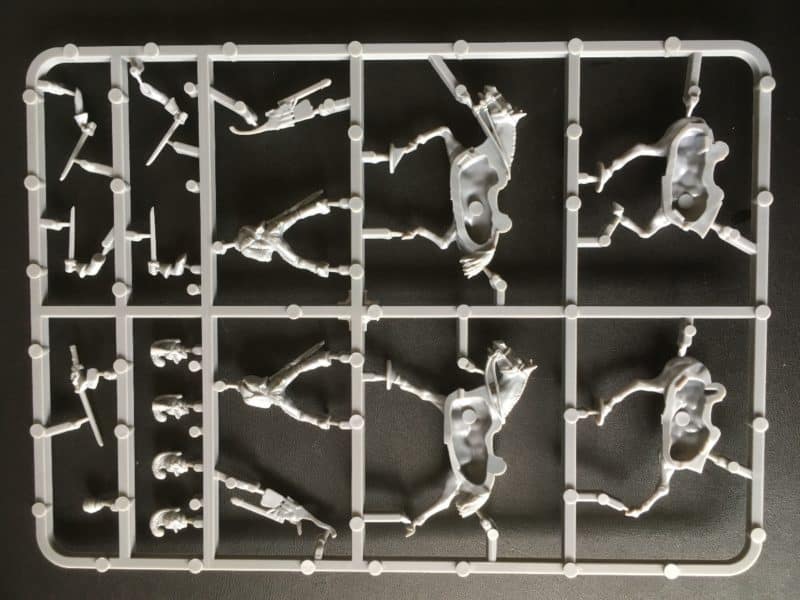
Union Brigade Sprue rear

Union Brigade Sprue Rear

The pictures above show the front and rear of the Union Brigade sprues. You will be able to use this set to make the following regiments: 1st Royal Dragoons; 6th (Inniskilling) and of course the iconic 2nd Royal North British or Scots Greys. The Horses are well posed and in full gallop and they look like the big horses that were used in the heavy cavalry regiments. I’m not sure but it looks to me as though you can mix and match the four halves of the horses to get a variety of poses but I have yet to put this to the test. The horses tails are ‘docked’ which is generally correct for British cavalry – it is said that officers often left their horses with full tails as they looked nicer on parade but lets not worry about that now…

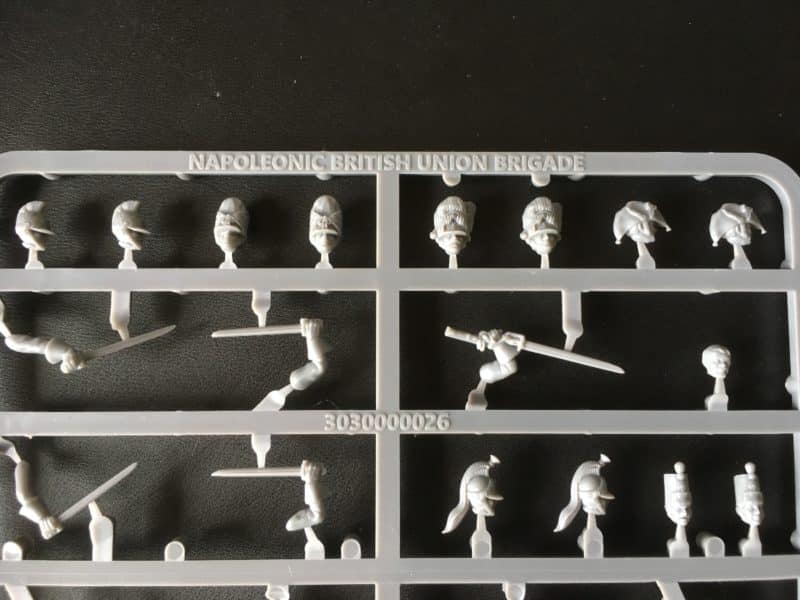
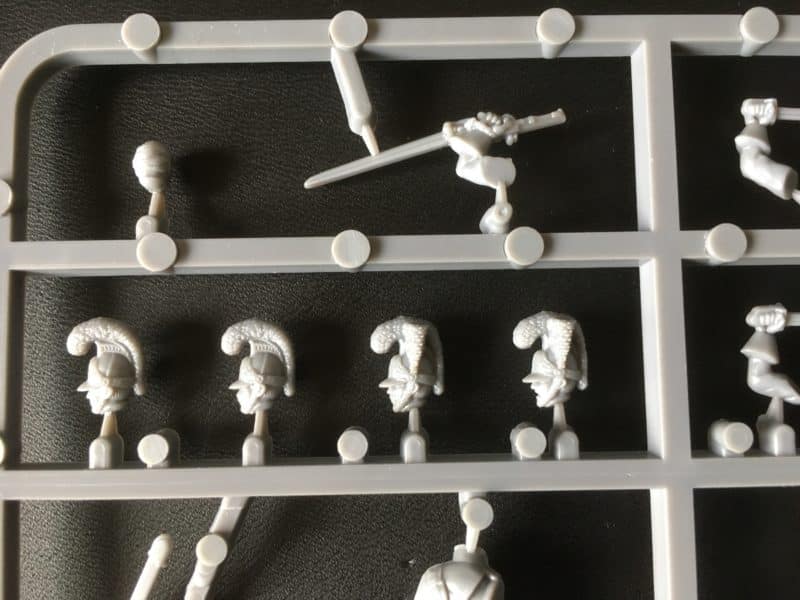
Union brigade heads

Union brigade heads

The cavalry men themselves look well molded and very well posed. When combined with the choice of the five sword arms supplied, you should be able to model some nice action poses. I like the arm holding the sword ‘at point’ and the arm with the pistol is a nice touch. There are six choices for the heads. Bearskins both with covers and without are supplied. For those that would like a ‘correct’ Waterloo look, the covered bearskins are the ones to use. For others, the chance to use the uncovered Bear skin headwear will make a nice change and the models will look even prettier on the wargames table! You also have the standard Heavy Dragoon helmet from 1815, an oil cloth covered version as well as the bicorne for the Penninsular Campaign. There are also Watering caps supplied that will unlock further conversion options – mounted 95th Rifle officer perhaps?

The parts all look well molded with little or no flash apparent and no sink holes to fill. I also like the way that the water bottle and sabretache fit onto the body as a separate piece. First of all, it is clear how it should fit and secondly the join should be nice and solid. I think that painting these as a separate item and attaching them later will be a good option and should simplify the painting process.

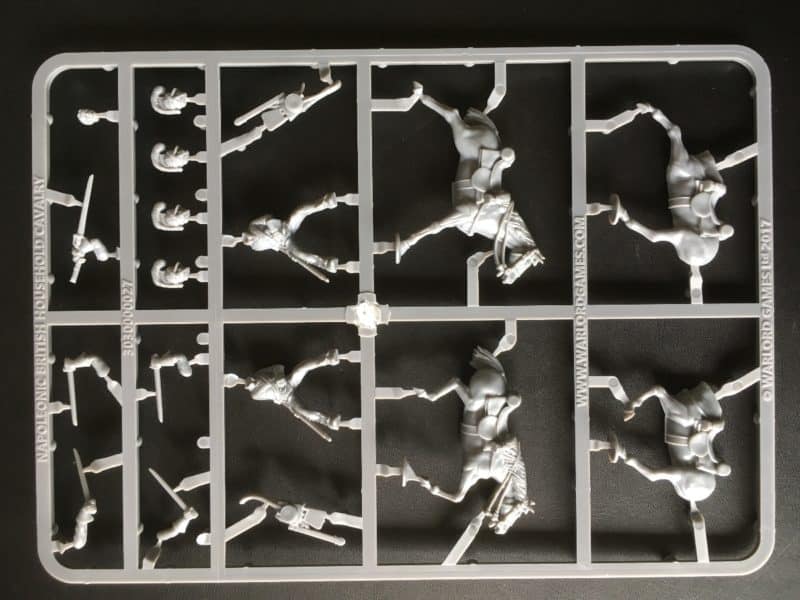
The House hold Cavalry sprue is very similar but has less in the way of headware options.

Household Brigade Sprue rear

Household Brigade Sprue rear

Household Brigade Sprues Front

Household Brigade Sprues Front

As you can see, the horses and riders are identical to the Union brigade sprues, it is just the headwear that is different. The heads come either with plumes – used in the main for officers & trumpeters or without, for the troops. It’s also worth pointing out that there is a bare head with a bandage – just in case you would like to model the regiment either after the battle or perhaps as one of the ‘riding wounded’ from Quatre Bras!

Household brigade heads

Household brigade heads

The box will let you model the main Household regiments, the 1st or 2nd Lifeguards, Royal Horse guards ( the Blues). To model the 4th regiment in the Household brigade ( at Waterloo), the 1st Dragoon Guards, you will need to use the Union brigade box to get the helmets with the ‘horse tails’.

I think that these sets are a fantastic addition to the range of plastics that are now available. My next project will be a ‘batch paint’ of 24 of these, representing the 1st and 2nd Lifeguards. They should go nicely with my existing ‘Blues’ and no doubt, the next project will be another 24 from the Union Brigade to go with my Scots Greys. It will be nice to have a representation of the British Heavy Cavalry Brigade at Waterloo and having them in plastic will mean that I wont need a fork lift to transport them! Now whether I ever get them all onto a wargames table at the same time will be another story…

The official release date for these sets is 17th June. Unusually for Arcane Scenery we will take pre-orders for these sets as we are close enough to release not to delay dispatch by too long! If you would like to order your sets just click on the links below and as usual we send our orders post free to most worldwide locations. As soon as we have them – we’ll send them …..CHARGE!

BRITISH UNION BRIGADE CAVALRY POST FREE!

BRITISH HOUSEHOLD BRIGADE CAVALRY POST FREE!


Vikings land in Newark!

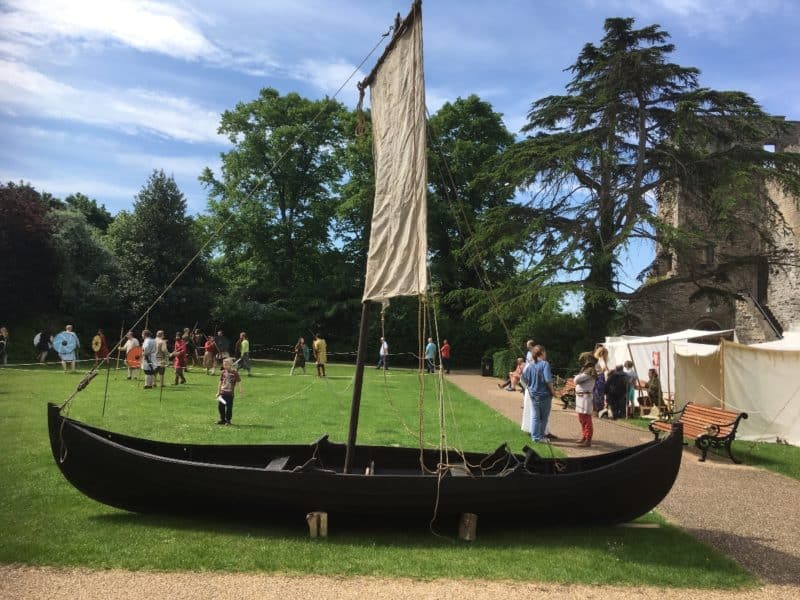
Small 'coastal' Viking ship

Small ‘coastal’ Viking ship

The bank holiday weekend was pretty much booked up with Family stuff but I did manage to sneak away on the Saturday and wander down to Newark Castle whilst Mrs Wood was having her hair done. To be fair, I had also been to the Barbers to get a smart new haircut, but 5 minutes is about as much time as  even the most careful of barbers can spend on my diminishing patch, so I had time to kill. I digress, having some free time I noticed that there was a Viking reactment taking place at Newark castle and as entrance was free it seemed a shame not to pop in.

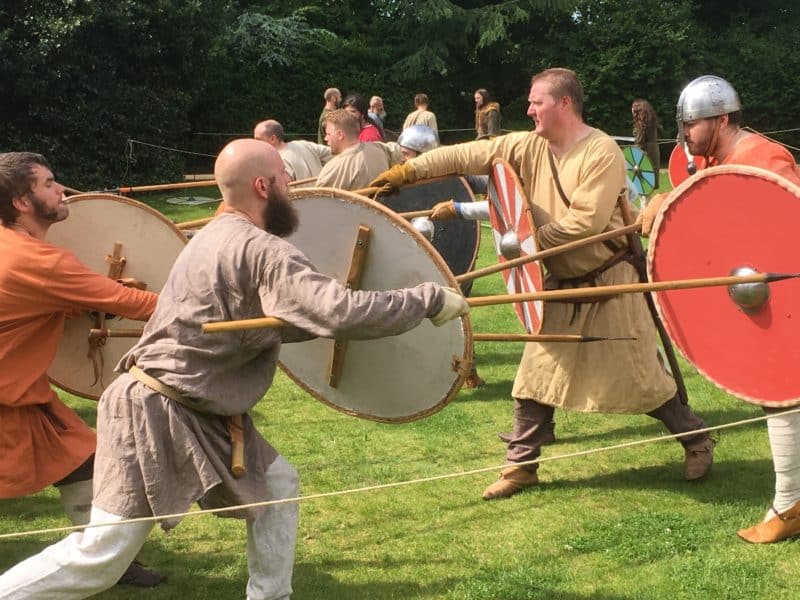
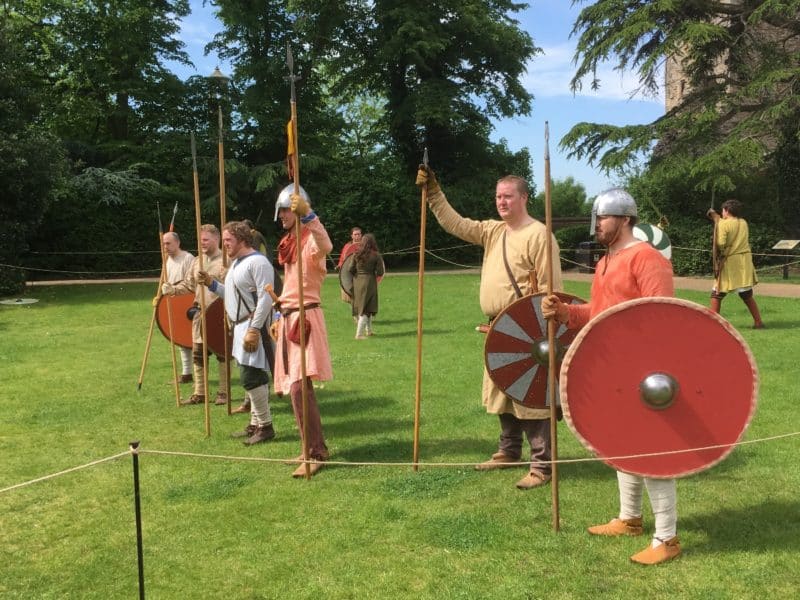
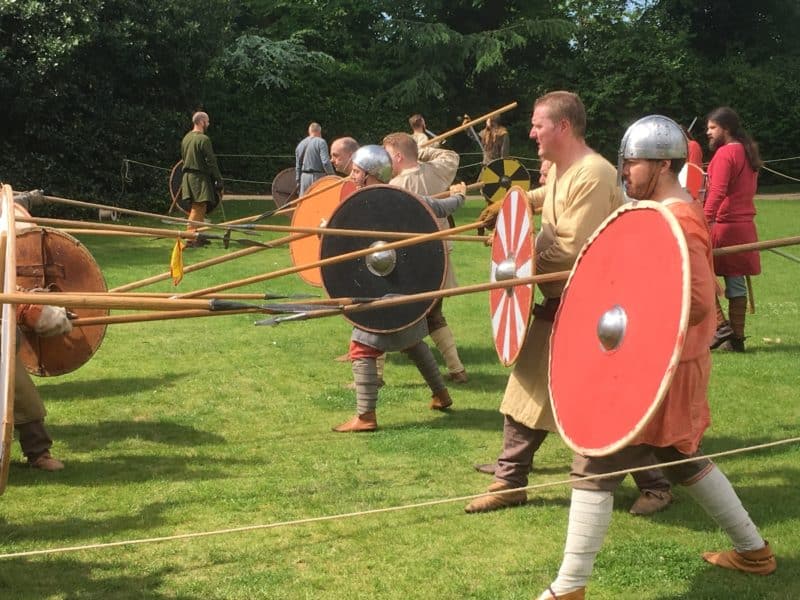
Viking Combat! Shield wall!

Viking Combat! Shield wall!

I think that reenactors share a similar strand of DNA to us wargamers but have perhaps taken it one step further. I must say that it does hold a slight appeal to me but only the bit where you sit around in the sunshine, having a beer and chomp on a lump of charred beef whilst chatting to your mates. I cant be doing with running around hitting people, or even worse being hit by some one younger and faster than me, it’s too much like hard work. I do, however, admire the work that these enthusiasts put into their hobby and they are a great source of information. Not only is their equipment and clothing extremely well researched but they know a thing or two about the tactics, weaponry and are there to ‘bring history alive’.

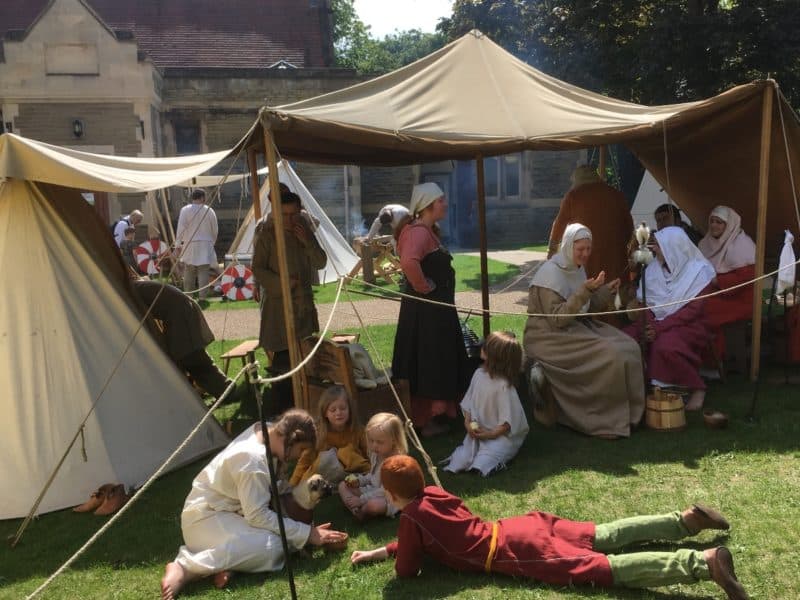
Camp life.

Camp life.

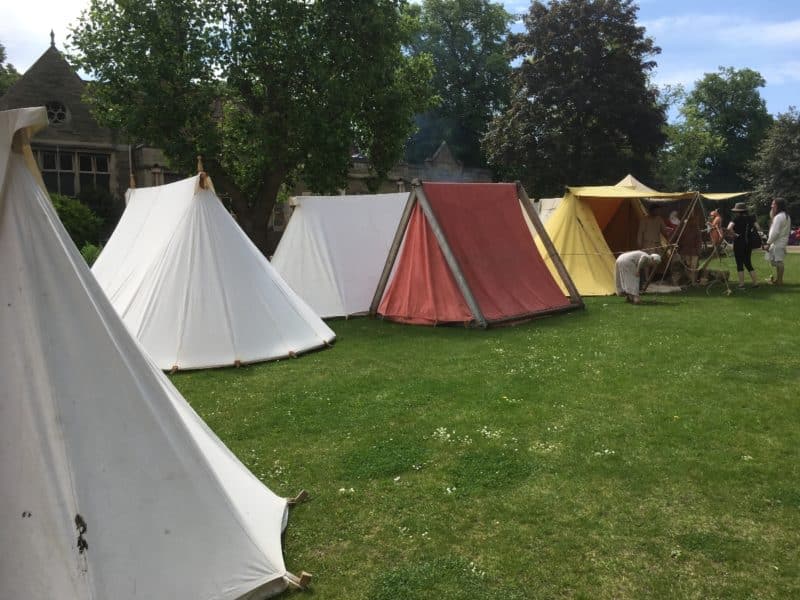
Like all enthusiasts, reenactor’s are generally a friendly bunch and only too happy to share their knowledge – you just have to ask. As I was wandering around a few things caught my eye (no, I wasn’t doing a Harold impersonation…). First of all the tents that made up the encampment all generally followed a similar pattern. It was interesting to see how an encampment might of looked. Renedra make a Saxon tent set and it was good to see that the style looked about right.

Renedra tents in full scale!

Renedra tents in full scale!

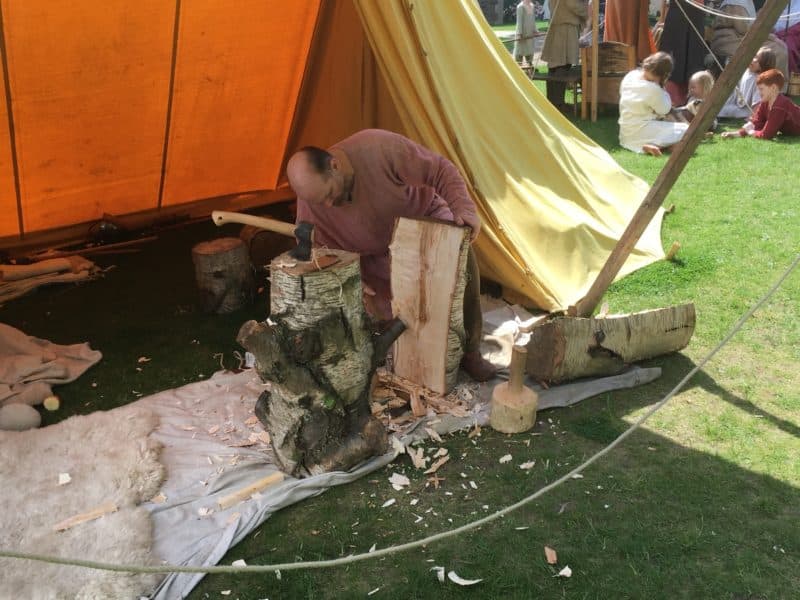
It was also interesting watching some of the craftsmen at work.

Craftsman at work

Craftsman at work

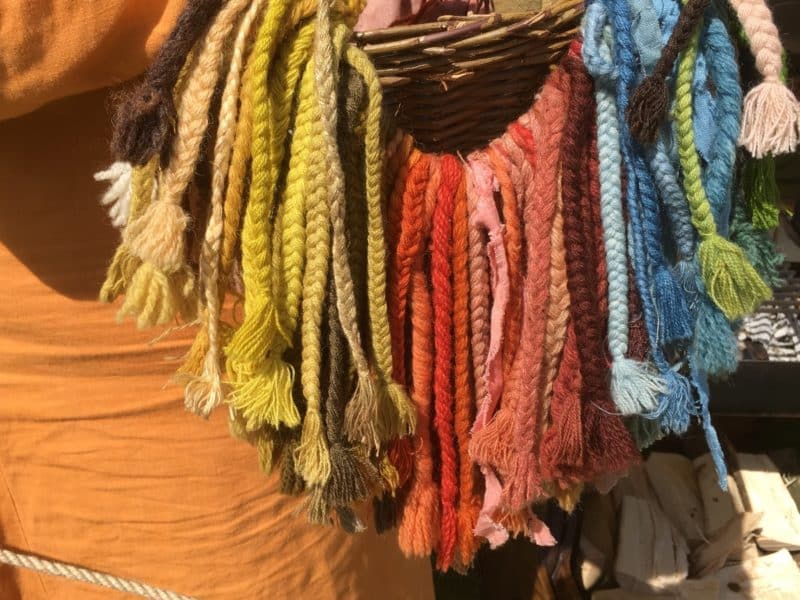
I was intrigued by the ladies who were making and dyeing cloth for the costumes. They were in the process of dyeing some cloth with a ‘stew’ of Madder root and so I had quite a chat about the colours used. I had already noticed that in ‘real life’ the clothing tended to be in more pastel shades than I painted my figures. Also there was a preponderance of orange/red clothing. The ladies were happy to show me a sampler of the sort of natural dyes that they were able to produce and that they thought were fairly likely to be accurate samples of what would have been used on tunics at the time.

Dye Samples

Dye Samples

As they explained, the dyes weren’t as colourfast as today and would certainly fade so although my tendency to chose bright colours for my wargames figures look OK on the wargames table, I think that my next Saga Warband might just have a more muted look. And Orange will definitely be on the colour pallet!

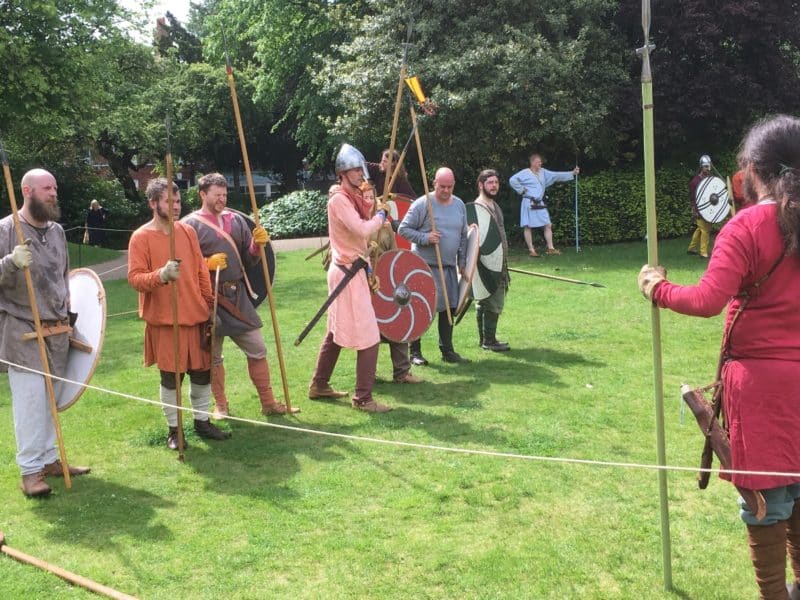
I should point out that the reenactors were both Saxon and Viking, so if in my blog I have got them a bit confused, I apologise. Here is a few more pictures of the Warriors going through their battle drill.

Stand ready...

Stand ready…

steady..

steady..

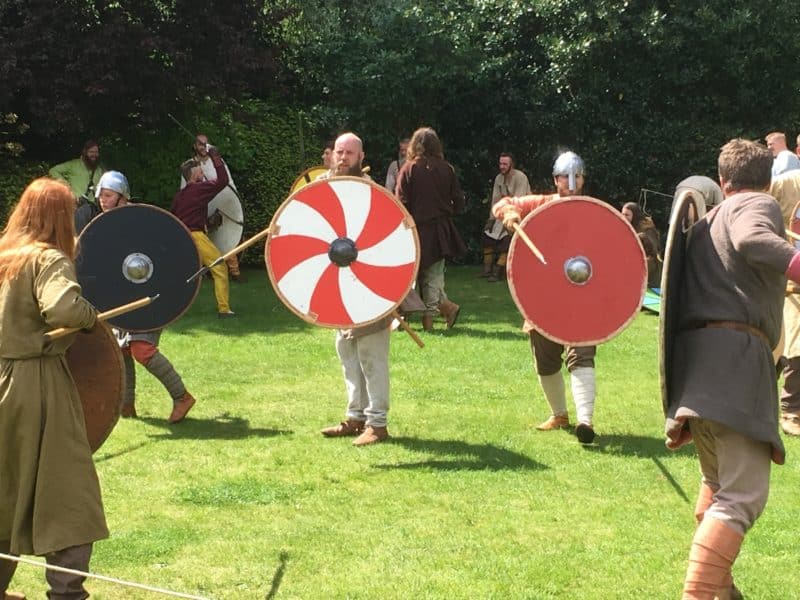
Close!

Close!

Shield design

Shield design

A final thought, I had always thought that the shield rims were beaten metal – these looked more like leather.

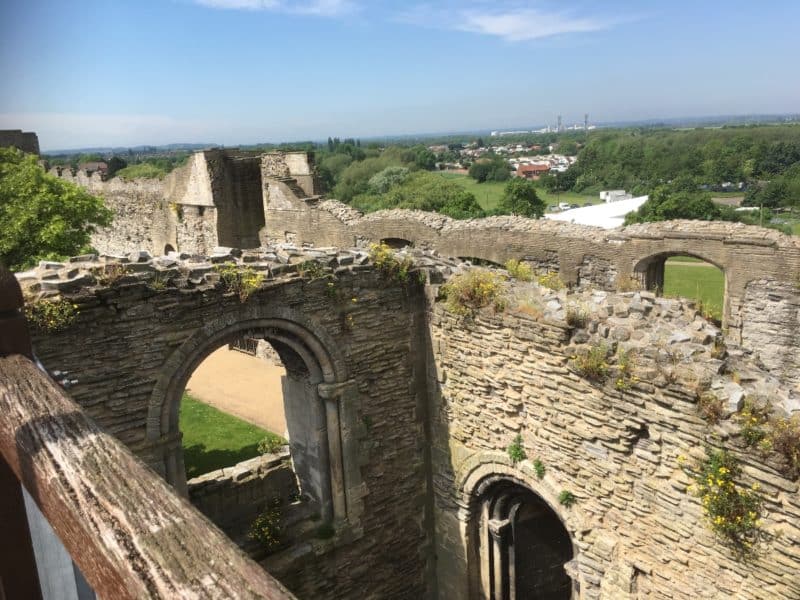
To sum up, a diverting and educational couple of hours. The tower to Newark castle battlements was also open and once again, entry was free, so for the first time I was able to climb to the top:

King of the Castle!

King of the Castle!

Next weekend I am off to Warwick Castle for a War of the Roses weekend. I will get back to my painting and modelling but I thought that I might as well enjoy the good weather whilst it’s here!