So the big day arrived on Saturday, the Lion Rampant event at Wargames Illustrated HQ. As with past events, the day was very well organised, with plenty of refreshments on hand and after the briefing and the mandatory mug of coffee we were off to fight the first battle! The day would consist of three scenarios, the first a pitched battle, the second, a random scenario chosen from the rule book and the third, a final battle with set objectives. In the first battle, we could support an ally by donating a unit to him at any point in the game. The second battle was as per the scenario and the third Battle was an eight player (four a side) grand battle with objectives. We had been split into two groups, Rebels & loyalists and with each scenario, it was possible to score ‘advantage points’ for our team as well as accumulating kill points which would boost our individual retinues.
The question was how would my retinue perform?
Scenario 1 – Pitched Battle
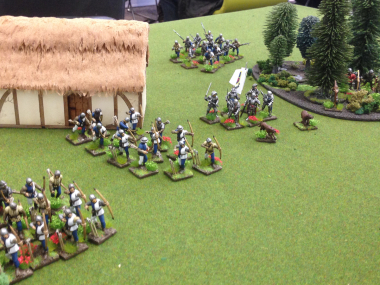
At last! The Retinue advances!
I had drawn Karl as my opponent, a familiar enemy from the club, so no surprises as far as his retinue went. He had a mixture of Crossbowmen, Archers, Bidowers, Mounted Sergeants and his command group of foot knights. The big problem was my command rolls – I just could not roll to get my retinue to move! The one time I managed to advance, Karl retreated and the frustration was building! After a brief arrow fight, I goaded Karl into advancing, although by now I think that he had seen me fail so many command rolls that it looked as though he would run me down with his mounted sergeants. At last, my archers decided to loose! The ensuing carnage saw Karl’s mounted units wiped out and his missile troops retreating as they failed their rally attempts. However, both of our command units proceeded to commit mutual destruction and in all the excitement, I forgot to use my special ability to automatically pass rally tests, meaning that my leader also fled the field.
I had killed or routed the majority of the opposition when the game ended, losing ‘only’ my foot knights & bidowers but alas, my victory was tarnished by losing the boss unnecessarily.
Scenario 2 – Meet The Neighbours
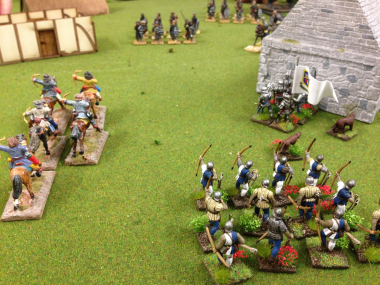
Loose!
After a very relaxed lunch break (more on this later), it was on to the second scenario. The scenario involved getting your retinue across the table to exit from the opponents deployment zone whilst stopping your opponent from doing the same to you. My opponent was Wayne, no less a personage than the Wargames Illustrated Sub Editor! His retinue was very similar to Karls with a good mix of mounted & missile troops. The game started for me where I had left off previously. I could not pass two command rolls in succession! I was beginning to become more frustrated with my dice rolling rather than focusing on the scenario. In my eagerness to at least do something, I moved one unit of archers straight down the board, unsupported, to engage the enemy. Well they moved and inflicted a few casualties but they did very little else until they were ridden down by the enemy…
Fortunately, those few casualties were enough to slow Wayne down and at last the other unit of archers joined the fight. My other success was that my defensive dice rolling with the foot sergeants in Schiltron meant that Wayne’ s attacks had ‘bounced’ leaving him vulnerable to failing his rally rolls. With a few hits from my archers, his mounted troops routed or were wiped out, along with most of his retinue. However, by now he had moved one of his units off of the table, his foot Knights, leaving just one unit of archers in my way. At last my retinue started to move and with two units just one move away from the edge of the table and two other units close behind, all I needed to do was to keep his archers out of the way.
I couldn’t resist a final shot at them though…. I passed the command, rolled for hits. I rolled 8 fives & sixes out of 12 dice, my best roll of the day so far. Four casualties inflicted in one go. Brilliant! Except it wasn’t. Wayne, of course, failed his rally test and the unit routed off the table, immediately ending the game. He had won the scenario as he had moved more of his units off of the table, one unit to my nil! Doh!
Well, my kill points were accumulating nicely, but that was about it.
Scenario 3 – Final encounter – capture the buildings
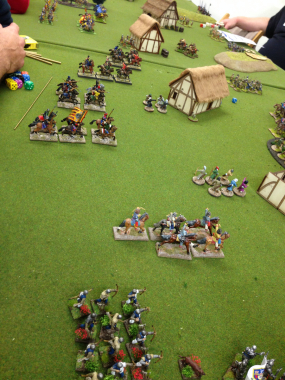
The last battle.
My Final opponent, Duncan had a Caliphate Army with a 50-50 split between mounted troops & foot troops, supported by 2 units of bidowers. Where he could, he had upgraded all of his units with bows or spears so that all of his army could fire missiles at 12 inch range. As well as capturing the buildings, the scenario was played over an open table so you could target and attack any enemy unit, regardless of who controlled them.
Once again, my command rolls were letting me down. It felt like I had failed 66% of my command rolls during the day, when it should have been closer to 33%. I think the day was summed up when my Foot sergeants took just one casualty from a bidower unit. They needed to pass a courage test of 5+, I rolled 3 and they became battered and moved back. I tried to rally them next go – I still need a 5+, I rolled 4, so they moved back again and lost a man. I tried to rally them again. I now need 6+, I roll 5, so they lose a man and go back. I try once more for a rally, I now need 7+ and yes you’ve guessed it, I roll a 5 again and now they have run out of table, so good bye Foot sergeants…
The rest of my command rolls are about the same, so whilst Duncan outmaneuvers my troops, attacks my ally and generally seems to go where ever he wants to, my army stands to one side, like the Stanleys at Bosworth, occasionally firing and inflicting the odd casualty. However, at last my luck turns and once again, the archers do the business, killing anything in range ( which is pretty much everyone by now!). So once again my kill rate is high and apart from the cowardly Foot sergeants who ran away from the bidowers, my army is intact. As regards the scenario, I captured just one building and two are required to score victory points. Oh dear!
Post match analysis
On the positive side, there’s no doubt that my retinue is a killing machine! Two units of expert archers can inflict deadly casualties when acting together. The down side is that the retinue lacks mobility, even allowing for my poor command rolls. There is no doubt about it though, I let my poor dice rolling cloud my judgement and as a result I lost my leader in the first scenario and the second scenario was lost outright. Had I stayed cool and worked with what I had, I would have won the first two scenarios, which would have given me a much stronger position for the third. On the day, the rebels were vanquished and the King was securely on the throne!
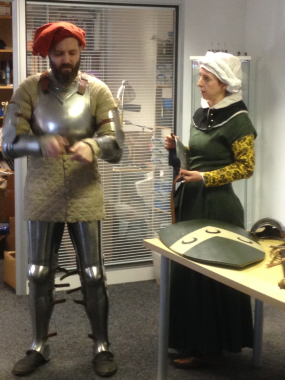
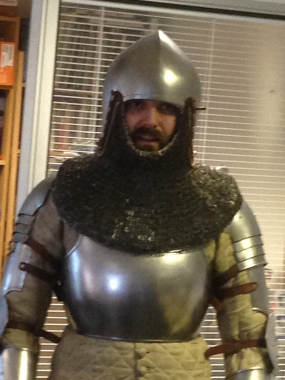
Armour On!
As regards the overall day, it was one of the best that I had attended. Superbly organised with plenty of refreshments and a superb Medieval meal of Beef stew, Ham, Pease pudding & cheese all served in a huge loaf or trencher. We also enjoyed a demonstration of how Medieval Armour was put on and the chance to handle some authentic medieval weapons. I cant wait for the next event!
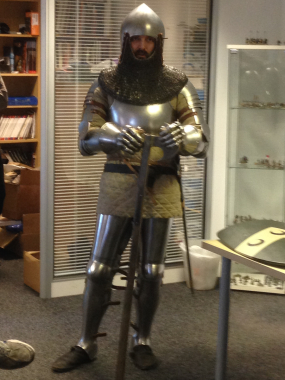
Ready for Battle
Helmet on!