Following the completion of my Irish Warband it was time to move on to a new project. I planned that this would be some scenery for my Saga games and rather than dive into the next pile of miniatures that are waiting on the painting table, I thought that now would be a good time to try my hand at some scenery making. The goal is to have some generic scenery for each period that I am gaming in, so that when I am off to the wargames club, I can just pick up the appropriate boxes and I’m ready for battle. I also thought that having some nice scenery would also improve the look of our games. I dont expect to reach Wargames Illustrated standards but having scenery that is relevant to the game will improve the visual appeal. I have some nice Sarissa Precision Dark Age buildings that I am working on at the moment. Previous blog posts have shown the first of these buildings that I have completed, the A frame Hut, in the background of my Irish figures.
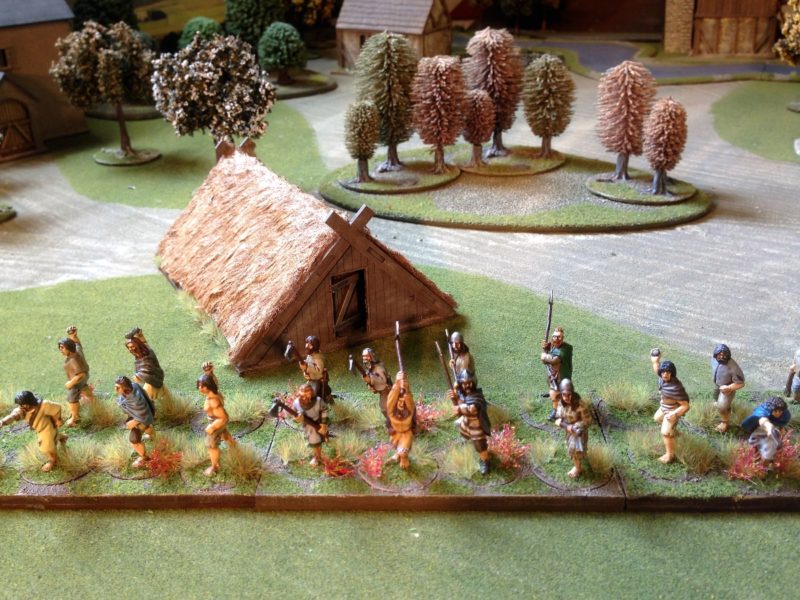
Fiana, Kern and A frame house.
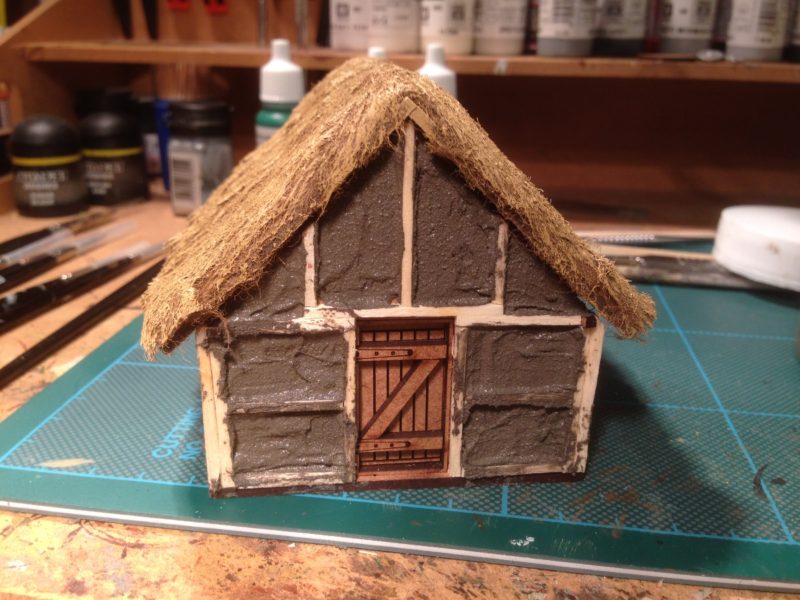
My next building was to be the Timber Framed House J14. I covered the roof in ‘Teddy Bear Fur’ thatch, to match the A Frame hut and then coated the fur in PVA glue to flatten it down and stiffen it up. Teddy Bear Fur is just one way of making roofing for these buildings. Gary, from March Attack, the designer for the range, prefers to use pan scourers as roofing and they look just as good, if not more effective. Other choices include flannel cloth or even coco fibre hanging basket liners. I think that it is a question of taste as they can all look realistic. I went with the teddy bear fur primarily because I had some to use up! I think that it’s worth pointing out that the Sarissa Buildings look very good with just a coat of paint, I just fancied trying a few ideas to pimp them up! So having covered the roof, the next stage was to add the timber framing.
To do this I used some standard matchsticks. I didn’t actually use the headless hobby variety – we do sell these in the shop in bags of 2000 for just £2.99 – but as I was at home, I resorted to a box of Swan Vesta’s that were handy! I used the etching on the building as a guide and cut them to the right length. It is then a simple matter to glue them to the building using PVA glue.
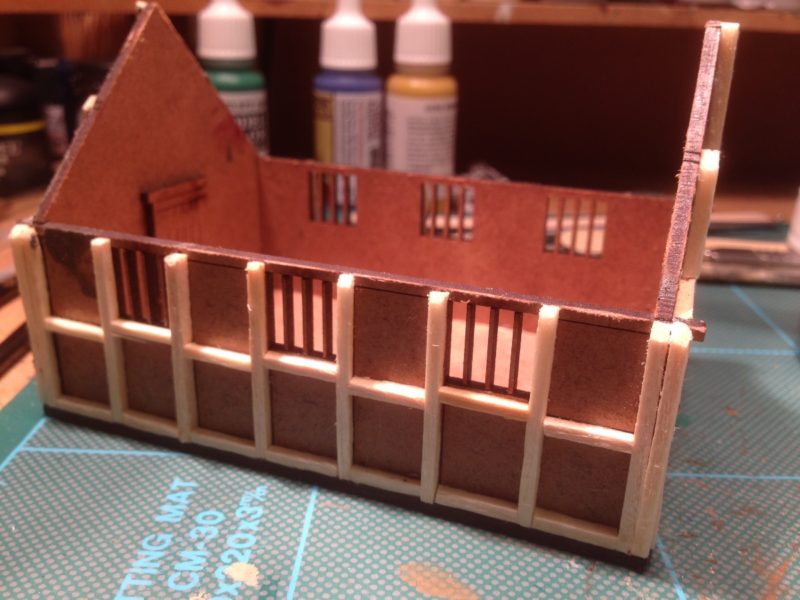
Sarissa Dark Age House j14 with framework added
You need to gently sand down the tops to let the roof fit nicely but it is a relatively simple job to do. Once the frame work was glued into place and dried I used Vallejo Dark Earth Paste to represent the mud or daub filling in the panels. Actually, you can use any of the Vallejo pastes as you will be painting over them At a push Polyfilla or a similar product will do! I used a squared off coffee stirrer to apply the paste, leaving the frame work showing. You can see that I used the stirrer to roughen up the paste to get more of a texture.
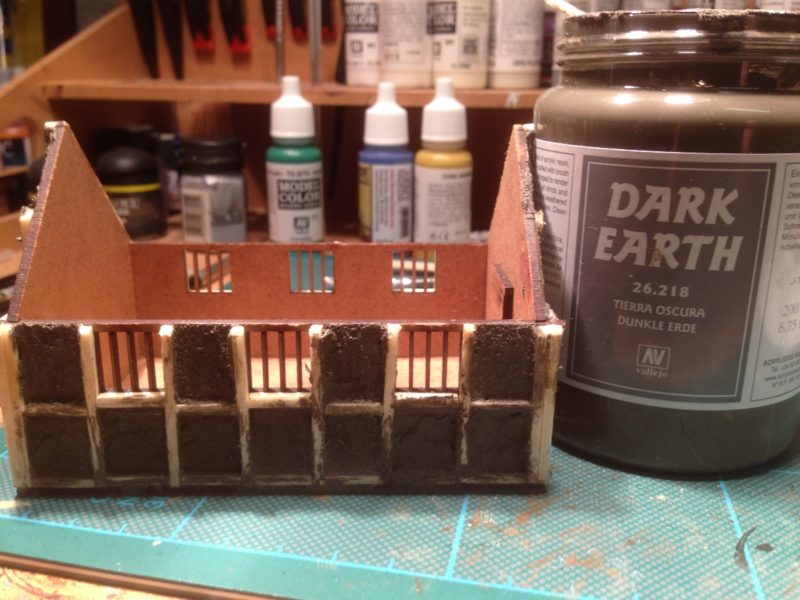
Applying the daub!
Once the paste had dried the next stage is to paint the building. I confess that I had made a slight mistake here. It would have made more sense to paint the inside of the building black before assembly or even afterwards, before I started to add the framework. As it is. I forgot and it doesn’t really show.
Dark Age house with daub.
The picture above shows the effect achieved before painting and the picture below show how the building looks from the end with the door.
Dark Age house viewed from the end – note door is left unpainted at this stage.
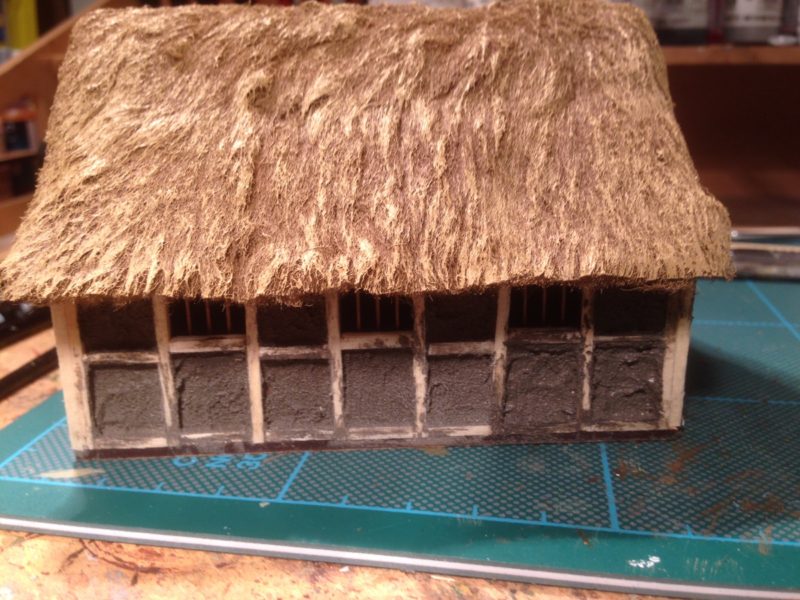
Once everything was dry, I painted the building with my favourite brown, Vallejo Chocolate Brown, including the door. I then dry brushed everything with a couple of lighter coats, using Iraqi Sand to lighten the brown on the panels of mud. Now, I’m no expert on Dark age buildings, so I wasn’t sure whether to paint the panels in a lighter colour or even whitewash them but I decided that they were best left a dry mud colour – this village hadn’t received a visit from the travelling Dulux Salesman! The next step was to paint the timber framing. I choose a very dark brown. Vallejo German Camouflage Black Brown was a good contrast. I used a light grey to lighten this and then gave the building, in particular, the timber frame, a gentle highlight using the dry brush technique. The final task was to pick out the door hinges with black and to add some black & grey to the smoke hole in the roof.
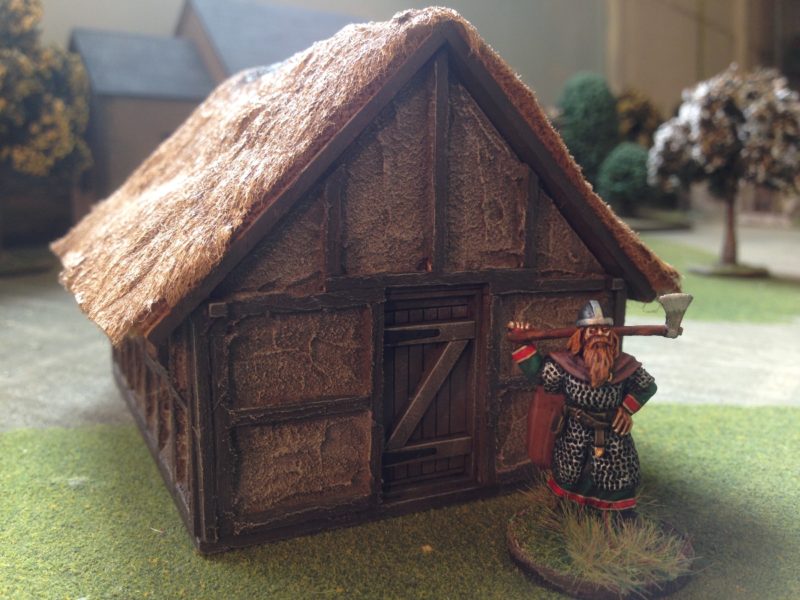
The finished dark age house, complete with new owner.
The building is now ready for the table and my village now consists of two houses. I have a couple more to finish in a similar style and that should give me a nice little settlement for my Dark Age war bands to fight over! Whilst I was thinking about other scenery that I could use, I remembered that Arcane scenery has it’s own small range of Neolithic monuments. Although not specifically designed for the dark ages, they seem to be useful additions to the table top and will add a bit of atmosphere! Here’s a couple of the pieces:
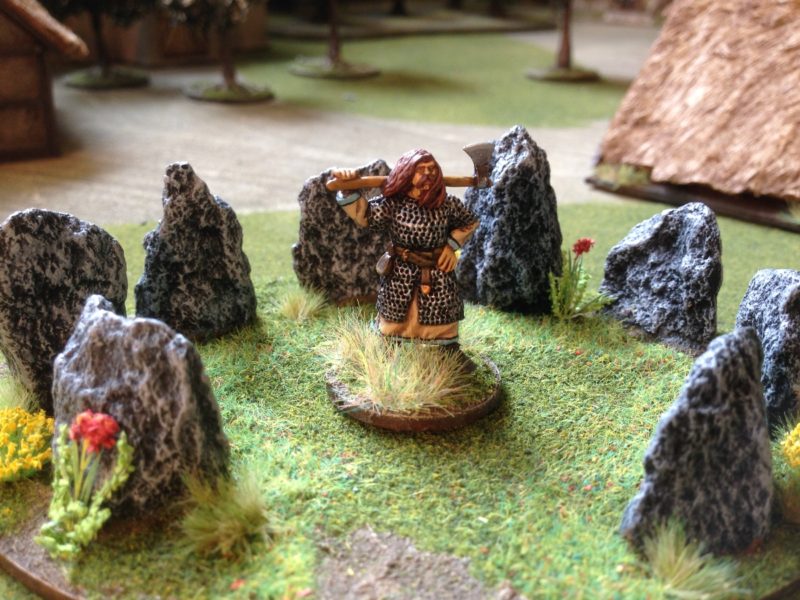
Neolithic Stone Circle
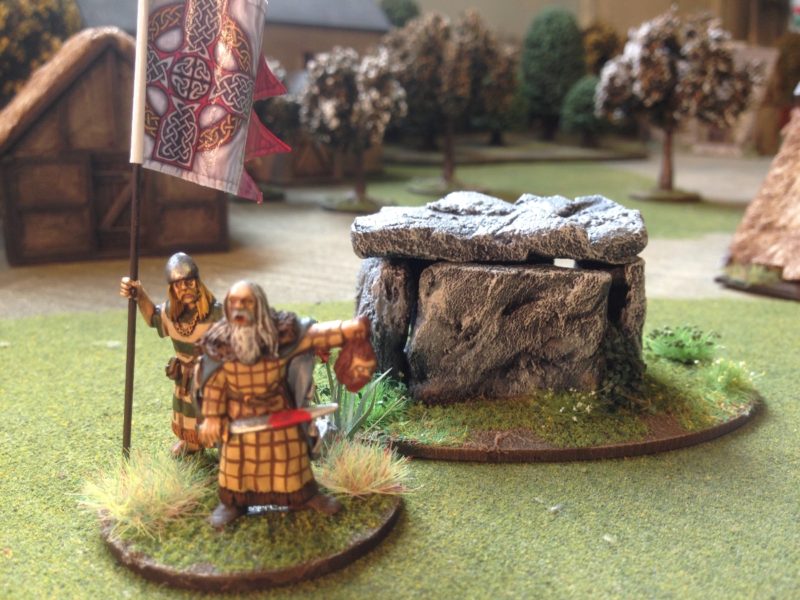
Neolithic Burial Chamber
If you are interested, the DeeZee scenery range can be found here: DeeZee Scenery
So, my aim of building some new scenery for my wargames has moved forwards. If you would like to undertake a similar project, I would recommend that you visit the March attack site for some very useful Tutorials of how to get the best from the Sarissa Precision MDF buildings. Just a very simple paint job will give superb results as Gary demonstrates in these PDF’s
http://www.marchattack.co.uk/Painting%20Building%201.pdf
http://www.marchattack.co.uk/Painting%20Laser%20Cut%20Terrain.pdf