A Weekend of Wargaming!

If it’s possible to have too much of a good thing, then I certainly achieved this with my wargaming  last weekend. I had been invited to join the ‘Lancaster Boys’ wargaming weekend hosted by Mark Lodge deep in the beautiful countryside of North Yorkshire. The three hour drive up from Nottingham with Andy and Ian was very pleasant – Ian was doing all the driving (thanks Ian!) and as a bonus, we stopped off at the small town of Otley to visit a bookshop. The shop was rammed full of military books and as well treating myself to a copy of Military Dress of North America for just £4.00, Andy and Ian discovered some interesting treasures for their book collections.

I also found a copy of the board game ‘Risk’ – the 18th century version with all the minifigures for just £3.00 in a charity shop. The visit to Otley was rounded off with a most excellent sausage and bacon cob and a mug of tea and it was back on the road to head up to Marks house.

Mark has the sort of wargaming set up that most of us can only dream about. A purpose built ‘stable block’ is home to a huge custom built wargaming table and a collection of figures, scenery, books and memorabilia that had me drooling! His passion is for Hinton Hunt figures and preferred scale is 20mm but there are armies in all sorts of scales and periods. All beautifully painted, based and labeled. Mark is also the new owner of the Jacklex figure range and is in the process of revitalising this classic range of 20mm metal figures. It’s well worth a browse and you can see his web site by clicking here:

JACKLEX MINIATURES

A small sample of the Jacklex miniatures range.

A small sample of the Jacklex miniatures range.

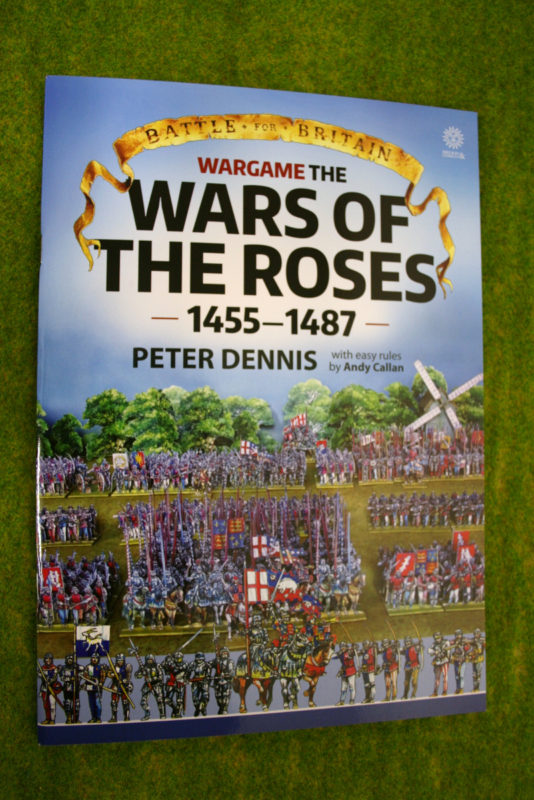
As an opener for the weekend, Tim (another founder member of the Lancaster Boys!) had downloaded a War of the Roses Table battle from the Wargames Vault. The game takes just 20 minutes or so to play. Rather than use ‘blocks’ or counters for the units, Tim had produced some lovely playing pieces using 20mm plastic figures – all beautifully painted and based. Tim had also ‘upgraded’ the reference cards that supported the game, making the game more intuitive to play and after just one game I think that I had the rules sussed! The game was based on the action at Bosworth -I played four times over the weekend winning two and losing two games, with Henry and Richard both victorious and losing equally!

War of the roses table top game underway.

War of the roses table top game underway.

The main game of the evening was a Zulu War encounter, with rules and umpiring courtesy of Andy. I’ll let the pictures provide the narrative:

The battlefield - all is quiet!

The battlefield – all is quiet!

The left horn of the Zulu army attacks first and pushes back the British piquets.

The left horn of the Zulu army attacks first and pushes back the British piquets.

The chest and right horn of the Zulu army emerge from cover!

The chest and right horn of the Zulu army emerge from cover!

the Left horn charges into the British camp - in the background the right horn is advancing whilst the British are distacted!

the Left horn charges into the British camp – in the background the right horn is advancing whilst the British are distracted!

The chest and the loins begin their advance on the camp. The right horn of the Zulu army moves ever closer whilst the struggle on the left continues.

The chest and the loins begin their advance on the camp. The right horn of the Zulu army moves ever closer whilst the struggle on the left continues.

The right horn makes contact - desperate times for the British!

The right horn makes contact – desperate times for the British!

The camp is completey encircled!

The camp is completely encircled!

The Zulus on the right break through into the camp.

The Zulus on the right break through into the camp.

All is lost! The Zulus have broken through on the righ and more Warriors have arrived to overwhelm the centre. It's time to save the colours, Boys!

All is lost! The Zulus have broken through on the right and more Warriors have arrived to overwhelm the centre. It’s time to save the colours, Boys!

As you can see, the game ended in victory for the Zulu’s, with the British being overwhelmed as they put up a desperate defence of their camp. To be fair, the British were vastly outnumbered and it was difficult to see how they could repulse such a huge army without some sort of fortification – somebody should have laagered those wagons! As a side note, the game was actually based on the Battle of Little Big Horn but with roles reversed. Custer’s three columns were represented by the Zulus and the British camp represented the Sioux Encampment. The Little Bighorn river is seen meandering gently through the centre of the table and the Zulus were hidden in the hills above. If ever you are stuck for inspiration for the basis of a game, taking a historical scenario out of context, so to speak,  is often an interesting solution and certainly worked well for this battle!

The following morning it was a Napoleonic encounter to start the day. The battle was based loosely on the early exchanges in the Battle of Leipzig 1813 and was umpired by Ashley, using another ‘home brew’ rules set. Once again, the pictures should provide a very short narrative to the Battle. I find that whilst playing, I forget to take enough pictures!

The Prussians and Russians to the left, French to the righ. Let battle commence!

The Prussians and Russians to the right, French to the left. Let battle commence! Early deployment moves as the Allied army advances onto the table.

The view from the French side

The view from the French side. The French centre and left are holding the Russians but in the distance the Prussian are making steady progress, threatening the right flank.

A decisive moment in the battle - the French are outflanked by Cavalry and the Prussian Infantry push them from the village holding their right flank.

A decisive moment in the battle – the French are outflanked by Cavalry and the Prussian Infantry push the French from the village holding their right flank.

Prussians win the battle on the Frencg right flank - the French decide to pull back conceding the battle!

Prussians win the battle on the French right flank with the Prussian infantry pushing forward and the Cavalry routing the French infantry and over running their artillery – the French decide to pull back conceding the battle!

The day was rounded off by two other games. Unfortunately, I dont have pictures but the first was a Russian – Japanese naval battle which resulted in a draw with both Fleets suffering a hammering and the unfortunate Russians losing a ship on the last throw of the dice.

The second game was another play test of our War of the Roses rules set ‘Never mind the Bill Hooks’. I’m happy not to have pictures of this battle as I was the Lancastrian Commander that managed to make rather a mess of the whole battle. The initial deployment was not too clever and this was compounded by a rash cavalry charge that resulted in the demise of the whole unit. We used our best unit, the heavily armoured foot knights (24 points) to chase around after a unit of Irish kern (9 points) at the rear of the battle and finished things off with a forlorn charge that resulted in the death of the Army Commander Harry Hotspur – it wasn’t a good day for Tottenham fans….

Harry Hotspur on a better day!

Harry Hotspur on a better day!

And so with five games played in less than two days, I felt a bit ‘wargamed out’ but it had been a most enjoyable weekend. I also ought to mention that the guests included Simon from S&A Scenics. Simon had produced much of the scenery on the table and if you are looking for high quality, reasonably priced ready made scenery, head over to his web store:

S&A SCENICS

Also present was Ian of Irregular Miniatures. At the time I couldn’t remember ever coming across Ian’s company, which was strange as he has one of the largest range of figures in the UK, with scales ranging from 2mm to 75mm! However, when I returned home and checked out his web site I found that I had quite a few of his models in my collection!  I had bought them over the years at various shows and it was his Dad, not Ian, that had served me! Check out their web site below, there are some real gems to be found!

IRREGULAR MINIATURES

To close the report of a most enjoyable and memorable weekend, I must again thank the ‘Lancaster Boys’ for their invitation and in particular Mark for his amazing hospitality.

I hope that you all enjoy your hobby as much as I do – remember that our web site will have much of what you need and even better, we supply post free to most worldwide locations! Click here to see our shop:

ARCANE SCENERY

Happy Modelling!


The Other Partizan

The ‘Other Partizan’ show at Newark goes from strength to strength in it’s new location at the Newark Show Ground and under the steady stewardship of the organisors, Laurence Baldwin and Richard Tyndall. This will be the last time that the show will run in August – it moves to October for next year. This can only be an improvement as far I can see. The summer slot has meant that it can get rather too warm in parts of the exhibition hall when the sun is at full strength and there are other pressures on both traders and visitors, in the form of Holidays, that get in the way of attendance. October should be less of a problem with regards to temperature and it is a great time to get back to your hobby with the nights drawing in and fewer distractions elsewhere. That said, with over 800 people through the doors this year, attendance is not a problem!

Iceni and Trinovantes meet the romans in battle! A most impressive display!

Iceni and Trinovantes meet the romans in battle! A most impressive display!

Iceni and Trinovantes - some of the detail was fantastic!

Iceni and Trinovantes – some of the detail was fantastic!

It was the first time in years that I was there as a customer rather than a trader. We have an arrangement with Sarissa Precision to take some of our ranges to shows, so Sarissa were doing the hard work whilst I loafed around at the show! It was a pleasure to wander around the games and chat to friends without having to look over my shoulder at what was going on at my stand. I stayed the full day, fueling up on coffee and other refreshments at the excellent catering facilities in the hall. The show has a nice friendly atmosphere, there’s plenty of space, even with such a good attendance. The lighting is excellent, so you can see just how much work has gone into painting the miniatures on display.  Free car parking, as well and easy access is a nice bonus! The great strength of the show is it’s consistency, so that you know which traders will be there, enabling you to plan your purchases. That said, it was good to see a couple of new traders and one in particular, ABC brushes, managed to prise open my wallet!

55 Minutes in Peking! By Victorious Miniatures

55 Minutes in Peking! By Victorious Miniatures

The format of having the inspirational demonstration games ( look but dont touch) at one end of the hall and most of the participation games at the other end made it clear where you could join in and roll some dice. That said, I find that the guys playing the demo games to be very welcoming and open to conversation. I think that it would help if the participation games were on smaller tables and had clearer ‘guest’ seating. Some sort of indication as to how long the game would take would also help. I found that I didn’t engage as much with the participation games as I didn’t know how long I would be committed to a particular game. Perhaps some of the manufacturers could persuaded to move their games into this area. Mind you, it’s easy to come up with ideas but as a trader, I know how much time and effort goes into just getting the stand to the show and manning it without having to find the resources to run a ‘remote’ demo. You also want your customers to be able to see that the product on the table is available to purchase. So I am mindful that as a spectator, my observations are at odds with playing on the pitch, so to speak!

Blood and Plunder - Leicester Phat Cats

Blood and Plunder – Leicester Phat Cats

Without wishing to be controversial, I actually think that from a Historical Gamers point of view, the Partisan shows are superior to Salute, with quality winning over quantity. The relaxed, friendly atmosphere, easy free parking and access, great selection of traders (yes I am biased here!), great showcase of historical games, a history resource area and good value refreshments mean that you will have an enjoyable day with more of your money spent on your hobby rather than the logistics of being there. If you can make a weekend of it, there is plenty of History around Newark to absorb you, from the Newark Aviation Museum (which is next to the Newark showground) to the Town of Newark itself, cradle of the English Civil War! Oh, and Stokes field down the road, if you fancy a bit of WOTR history. With Games Workshop in Nottingham, about 40 minutes drive away, you can even scratch your fantasy and 40K itch, so to speak!

Detail from the Battle of Madonna Dell' Olmo

Detail from the Battle of Madonna Dell’ Olmo

I’ve posted a selection of the games that caught my eye through out the blog post and below. They are only a small selection of the games on show and really don’t show half of what is there. The pictures do not do justice to some of the larger games. A really great day out for me and I’m very much looking forward to the next Partizan. If you can get there, you will not be disappointed!

The Great Northern War

The Great Northern War

THE COMMERCIAL BIT

If you are unable to get to a show, don’t worry, at Arcane Scenery we have a huge selection of products to help you with your hobby and even better we send your order out post free, to most world wide locations! You can see our shop here:

ARCANE SCENERY SHOP

To keep up to date with the partizan Shows, visit their web page here:

PARTIZAN SHOW

To see the Wargames Illustrated Video of the show, click here:

WARGAMES ILLUSTRATED TOP GUIDE

Dan, the owner and editor of WI showing off his steady cam skills!

Dan, the owner and editor of WI showing off his steady cam skills!

Happy Modelling!

Warlord Open Day – Salt Peter Demo Game

British Exploring Officer scouts the terrain!

British Exploring Officer scouts the terrain!

As good neighbours and friends of Warlord Games, we were very pleased to be invited to their Open Day to put on a Black Powder Napoleonic demo game. It’s no secret that I am a great admirer of the Black Powder Rules system in general and the Napoleonic period specifically. After a conference with my gaming group, the NG13 gamers we decided to re-run a version of an early demo game that we had played, ‘Combat at Foz D’Arouce’, this time using Black Powder as the rules for the game. You can see the battle Report for the ‘original’  Foz D’Arouce at the Bingham Napoleonic Days Event here:

COMBAT AT FOZ D’AROUCE

Foz D'Arouce - setting up the table.

Foz D’Arouce – setting up the table.

The challenge in using Black Powder was that the table is only 4 foot by 4 foot. However, we have our own version of Black Powder that we use for our club games called ‘Salt Peter’. This stripped back version of Black powder allows us to play a decent club game on a six foot by four foot table in an evening. To be fair, it’s not so much ‘stripped back’ as sparing with the use of any of the additional rules or supplements. All measurement is reduced by two thirds and the units used are generally half the normal size, so a Battalion of troops is represented by 12 figures. Of course, there’s no reason why they should be referred to as a Battalion. They could just as easily be a company, with the ‘Brigadier’ or commanding officer, in charge of a detachment of Company’s. Purists may baulk at such a thought but the aim of our games is to spend a couple of hours in good company, using the figures that we have painted and collected.  We try to restrict the ‘serious’ side of the hobby to our research, reading, painting and modelling. Gaming is for fun!

French Hussars - these troops would be late for the battle!

French Hussars – these troops would be late for the battle!

The game would again be using the superb table that Pete Harris had produced and this time, it would be Portuguese versus the French, for no other reason than I had a Portuguese Brigade that needed an outing on the table! Having said that we had stripped back the additional rules in Black Powder, we did have some extra Scenario specific rules that we had agreed on before the Battle. These related to deployment, command structure and limitations imposed by the scenery. These are listed below in the additional PDF.

The Portuguese Army Deploys

The Portuguese Army Deploys

And so to the Battle itself. Pete, playing the French, had won the roll to choose the table side for deployment. I won the roll to decide who went first. Apart from a small unit of Skirmishers (Cacadores for me!), both armies were deployed off table and had to be ordered on. In addition, the units would initially be in march column. The commanders might know that the enemy were coming, but our troops didn’t! We had also placed a limitation on the number of orders that could be given – two was the maximum, which not only restricted movement but made fancy formation changes a bit trickier…. My Portuguese Army deployed in full but was somewhat crowded as it attempted to cross the river using the bridge and the ford. The French had no such obstacles to negotiate and the first brigade marched on without hindrance. The second brigade, however, failed it’s order and stayed off the table.

Portuguese delayed by the river crossing

Portuguese delayed by the river crossing

By Turn Two the French advance party of Skirmishers had reached the top of the Village and a Company of troops also marched towards the gates to fortify themselves inside. However, the second French brigade still refused to come onto the table. What should have been a bonus for the French then turned into a slight distraction. We had said that any commander rolling under 4 on an orders roll would receive a ‘bonus’ unit of skirmishers. The French achieved this in turn two and the second unit came on to the table – they also headed for the village.

French Voltiguers secure the village.

French Voltiguers secure the village.

The Portuguese had managed to get a squadron of Dragoons across the river to threaten the French advance, as well as deploying their artillery. However, the balance of the force was still either on the wrong side of the river or stuck in it. The Cacadores, who were supposed to be rushing to take the footbridge at the top of the village had decided that a slow walk to admire the view was more appropriate and were making poor progress. The opening shots of the battle started with little effect but it was game on!

French about to march into the Village

French about to march into the Village

With the possibility of getting both units of skirmishers into the village the French commander halted his other battalion and diverted them to the main combat. The second French Brigade still refused to come onto the table! After all, Pete had spent the last few days lovingly painting a unit of French Hussars just for this scenario…why would they want to get into action and spoil their uniforms! If the French were being shy, the Portuguese were still struggling to clear the river. Once across, each unit had to test to see if it was disordered. To pass the test a 4+ was required. 3 out of four of the Portuguese failed! Meanwhile, although now joined by a ‘bonus’ unit of 95th rifles, the Cacadores were still taking their time to move up to the footbridge and now decided that it was time for tea!

The only good news was that the French were slow to take advantage of the Portuguese congestion. Their advance delayed by the move towards the village. The Dragoons had put a French unit into square under the nose of Portuguese artillery, holding their line. This at least kept the French at bay.

Portuguese cross the river but are caught in march column.

Portuguese cross the river but are caught in march column.

By now, Pete had a sudden moment of clarity and realised that with his General off table, he was entitled to a re roll should his missing brigade fail their orders! In addition, instead of trying to move the cavalry first ( Who required an 8 on two D6) he would start with the infantry, who in column, needed a 9+ to get moving! This new strategy worked and the second French brigade moved onto the table. Things were not looking so good for the Portuguese. To add to their woes, one of the Portuguese units attempted to reinforce the first one over the river only to find itself stuck in column with it’s flank facing a French unit… merde!

Portuguese caught in Column!

Portuguese caught in Column!

It was too tempting for the French to ignore, they charged in to attempt to batter the March column and break through. Confident of victory in this part of the Battlefield, Pete directed half of his second brigade up the hill behind the village to head off the threat of the very slowly approaching Cacadores and 95th units. The Portuguese were made of sterner stuff! Despite having to take the attack in the flank, with no reply permitted, they survived the first round of combat passing their morale test and turned to face the French unit, eventually winning the combat and pushing the French back! The Portuguese artillery fire into the unit in square was beginning to tell and casualties were mounting on both sides.

The French attack!

The French attack!

One of the French units broke under fire, running from the battle, forcing the French Commander to march his other brigade back down the hill ( Hmmm that sounds like a British tactic, first perfected by The Duke of York….) to support the forward brigade. Despite this set back, the French inflicted sufficient casualties, using additional fire from the skirmishing units now safely in place in the village, to break the Portuguese brigade, who retreated back across the river. Meanwhile, in all the chaos, the second Portuguese brigade had started to deploy and mauled the lead French brigade, causing it to break. The Cacadores had made it to the bridge….

Portuguese under pressure

Portuguese under pressure

Although the Portuguese had taken a beating, with the lead brigade broken, the second brigade had now deployed successfully in strength and started to hammer the French. The French were now in a worse position. The retreating brigade was hampering the movement of the second brigade, blocking line of sight and because of the earlier attempt to flank the village, the brigade was strung out and it’s forward units vulnerable to fire. A successful round of shooting from the Portuguese persuaded the French that the battle was lost and they started their withdrawal from the field. The Cacadores never did cross the bridge!

The Portuguese advance!

The Portuguese advance!

Cacadores reach the bridge

Cacadores reach the bridge

A marginal victory for the Portuguese and a most enjoyable game on a most enjoyable day. We played the game at quite a slow rate as we were stopping to chat to visitors to explain how that game was going and answer questions regarding the scenario.

The Warlord open day was a great success and I think the best yet. The main hall was packed full of demonstration games – I was very pleased to be able to try out the forthcoming Black Seas game – it looks great! I’m sure that Warlord will be running the event next year and I would recommend attending. As well as the chance to meet with the Warlord team of sculptors, designers and staff, try out the various Warlord games, there are plenty of other guests there to talk to – Sarissa Precision, Mantic Games and the Terrain tutor to name a few.

THE COMMERCIAL BIT

I’ve added the Quick Reference sheet that we used on the day for the shorter ranges etc here:

BlackPowderUnofficialQRS_66p

It’s a Black Powder Edition 1 sheet, so ignore the modifications for skirmishers hitting  with +1.

The ‘house rules’ for the game are here:

BLACK POWDERFOZ RULES

Arcane Scenery have most of the Warlord range available, as well as some 60 other manufacturers. Even better, we send post free to most world wide locations. You can visit our shop here:

ARCANE SCENERY

You can see the Warlord report of the day here:

WARLORD OPEN DAY

Happy Modelling!


The Battle of Pea Ridge Arkansas 1862

Our gaming group continues to work its way through the Battles of the American Civil War, with this battle, based on the action at Pea Ridge, Arkanas 1862. Our small group has long been fascinated by the American Civil War and all of us had a large collection of  Airfix /72nd scale armies – conveniently produced in grey plastic for the Confederates and blue for the Union, that we played with and gamed with as kids. I also had a lovely collection of the Britains ACW figures, including the beautifully produced artillery limber. So the temptation to collect armies in 28mm scale has been there and gnawing away, particularly as the Perry’s produce such a great introduction to the period with their Battle set.

PM_ACW_BB1However, recently, Andy has treated himself to a huge collection of beautifully painted miniatures that covered both the Union and Confederate forces and this has allowed us to branch out into the American Civil War without having to paint armies! We have already fought a number of battles using these figures and you can see our version of the First Bull Run in an earlier blog here;

The First Bull Run

We are using Black Powder Rules, modified with the Glory Hallelujah! supplement, as well as some house rules that enable each battle to reflect some of the challenges that the Commanders faced on the day. For this battle, the main consideration was the large wooded area on the Confederate left flank, Morgans Wood, bordered by the road. The house rules were that no brigade orders could be issued to troops in the wooded area, each regiment would have to receive separate orders. In addition, units could only move a maximum of two moves per turn in the woods and would suffer a -1 on firing if two moves were made. Musket/Rifle range was limited to 12 inches in the woods. The Union forces were able to deploy first but were permitted to ‘hide’ some of their forces. The Confederates had to indicate their deployment on a map of the table, without first being able to see how the Union forces were disposed.  Pete would be commanding the Union Army as General Osterhaus, I would command the Confederates as General McCulloch. Andy was umpiring.

Table layout for Pea Ridge, Arkansas

Table layout for Pea Ridge, Arkansas

As ever, the battle report is somewhat one sided and picture heavy, with the highlights from the Confederate point of view!

Initial Deployment, with Confederates advancing into Morgans Woods

Initial Deployment, with Confederates advancing into Morgans Woods

Despite the limitations on movement in Morgans wood, I deployed a full brigade into this area. Taking advantage of the new Black Powder rules, which gives brigade commanders a re roll if the Army Commander is present, General McCulloch was moved to oversea operations on this flank. It was not clear how the Federals were deployed as some of their units were off table and hidden. The centre appeared to be unguarded with most of the visible Union forces far out to the right. I had decided to place my strongest brigade in the centre, supported by the cavalry, concealed behind the tree line. The right flank would be held by a weaker brigade under the command of General MacIntosh. The plan was to pivot the whole army on the right flank, with a probing attack through the woods on the left.

General Osterhaus commanding the strong Union Brigade on the right.

General Osterhaus commanding the strong Union Brigade on the right.

Confedrate Cavalry concealed behind the tree line.

Confederate Cavalry concealed behind the tree line.

Confederate Centre commanded by General Herbert

Confederate Centre commanded by General Herbert

The brigade in the woods were extremely successful in their advance. Not only were they able to maintain cohesion through the difficult going but they surprised an advance Union Regiment and immediately put it to flight with superior gun fire. Or to be more precise, my strategy of having the General on hand for re rolling failed command rolls worked as planned and my dice throwing was extremely fortunate when it came to combat!

Union Outflanked!

Union Outflanked!

With the successful march through the woods the Union Centre was now out flanked and to add to the Unions woes, their reinforcements were late arriving. By the time they were able to deploy their reinforcing brigade, the advance brigade had been broken and once again, they were out numbered and out flanked.

Union advance on the right!

Union advance on the right!

An aggressive move by the Federal troops on the right flank was more successful, pinning the Confederate brigade and inflicting severe casualties. However, the Rebel cavalry were able to push back the Skirmishing line and threaten the rear of the advancing Union Brigades. Despite the Unions success on this flank the centre was crumbling as a second Brigade succumbed to superior fire power!

Pour it on Boys!

Pour it on Boys!

A lull in the battle, whilst the advancing Confederate troops reorganised and negotiated one of the many fences on the battlefield, allowed some respite for the Union. The Union almost stemmed the tide but the damage had been done and the retreat was sounded.

Forward! The confederates clear the fence and push on to Victory!

Forward! The confederates clear the fence and push on to victory!

Another victory for the Rebels and a complete reversal of the actual historical result! The surprise was, that despite the additional rules, the Rebels were able to force their way through the woods without any disruption and effectively outflank the Union forces. Add to this, thanks to some unfortunate dice rolling, the Union reinforcements arrived far too late, allowing the rebels to deal with one brigade at a time, effectively winning the battle on the left flank and the centre. The aggressive move by the Union forces on the right caused some consternation and badly damaged the Brigade commanded by General Macintosh but not enough to influence the overall outcome.

The Confederates march on – things will get tougher as we get further into the war. I suspect that my jammy dice rolling will also take a turn for the worse at some point….

THE COMMERCIAL BIT

If you would like to build an ACW army, a great place to start is with the Perry Miniatures plastic boxed sets. They are available, post free from my shop:

PERRY MINIATURES ACW RANGE

The Black Powder  ACW supplement ‘Glory Hallelujah’ can be found here:

GLORY HALLELUJAH!

To follow us on Face book click here:

ARCANE SCENERY FACEBOOK PAGE

Happy Modelling!

Never mind the Billhooks

My gaming groups foray into the War of the Roses continues as we play test the rules set that Andy Callan has developed. As you can see from the title, there is a nod in the direction of the Two Fat Lardies style of play. The WOTR rules that we are using have morphed from our ‘Rules for Old wargamers with short memories’, which we used for our Napoleonic skirmishes, also written by Mr Callan. Andy has a long history of rules writing and tinkering. Indeed, his rules set ‘Loose files and American Scramble’ originally published in Wargames Illustrated back in the ’80’s (and incidentally, the only article to be republished in the magazines history) has often been copied and they are still in use today. More recently, Andy has collaborated with Peter Dennis on the ‘Paper Soldiers’ Project, with Andy writing the rules for many of the books.

Andy Callan's rules set are included with the book.

Andy Callan’s rules set are included with the book.

The battle report that follows is a run through of the latest manifestation of the ‘Never mind The Billhooks’ rules. As usual, I was playing, so the report will inevitably be biased and one sided, which makes it totally authentic when compared with accounts of the actual battles in the War of the Roses as written by the chroniclers of the time…

The Battle of Bingham Fields - the set up.

The Battle of Bingham Fields – the set up.

The initial set up allows the players to deploy their troops as they see fit, with the army being commanded by a number of officers or characters. In our battles, the commanders are all fictitious, with my commanders named after Tottenham players, Harry Hotspur being the leader.

Sir Harry Hotspur makes ready to advance.

Sir Harry Hotspur makes ready to advance.

The Commanders are activated by  drawing cards and once activated, they can give orders to the appropriate units within their command range. To speed the game up, at the start, players are able to freely move their units, one at a time, until either the first contact or shooting action. At which point the game is then controlled by drawing the cards. This allows the players to manoeuvre before battle is joined!

Skirmishers!

Skirmishers!

Skirmishers are semi independent of the control system, in that they are activated by their own card but can also be given orders if they are within range of a commander.

My cunning battle plan - go right!

My cunning battle plan – go right!

My cunning battle plan was to send my cavalry (out of shot in the above picture) and one unit to the left as a feint, whilst switching the main attack to the right. This would allow me to bring the bulk of my archers to bear against Lord Binghams force. In the game, Archers have a limited arrow supply, so it is important to choose your target carefully. You can see that I had one gun to provoke the enemy into moving. Whilst Artillery isn’t too effective in the game, it does wear the enemy down if they don’t get out of the way!

Archers Loose!

Archers Loose!

With my archers screened by both the woods and skirmishers  on the flanks, they were free to unleash an arrow storm on Lord Binghams forces whilst the Men at Arms advanced in the centre.

Irish Kern attack!

Irish Kern attack!

There was a moment of consternation when a band of Irish Kern skirmishers burst out of the woods and hit the flank of my archers. Lord Bingham had also finally managed to move his archers around the other side of the wood to threaten my flank.

Lord Bingham's Archers - down to their last two shots!

Lord Bingham’s Archers – down to their last two shots!

However, The Cavalry, commanded by Lady Ravenshead were able to halt the enemies advance and Sir Harry Hotspur chased off the Irish to secure the left flank.

Hold the flank!

Hold the flank!

Meanwhile, Sir Eric Diehard had closed with the enemy, and true to form, was giving them a good kicking (you need to be a Spurs fan to appreciate the tactical nuances…), pushing Lord Bingham back.

Captian Eric Diehard secures the right flank

Captian Eric Diehard secures the right flank

With Harry Hotspur now able to join his loyal Captain in the push, Lord Bingham’s force began to waver.

Harry leads his forces to Victory!

Harry leads his forces to Victory!

With numerical superiority established on this side of the battlefield, numbers began to tell and as casualties mounted, Lord Bingham was forced to withdraw from the field. In fact, Lord Bingham was forced to retreat across a turnip field to make his escape! He would be back to fight again once he had cleaned up his armour!

Victory for Harry!

Victory for Harry!

Not quite a resounding victory for Sir Harry but a victory nonetheless!

The battle was a good run through of the rules and many lessons learnt. To be fair, my opponent, Pete, had not played this particular version of the rules before, so I was at a slight advantage. During the post battle discussion, Andy has since come up with some amendments that will allow the battle to flow more easily. As usual, with rules writing, there is a conflict between allowing the rules to reflect some of the character of the period whilst allowing the game to flow. I think that we are getting there. I haven’t described the effect of some of the ‘special cards’ that can be introduced into the game that allow for say, an arrow resupply or for a commander to waver or even change allegiance. The method of calculating a units morale is still quite cumbersome and will be refined.

I particularly like the idea of naming your characters and using them consistently over a series of games. I have found that they can take on a life of their own and add extra fun to the play. Once we have a settled rules set, with Andy’s permission, I will publish a PDF for download.

THE COMMERCIAL BIT

If you are a wargamer or modeller you will find that Arcane Scenery has a very well stocked shop that should be able to help with most of your modelling requirements. Even better, we supply post free to most worldwide locations! Click here to see our ranges:

ARCANE SCENERY


Should you wish to read more about my WOTR project, click on the War of The Roses Category in the side bar of the blog.

Happy modelling!

A Blast From The Past

Our small war games group have started to mix things up a bit recently. The winter weather has meant that some of the venues are not particularly comfortable, as they are in cold garages. At our age, cold bones are a bad idea. So we have started to play board games in the comfort of the house to give ourselves a break from ‘traditional wargaming’ every other week or so.

Catan, Ticket to ride and Camel Up!

Catan, Ticket to ride and Camel Up!

Initially, we started to play some of the more ‘recent’ games that are popular on the board games scene. ‘Ticket to ride’, ‘Settlers of Catan’ and ‘Camel Up’ are most enjoyable. It is fairly easy to pick up the rules but the games are cleverly designed with a great deal of depth to them.

Campaign and Risk - 'classic' games!

Campaign and Risk – ‘classic’ games!

That then prompted us to dig out some of the games that we played in our Youth. Risk was the first, closely followed by Campaign. Two classic games that I spent hours playing as a teenager. I then suggested a game that I played with my kids and had great fun with. It was the closest that I got to involving my children into wargaming – ‘Space Crusade’!

Space Crusade.

Space Crusade.

For two of the group, Space crusade was a new experience, as was the idea of gaming with Science Fiction figures. However, the game is brilliantly designed and soon had them absorbed in the game play. In fact, the game did what it was supposed to do when initially released. It fired up their imagination and we were soon all talking about how we could customise it and have our own Space Marine Chapters and perhaps designing different versions of the board. Of course it is also classic ‘Granddad material’ to play with the grand children once they reach about 8 or 9. Granddad will of course be the Alien player, springing nasty surprises on the kids, just like we did with our own children. I can still remember the squeals as a Gene stealer appeared as a result of a Alien Event card being turned over! Happy days!

Space Crusade Board set up.

Space Crusade Board set up.

The game takes a bit of time to set up, about 20 minutes or so but once done so, the game play is very smooth, with each marine player taking it in turn to move onto the board. The marine players are in competition with each other to achieve a mission but can of course co operate against the Alien player. The Alien player has a variety of troops at his disposal and deploys them onto the board, initially as ‘blip tokens’. It is only when a Space marine has line of sight on the token that he will know what he is facing!

Gretchin!

Gretchin!

Gretchin are at the bottom of the Alien food chain. They are numerous and in the main, ineffective – but you never know when they will get a lucky shot off!

Space Orks.

Space Orks.

Next up are the Space orks. A bit tougher to kill and dangerous in combat.

Andriods!

Andriods!

The Andriods pack quite a punch. They are slow to move but tough to kill and are more than capable of taking out a standard Space marine.

Chaos Space Marines - the baddies!

Chaos Space Marines – the baddies!

The Chaos Space marines are the Bad Guys. Not quite as tough as Standard marines but dangerous if they get the first shot off.

Gene Stealers from the Kult of the Living Flesh!

Gene Stealers from the Kult of the Living Flesh!

The gene stealers only appear on the turn of an Alien Event card. They are fast and vicious and can even badly damage a Space Marine Captain in their hit and run attacks. I painted these figures for Space Hulk – another classic game. They are from my Gene Stealer cult, the Kult of the Living Flesh, or KLF – guess what I was listening to at the time….

Alien Chaos Dreadnought

Alien Chaos Dreadnought

The Alien Chaos Dreadnought is perhaps the toughest character on the board, excepting the Space Marine Captains. When he appears, you better take cover and come up with a good plan of attack!

The Ultramarines are ready to board the Space Hulk.

The Ultramarines are ready to board the Space Hulk.

The Space Marines in the game are equipped with some very hard hitting weaponry that will take down most of the aliens that they will face. The Captain has 6 lives or wounds, so he is quite tough. In addition, the marines have a number of equipment upgrades, that if played at the correct time, will get them out of trouble or take down that cursed Dreadnought!

We have now added Space Crusade into our portfolio of games to play when we meet. I suspect that we will work our way through the mission book! Playing board games through the winter has been a great way to keep the group together and keep us gaming. It has also been a welcome change from our usual activities and sometimes a change is as good as a rest. We will still keep wargaming and as summer approaches, the campaign season will start!

THE COMMERCIAL BIT

Space Crusade is long OOP so you will have to resort to eBay to obtain a copy, although the price is pretty steep these days. Better still, add it to your list and check out the local charity shops or car boot sales – you may just get lucky!

For all your other gaming needs, particularly when it comes to wargaming, painting and modeling, check out our shop. We send post free to most worldwide locations at the time of writing!

ARCANE SCENERY

Happy Modelling!


Combat at Foz d’Arouce

I had a most enjoyable weekend at the Bingham Napoleonic Days event, organised by the Author and Bingham resident, Peter Youds. The Saturday was spent playing in a Napoleonic demo game based around the action at Foz d’Arouce in the Peninsular War on a beautiful table, designed and built by Peter Harris. On Sunday, I attended a number of talks on Napoleonic subjects, the highlight for me, being a talk on the ‘personalities’ in the 5/60th rifles given by author Robert Griffith. In this weeks blog, I’ll give you the battle report from the Saturday, whilst it is still fresh in my mind and next week, I’ll cover the event itself.

The Village of Foz d'Arouce - Table built and designed by Pete Harris

The Village of Foz d’Arouce – Table built and designed by Pete Harris

Andy Callan had come up with the scenario and the rules that we would use to pay the game. In the attachments below, you can read the actual account of the battle from Oman, the scenario for the game itself and the briefing handout for visitors. It’s worth taking the trouble to have a read – the links are PDF’s which you are free to use should you wish to – they should open in a separate tab on your computer.

FozOman (1)

FozScenario (1)

Fozhandout (1)

I’ll also include a link to the rules at the bottom of the blog. We have been a bit easy going when it came to the actual figures used. You will see that the figures on the table don’t quite match the actual regiments present. I should also say that the battle account is very much from a British perspective (me), so if you ever get to chat to my opponent, Pete, dont be surprised if he has a slightly differing version!

The British Officers are all Characters from 'The Hardest Fight' by Peter Youlds.

The British Officers are all Characters from ‘The Hardest Fight’ by Peter Youlds.

The British force was led by characters from Peter Youlds novel, ‘The Hardest Fight’, whilst the French Officers were all named after cheeses! The battle started with Captains Jago and Herryck a company of the 95th Rifles already in place in the village, with two companies of British infantry, led by Marlow entering the field of battle at the top of the board.

Marlow leads his troops onto the field of battle

Marlow leads his troops onto the field of battle

Rifles sneak into the village!

Rifles sneak into the village!

The French encampment - they are defending the wrong road!

The French encampment – they are defending the wrong road!

Breast or Leg Sir? - Just give me the chicken, I have a battle to fight!

Breast or Leg Sir? – Just give me the chicken, I have a battle to fight!

The first turn saw the British suprising the French and opening fire on both the camp and the companies defending the road at entry point b. Captain Rocquefort decided to pull back from the road and defend the camp, with Captain Vachequirit abandoning his lunch to join him on the hill. In the subsequent exchanges of fire, the French were temporarily driven back, one company suffering badly and failing it’s morale. To add to the French discomfort, Lt. Thicknesse had arrived with two more companies of red coats to put more pressure on the French.

British Reinforcements push the French back up the hill

British Reinforcements push the French back up the hill

It all seemed that it was going well for the British but in their over exuberance, the commanders had lost touch with some of their units which meant that the British were unable to follow up their early success. To add to their woes, the French had received reinforcements, with Sgt Camembert leading a company of elite Voltigeurs and Lt Brie leading his squadron of Hussars. Lt Brie charged straight into the action.

Lt. Brie withdraws having mauled the British Infantry

Lt. Brie withdraws having mauled the British Infantry

Lt Brie caused havoc in the British lines, severely mauling one company and pushing it back off the table, which caused further confusion in the British lines. The French Cavalry were stopped by a furious musket volley and having suffered a number of casualties, Lt Brie retired to the rear. The French had recovered from the initial shock of the British advance and were further able to halt the British advance with some excellent musketry, which left the British in disarray and in need of re organisation.

The British form up again!

The British form up again!

For a short period, the French appeared to have the initiative, with Sgt Camembert attempting to sneak around the side of the village whilst taking on the 95th Rifles.

Voltigeurs skirmishing around the rear of the Village whilst more French reinforcements arrive.

Voltigeurs skirmishing around the rear of the Village whilst more French reinforcements arrive.

Take the Village!

Take the Village!

The tide turned again, with more British reinforcements arriving. A battery of Horse artillery had arrived and immediately went into action against the French infantry and Cavalry. A further two companies of infantry had appeared at the top of the village. The British had by now sorted out their command, with Captain Herryck leaving the village to take control of the newly arrived infantry and advance on the French around the other side of the village. Captain Jago had also taken command of an additional light Company and brought them into the village to secure it from the French.

Light Infantry secure the village.

Light Infantry secure the village.

British superiority is re-established!

British superiority is re-established!

A desperate attempt by the French Voltigeurs to storm the village was easily repulsed and the British were now able to go onto the offensive again. Just to add the the French Commanders woes, a company of Cacadores appeared on the bluff to his rear and started harassing the now retreating French columns.

Cacadores! Where did they come from!

Cacadores! Where did they come from!

The French were now facing superior fire power and having been worn down by the British attack, realised that retreat was their only option. With the bridge choked, one retreating unit was forced into the river at the ford and suffered further losses to the treacherous current. Some order was restored on the far bank and the French prepared to blow the bridge.

French in new defensive position

French in new defensive position

The British hold the field!

The British hold the field!

The umpire decided that the French would need to roll to see if the explosives had been placed correctly and on which side of the bridge the charge had been set. A 1,2 or 3 would mean that the charge was on the British side; 4,5 or 6 it would be on the French side. Pete, the French commander, managed to roll a 2. The race was now on! Could Capt. Herryck reach the bridge and diffuse the explosives before the bridge was blown?

A solitary French trooper was sent to light the fuse!

A solitary French trooper was sent to light the fuse!

The fuse was lit, anything but a 1 on a D6 and the bridge would blow before Herryck could get there. Pete rolled the dice…a 1! The charge had failed to blow, the British were delighted! But wait! The French had a re roll card to play. The umpire obliged and we held our breath as the dice was rolled again…a 1! The British once again celebrated in a most unsportsman like way… Herryck rushed to the bridge to difuse the charge, a 2,3,4,5,6 would make him the hero of the day. A 1 would mean that the charge was booby trapped and the whole thing would blow after all. I rolled a 1! As I looked at the dice in disbelief, willing the spots to change, the French commander was badly concealing his glee. Bloody wargaming!

Oh No! He's killed Herryck!

Oh No! He’s killed Herryck!

I would now have to tell Peter Youds that I had killed off his main character. Oh well, these things happen, time for a pint, I think.

THE COMMERCIAL BIT

As I hope that you can see we had great fun with our game. The rules are a mash up of the original Sharp Practice rules and Muskets and Tommahawks with some extra ideas from Andy, hence Sharp Tomahawks. The sub title of ‘Rules for old wargamers with short attention spans’ is a clue as to why we like them. We have used them before and they are available here as a brief PDF. The new Sharpe practice rules would have worked just as well and if you are not familiar with them, I recommend them as one of the best set of skirmish rules around.

SharpTomahawks

We sell many of the figures, scenery, rules and accessories used in the game – if you would like to visit our shop and see the huge range that we have, click the link below. At the time of writing we send orders post free!

ARCANE SCENERY

Happy Modelling!


The First Bull Run

Our journey through the American Civil War battles continued this week with a refight of the First Battle of Bull run. Just to put the game in context, Andy Callan had recently acquired a superb collection of ACW figures that he has added to, and as well,  built a very nice selection of scenery and buildings. His plan is to refight the major battles of the American Civil War over the next year or so, more or less in the sequence of the war itself.

We are using Black Powder Rules, modified with the Glory Hallelujah! supplement, as well as some house rules that enable each battle to reflect some of the challenges that the Commanders faced on the day. For this battle, the First Bull Run, Andy was to be the umpire. Pete would play the Union side, commanded by Brigadier General Irvin Macdonald, I would command The Confederate forces under Brigadier General P.G.T. Beauregard. Whilst the individual units in our game weren’t strictly accurate, the main Brigades involved were represented, as was the general disposition of the battlefield. This was after all an evening club game not a full blown demo game!

The Table set up

The Table set up

Manassas Junction - all the main features of the battlefield were identified.

Manassas Junction – all the main features of the battlefield were identified.

Neither Pete nor I were aware of the details of the battle but we were supplied with a basic briefing for our troops. Neither player knew exactly what the other had in terms of troops and guns available, that would only become clear as the battle progressed.  Having won the initial dice off, the Confederates were allowed to deploy two infantry brigades and a cavalry brigade onto the table. I knew that a third Confederate Brigade would be arriving via the rail road junction , just not when it would appear. With this in mind I deployed Jacksons 2nd Brigade in line to defend the railway junction ( resisting the temptation from the umpire to detach pickets to guard the bridge crossing). They would be supported by Jeb Stuarts Cavalry Brigade in the centre, with Bonhams 1st brigade assigned the left of the battlefield.

Confederate Deployment

Confederate Deployment

The Union forces then attempted to deploy onto the battlefield using the three entry points over the bridges. As they had lost the dice off, they were considered to be ‘under fire’ and so a command point was deducted for the initial turn. This made the deployment a slower process for the Union forces and combined with some poor command rolls from Pete, only the leading Regiments from two of the brigades managed to deploy onto the battlefield.

Union Deploy - the bridge slows the advance.

Union Deploy – the bridge slows the advance.

Pete’s unfortunate dice rolling was to be a major factor as the battle progressed. Not only were the Union forces finding it difficult to deploy in strength but the dice results meant that they suffered heavily when under fire. To make matters worse, their own shooting was in the main, ineffective. This was perhaps best illustrated as the Second Union Brigade under Hunter attempted to cross the river in front of Jacksons brigade. Artillery fire and accurate musketry took a heavy toll of the leading Union regiments, whilst true to form, Jackson stood firm!

Bonhams Brigade under pressure!

Bonhams Brigade under pressure!

If the battle was going well for Jackson, on the left, at Robinson House,  Bonham found himself out numbered, out flanked and in some disarray.  The union forces under Sherman had found a ford across the river that helped with deployment and a strong flanking force, of two brigades had appeared at the bridge at Robinson House. Jeb Stuarts Cavalry, were ordered to redeploy in support of Bonham to shore up the flank until more reinforcements could arrive.

The fighting is intense around the Robinson house!

The fighting is intense around the Robinson house!

As Bonham was pushed back, the third Confederate Brigade, under the command of the somewhat mis-named Colonel Early had arrived at the Railway junction and rushed to the left to rescue Bonham. Jackson had pinned and  all but defeated two Union Brigades, In a desperate move to break the Confederate left the remaining Union regiments in front of Jackson attempted to move to the Left Flank to support the  Union force there.

Colonel Early marches to support Bonham!

Colonel Early marches to support Bonham!

Although Bonhams Brigade had now broken under the Union pressure, they had inflicted a heavy toll on the Union forces. Jeb Stuart had led two successful cavalry attacks, crashing into the flanks of exposed Union regiments during the confusion of the battle here. Colonel Early had managed to get his brigade in position around Henry House, joining with Jackson to beat off the final Union push. With more brigades broken than effective, the Union were forced to concede the battle.

Colonel Early moves to defend Henry House and covers Bonhams withdrawal.

Colonel Early moves to defend Henry House and covers Bonhams withdrawal.

So the Confederates whooped with joy as the Union fell back from the battlefield. There is no doubt that the Confederates had benefitted from some very fortunate dice rolls whilst the Union were hampered by the opposite. The result of the battle was of course very similar to what happened in history and despite not knowing the details of the battle, it was strange how somehow key moments were reflected in our game.

Andy had done a tremendous job organising the evening and providing us with great entertainment. It is worth pointing out that much of the scenery and buildings that were used have been scratch built by Andy – I need to persuade him to do a tutorial for the blog!

THE COMMERCIAL BIT

If you fancy a go at the ACW, there’s no doubt that a great place to start your army will be the impressive Perry’s plastic range. You can see them here:

AMERICAN CIVIL WAR PLASTICS

The Warlord Games Glory Hallelujah! Supplement is available here:

GLORY HALLELUJAH! 

Of course, we have a massive range of wargaming, modelling and painting accessories in our web store, all post free worldwide at the time of writing!

ARCANE SCENERY AND MODELS


The Blue and the Grey

After Novembers paint challenge, I was expecting a drop off in my output. Finding just 30 minutes a day to paint, is in theory not too demanding a challenge but the assumption is that you are actually at home in the first place. With the onset of the festive season, I have been pulled away from my hobby by the various social activities and the many tasks that arise at this time of year. Work is also quite busy, so it’s not just about the time but also finding a clear space in my head so that I can focus on painting. My output has slowed and although I have yet another battalion on the work bench, it’s very much a work in progress as the picture below shows.

British Napoleonic Infantry in great coats - still a W.I.P.

British Napoleonic Infantry in great coats – still a W.I.P.

There is more to the hobby than just painting though! My regular Thursday nights gaming with my friends continues and last week Andy surprised us with a new army that he had picked up. Actually it was two armies, Union and Confederates from the American Civil war. So we played our first ACW battle using the ‘Glory Hallelujah’ Black Powder supplement rules.

The scenario was fairly simple, a Confederate force was to surprise and capture a Union Village, hold it’s ground and push the relieving Union force from the table.

Confederates advance on the farmhouse

Confederates advance on the farmhouse

The battle initially went well for the rebels with a quick advance to the leading farm house on the right, securing a good platform to launch the attack on the village. However, the second Confederate Brigade on the left was slow to move in support and then surprisingly, found itself facing a superior Union force.

Although cavalry is not so effective in the ACW period as our usual Napoleonic games, the cavalry could skirmish quite effectively and a fast advance around the flank of the Confederates by a unit of Federal Cavalry was enough to cause consternation in the rebel ranks!

Union Cavlry advance!

Union Cavalry advance!

The Confederate response was to forge ahead and occupy the farm buildings but to detach a battalion to guard against a flank or rear attack by those sneaky Federal forces!

Confederates take position in the farm house

Confederates take position in the farm house

Sure enough, whilst the farm house became the centre of the battle on the left, the Union managed to slip around the sides, turning the Confederate flank.

The Confederate commander urges the troops on the left to advance!

The Confederate commander urges the troops on the left to advance!

Meanwhile on the left of the field, the Confederates had pushed forwards, only to find that not only were they were facing a superior infantry force but were out gunned in artillery. Their advance was stopped dead!

Open fire boys!

Open fire boys!

The federal move around the flank of the farm house was causing havoc and the Rebel battalion holding the rear found itself out numbered. They were ordered to stand firm what ever the cost! The Confederate strategy hinged on being able to defeat the Union forces just behind the Farmhouse so that they could push on into the unguarded village.  The Farm house was beginning to resemble the Alamo as Federal forces concentrated their artillery fire here. So with one battalion pinned in the Farm House and one protecting the rear of the brigade, the remaining forces were unable to create a local fire superiority.

Out gunned!

Out gunned!

It was the end of the Confederate push. With the right flank stopped in it’s tracks and the Farm House about to fall, it was time for the Confederates to pull back. Their surprise attack had been thwarted!

Shaken on the flank - those bots wont hold for much longer!

Shaken on the flank – those boys wont hold for much longer!

The game had ended with a Union victory. As our first foray into ACW gaming, using Black Powder Rules, we were pleasantly surprised at how just a few rules tweaks could give quite a different feel to the game. No doubt we missed some of the subtleties in the Glory Hallelujah! supplement but as a first attempt, it was a good introduction into the period. The question is, will we be tempted to start our own ACW armies?

THE COMMERCIAL BIT

If I do become beguiled by the ACW period, there’s no doubt that my first stop for troops will be the impressive Perry’s plastic range. You can see them here:

AMERICAN CIVIL WAR PLASTICS

The Warlord Games Glory Hallelujah! Supplement is available here:

GLORY HALLELUJAH! 

Of course, we have a massive range of wargaming, modeliing and painting accessories in our web store, all post free worldwide at the time of writing!

ARCANE SCENERY AND MODELS


Mortal Gods – Play Testing

I was lucky enough to be able to attend the Mortal gods play test event at Boards and Swords in Derby last Sunday. The venue is well worth a visit and if you are anywhere near to the Derby/Nottingham area, you might consider using the venue for a gaming event or hobby day with your mates. There are plenty of tables and the venue is very easy to get to by car, with safe free car parking on site. I think that the growth of such venues is good news for the hobby. Not everyone can find a local gaming club but a venue such as this can soon provide contacts and of course opponents! We have ‘bookmarked’ the venue as a possible location for one of our future Black powder grand scale games! The web site address is at the bottom of the page.

mortal gods

As usual, I digress, back to Mortal Gods. The demo games were organised by Andy Hobday and Mark Farr of War banner, so there was plenty of expertise to help facilitate the games. The game is based on the same game engine as Test of Honour, with all the Samurai background and flavour stripped out and of course, plenty of Ancient Greek flavour added back in! If you are not familiar with Test of Honour, it’s worth explaining that the game is essentially a skirmish game built around small war bands. This makes the game an ideal entry point into a genre that perhaps you hadn’t considered before. I certainly had not planned to start a Samurai Army, but Test of Honour facilitated the start of my collection and allowed me to try the period without having to commit to buying and painting hundreds of figures before I could start gaming.

Test playing Mortal Gods

Test playing Mortal Gods

Test of Courage will do the same job for Ancient Greece. If you have been tempted by such films as ‘the 300’ – the Battle of Thermopylae – or other such or tales but never had the enthusiasm to paint a massive Ancient army, then this game will help to scratch that ‘itch’. A typical war band or Lochos will consist of around 20-30 figures, although it is possible to use more or less, depending on the scenario and the players involved. The other point to make about the game is that it is designed to be exactly that, a game. Whilst Test Of Courage is firmly set in the Ancient Greek realms, it is not designed to be a simulation or does not claim to represent an accurate view of combat in the Ancient world. Andy Hobday is very much focused on producing an enjoyable, cool game with some clever gaming mechanics, whilst Mark Farr and the War Banner team are steeped in the detail of the history and keep the game close enough to the period, with the appropriate troop types and weaponry, to make it feel like you are battling in Ancient Greece.

Not the best dice roll!

Not the best dice roll!

And so back to the play test game. I played two games, the games being superbly umpired by George and Jade, who were there to help with the rules and offer guidance when required. Having played Test of Honour, it was easy get get the general thread of the rules and we were soon focusing on the game rather than the rules. Your units or heroes are activated by drawing tokens and placing them on the appropriate card. The cards of course contain most of the stats and character rules that you need to play, so there is little need to refer to a rules book once you get going.  Most of the action is decided by rolling the special test of Courage dice. Three swords will give you a pass, Medusa’s are bad news! One of the cool changes is the ability to form your hoplites up into a ‘mini phalanx’ making them very tough to take on from the front. However, if you can get around the back….. The other change I like is the ability of your Hero or commander to use activation’s to give orders to other close units. Another mechanic is the fate tokens that are much more influential on the game but easier to come to terms with than drawing extra cards as in Test of Honour. Fate affects everyone in the game – watch out!

Combat begins.

Combat begins.

So when is the game released? Well actually not until March of next year. Which is another cool thing about the guys at War Banner. They are giving the basic game plenty of exposure to gamers and therefore the opportunity for the community to be involved in it’s development. The basic framework is there but in the light of play testing and feedback from gamers they are open to ideas. An example of this was on the day, the test for giving orders was moved from the receiving units stats to the hero giving the order, making it more likely that the order would be passed but still leaving the possibility of a fail occurring.

My Lochos is under way!

My Lochos is under way!

The other point to make is that whilst there may be some changes to the rules, Andy and Mark are working hard to ensure that the presentation of the game is top class. The Art work for the cards, rules tokens and all the other kit that you will need is already looking brilliant. With Stavros Zouliatis busy scuplting figures for the game to supplement the superb Victrix range that is already available and Sarissa Precision in the wings working on some evocative scenery, I can guarantee that the final product will be amazing!

THE COMMERCIAL BIT

If you would like to visit Boards and Swords here is the link to their website:

BOARDS & SWORDS

If you would like to know more about Mortal Gods: A test of Courage, checkout the Facebook page here:

MORTAL GODS 

If you would like to make a start of a mortal Gods Locos, we have some great models in our range of Vitrix Models, available POST FREE to most worldwide locations!

VICTRIX RANGE

Happy Modelling!


June 15th, Jumet – a Black Powder Battle Report

I have previously noted that I have been reading John Husseys’ splendid book, ‘Waterloo, Volume 1’ covering the Campaign of 1815. Although somewhat drier than some accounts, the book is a detailed account of the campaign and new to me, was the forensic detail in which Hussey has examined the lead up to the more familiar Battles of Ligny, Quatre Bras and of course, Waterloo. Inspired by what I had read, and motivated by the delivery of my copy of the second edition of Black powder rules, I put together a very simple scenario, very loosely based on the French attack into Belgium, prior to the main battles that were to come later.

The briefing to the players was as follows:

You are commanded to lead the advance Corps into Belgium to split the Allied and Prussian Army. Having crossed the Sambre successfully and moved past Charleroi you have encountered a small force of Prussians that are holding the route onto Brussels as well as preventing access to the Brussels – Liege road. You must push on and brush aside these defenders. Time is of the essence.

Your scouts have informed you that the Prussians consist of approximately 2 brigades of Infantry, some artillery and a small brigade of Cavalry. There are other Allied and Prussian units in the area but you are confident that it is unlikely that they will give support.

The Prussian detachment has already deployed and is barring your advance.

You have one brigade of 3 regts of Light Cavalry already in position as well as one brigade of Infantry (including one light infantry battalion). These units do not have artillery. They are deployed as you wish anywhere within 8 inches of your table edge.

As the attacker, you will have the first move.

On your turn two you may deploy an additional brigade of 4 Battalions of infantry + One Artillery piece OR a brigade of 3 regiments of Cavalry + One Artillery piece of your choice. They must enter the centre of the table through a 12″ window depending on orders thrown. All French units within 12″ of their own table edge (on or off the table) will benefit from a re roll in the case of a failed order. Blunders excepted! Your command level is 8 – no ‘pa de charge’ but column movement bonuses apply.

On turn three you may repeat the above, and so on until the end of the game.

It is not possible for the French Army to be Broken….French Brigades that are broken will Rally automatically at their table edge and any casualties reduce by one and any disorder removed. Routed units will be removed and will not return.

All French INFANTRY units will roll off disorder on a 5+.

Victory will be achieved if you can remove the Prussian barrier before turn 5….

I had anticipated the battle would be between myself, playing the Prussians and Pete Harris, playing as the French. I knew that the table that we would be playing on was 8’x 4′, so I was concerned that the scenario might favour the French, with their ability to advance so quickly in attack column.

However, a new dynamic was introduced when we were joined by a couple of extra players! So Andy Callan took control of the Prussians with no other briefing than the above and Jaz Storey-Smith took command of the advance guard of the French, with Pete commanding the reinforcements as they arrived.

I had thrown in a bit of mis information in the briefing, hinting that Allied units might be available – they would not be.

The Prussian deployment, the two Lancer regiments are to the far left of the artillery.

The Prussian deployment, the two Lancer regiments are to the far left of the artillery, out of camera shot.

Having seen the Prussian deployment, the French then deployed their units. The first surprise was that the French commander decided that the main threat was to the advancing flank and so deployed the entire advance column of 4 battalions of infantry and three regiments of cavalry to the far left flank facing just two regiments of Prussian Lancers.

Initial French deployment - the coffee mat was not there to inhibit the move to the flank!

Initial French deployment – the coffee mat was not there to inhibit the move to the flank!

Turn one saw a very cautious advance by the French…It was at this point that Napoleon (well me) sent orders reminding the French that the object of the battle was to clear the Prussians from the table by turn 5. This had the effect of galvanising the Prussians into action and their Lancers charged the French Light cavalry.

Prussian lancers charge home!

Prussian lancers charge home!

The Lancers charge was devastating! The first unit of French cavalry lost the combat and failed their morale check routing from the table. One of the supporting units also routed and the final unit was shaken by the sweeping advance that followed. So turn one and the French infantry were isolated on the flank, the French Cavalry  had run away and the Prussian lancers were confidently holding the flank!

There's Jaeger in those woods!

There’s Jaeger in those woods!

Turn Two and the French brought on the next brigade which advanced in the centre toward the woods. The French Brigade on the Flank, continued with it’s slow advance but perhaps stunned by the loss of their Cavalry made little progress, being pushed into square by those pesky Prussian Lancers. The Prussians, in reply simply blocked the pass engaging in combat with the leading French unit.

Prussians hold the road to Brussels!

Prussians hold the road to Brussels!

Turn three saw the French bring on a brigade of Cavalry to try and put pressure on the Prussian right Flank. However, despite orders to the contrary, the cavalry appeared to be in no great hurry… In the centre, the deadlock at the road junction continued with the Prussians holding firm and the French throwing more units into trying to dislodge the small unit of Jaegers in cover and force the road through the trees. On the left, the French continued with a rather ineffective advance whilst the Prussian Lancers smugly looked on! The Prussians were happy to hold, whilst in the French camp there was growing disquiet at the lack of progress.

Here come the cavalry.

Here come the cavalry.

Turn Four and at last the French, in some desperation brought on the next brigade and force marched past the woods to threaten the Prussian Landwehr. The cavalry had moved out to the flank, pushing the Prussian infantry there into square but deadlock remained at the woods! Still the French on the left were unable to move!

The French Column pushes forwards

The French Column pushes forwards

The Prussians were now feeling quite confident of winning the game, if not the battle and the French morale was somewhat shaky.

At last, the French engage the Prussian

At last, the French engage the Prussian

Turn 5. At last the French columns closed with the Prussian Infantry Line in the centre and although casualties were heavy on both sides the Prussians were now under pressure. With the right flank tied up with cavalry and now facing artillery at close range, something would have to give. However, despite numerous rounds of close combat the Prussians at the road held on, stopping the advance here. As to the left flank, well the Prussian Lancers were still in the ascendancy whilst the French infantry here were unable to progress.

The French march to Ligny!

The French march to Ligny!

It was a tactical victory for the Prussians! The French would march on but somewhat delayed by a stout Prussian defence.

POST BATTLE ANALYSIS

My concern was that with the quick movement rates in Black Powder, the game would have been over by turn three. However, a combination of some timid decision making by the French Commanders combined with some unlucky orders rolls meant the it was only turn in turn five that the French really managed to push though and engage the Prussian infantry.

With hind sight, the French were overly concerned with the brigade of Prussian lancers on the left (Although to be fair – they did soundly beat the French lights in combat) and taking the narrow road through the woods was asking for trouble. Had they bypassed them as they eventually did so, the French would have engaged the Prussian far more quickly than they actually did.

That all said, there were two other factors that made the battle more difficult for the French. The commanders natural caution to preserve their forces as with ‘normal’ battles meant that perhaps they could have taken more risks with their troops. There were plenty of reinforcements available and they couldn’t be broken as an army, whereas the Prussians would have to accumulate any casualties and could be broken.The second factor was the time limit and the umpire (me!)goading them to go faster! this added to the pressure and lead to some errors – forgetting to give units orders, forgetting to rally off casualties and even forgetting to order units to fire, all in the ‘heat’ of battle!

I think that the players enjoyed a different type of battle. The Prussian commander went home happy and I certainly had some fun. May be next time for the French!

THE COMMERCIAL BIT

Just a reminder that orders from Arcane Scenery are post free to most worldwide destinations!

You can visit the shop here:

ARCANE SCENERY

If you would like a copy of Black Powder or any item from the Warlord Napoleonic range, we are offering 10% off plus free delivery worldwide for the next week until 19/10/2018. Enter black2 into the coupon code as you go through checkout – click here for Black Powder:

BLACK POWDER RULES SET

Click here to see the Warlord Napoleonic range:

WARLORD NAPOLEONICS

Battling with Black Powder

In what could be the last battle with the ‘old’ Black Powder rules set before the relaunch of the new version on the 6th October, I faced off against my long term gaming buddy Pete Harris in his new gaming room. We are both great fans of the Black powder rules set, having fought many a battle with them and enjoyed the easy going social atmosphere that the rules set bring to our games. We tend to play the ‘Vanilla version’ with very few of the extra rules from the supplements. We find that this makes for a simpler, fairer game, with less need to refer back to the rule book and fewer contentious issues to resolve. Our games are played in the course of an evening, on a smaller 6 x 4 or 8 x 4 foot table and so we use 66% movement and ranging distances. We also use half size units on the smaller tables for these ‘club’ battles. My British Battalions are actually split into 2 x 12’s, two units for the price of one! Pete has organised his French infantry into 16’s for club battles – the French are more likely to form column and 16’s look nicer. Cavalry are 6 per regiment, we simply split the full regiment of 12 for the club games. We still use one gun for our artillery but when we do get the chance to play larger battles, then we find that batteries of two guns look nice! Once on the table, there are enough figures to give the ‘feel’ of a decent sized battle but there is still space for the armies to  manoeuvre.

French Army deploy into line after a rapid advance.

French Army deploy into line after a rapid advance.

The only flavour that we have added to the basic game is to Give the French ‘Pas de Charge’ which effectively means that a level 8 general will pass orders for infantry columns on a 10. The British get first fire for their battalions but must fight in line. We do not give the Brit’s counter charge, or use any other of the rules in Albion Triumphant. These two simple changes are enough to ensure that the French will tend to be quicker to move around on the Battlefield and the British will tend to fight a more defensive battle.

The British Heavy Cavalry Brigade and the First Infantry Brigade.

The British Heavy Cavalry Brigade and the First Infantry Brigade.

Another change is our points system. It is very much simplified with standard Infantry battalions and Light Cavalry worth 2 points, Artillery 1.5 points, Lancers 2.5 points, Heavy Cavalry 2.5 pts. Add one point for D3 Heavy cavalry, Add 0.5 point for light Infantry, add 0.5 point for rifles. We also adjust by a point or so for elites, large units, small units etc. It is by no means a perfect system and how we got to those values is lost in the mists of time. However, it works and allows us to bring approximately equal forces or if required, deliberately unbalance the forces. For our battle tonight, Pete had 30.5 points and I had 31 points. This gave us both 2 Brigades of infantry and one Brigade of cavalry. If that sounds as though the forces were identical, the detail will show that this is not quite the case. For example, Petes’ cavalry brigade consisted of two regiments of Lancers and one regiment of light Chasseurs plus a Horse artillery gun. I had two regiments of Household heavy cavalry. There were other differences in the make up of our Infantry Brigades but I wont detail them here. You can see our original points system in an older blog here:

BLACK POWDER FOR CLUB NIGHTS

There’s one other rule we usually follow for a club night battle – we go off to the pub for a nice meal and a drink before settling down to play – We find this helps to put everyone in the right frame of mind! We don’t like to battle on an empty stomach!

THE BATTLE

The French Infantry occupy the Farm House

The French Infantry occupy the Farm House

The French won the initiative and immediately advanced to capture the Farm house on the British Left. The general push forward saw them advancing on the Central pass between the hill and lake and attempting to capture the large hill that would dominate the battle. The British in reply decided that the French could have the Farm complex and moved their army to the open ground on the right. This would allow them to flank the French with the heavy Cavalry brigade and a strong infantry brigade, leaving the Rifles to defend the left wing and the rest of the brigade to hold the central pass.

British Move to the right

British Move to the right

It was now that the French ran into trouble. The artillery battery trying to gain a dominant position on the hill stalled, failing it’s orders to move thereby hampering the rest of the French brigade from moving. A blunder on the left also meant the the other brigade was not moving. Even though the French Commander was able to intervene, the French were unable to fully implement their plans. The Brigade on the far left was now playing catch up in pursuing the British, whilst the French cavalry were divided and vulnerable on the right.

Brish hold the pass - Rifles hold the flank!

Brish hold the pass – Rifles hold the flank!

The British Cavalry seized the initiative and the full Brigade charged a regiment of French Lancers. The ensuing combat saw the Lancers shaken and withdrawing in disorder. Although the lead British cavalry regiment had taken wounds, it was still able to follow up and charge the French Light Chasseurs. The resulting combat saw them forced from the table and the French Cavalry Brigade were now broken.

On the left, the Rifles had taken a pounding and before too long, they were unable to stand the pressure exerted by the full French Brigade on the left, resulting in them breaking and leaving the table. They had bought just enough time for the British to bring reinforcements to the centre to hold the pass and rout the lead French infantry unit.

The British Left under pressure. Can they hold?

The British Left under pressure. Can they hold?

For 5 turns, the French Artillery unit attempting to ascend to the top of the hill failed it’s orders, stalling the brigade and frustrating the French army in its attempt to dominate the centre of the Battlefield, whilst the British continued to press from the right. The French Commander was heard to shout ‘must I do everything myself?’ in frustration, as order after order was failed by his brigade commanders!

Withe the artillery stalled on the hill, the French infantry march into a trap!

With the artillery stalled on the hill, the French infantry march into a trap!

Eventually, the large French infantry unit ascended the hill only to find that they were in the jaws of a trap and facing two gun battery’s and five battalions of British infantry. They too were routed. With the British Heavy Cavalry now rested, they were now threatening the rear of the French army. Although the French were taking a heavy toll of the British brigade on the left, the game was up for the French. The Second Infantry brigade was broken and the Army decide to pull back, leaving the British in control of the field!

Heavy Cavalry break through! Fench rear under threat.

Heavy Cavalry break through! Fench rear under threat.

POST MATCH ANALYSIS!

Once the French had captured the farmhouse it was pointless to try and challenge on the left. It is difficult to take on infantry in fortified positions, so a move to the right was inevitable for the British. The surprise was how effectively the British were able to execute their orders. Conversely, the French had appalling luck with their orders rolls, leaving the commander to pick up the pieces and do the best he could. This gave the British the opportunity to exploit their numerical superiority on the right flank, whilst holding the majority of the French infantry on the left and in the centre. For once, the British Heavy Cavalry did as ordered and were more than a match for the Lancers. The real bonus was catching the French lights on the edge of the table, they were always going to loose the combat and get pushed back from the field of battle. With the French Cavalry gone, the British were free to move their infantry without threat.

Merde! Le Gun est stuck in ze mud...

Merde! Le Gun est stuck in ze mud…

The French gave the British Brigade on the left a good mauling, breaking them in the final turn but it was too late to save the battle. The French commander was going to have a serious talk with his Brigadiers!

French Infantry advance. These guys did their job!

French Infantry advance. These guys did their job!

It’s nice to win a battle but in fairness to Pete, I should point out that the last time our forces met, he trounced my army in three turns! The dice gods can be very fickle!

THE COMMERCIAL BIT

It’s no secret that I am a great fan of the Black Powder Rules set. I think that it facilitates a great game without losing sight of the fact that the hobby is about having fun with friends whilst playing with toy soldiers.

fc57c2a7-4872-488d-8dd9-61f47aa5e874

The new version of Black Powder is due to be released in Early October, provisionally on the 6th. If you would like a copy post free, with the exclusive miniature then simply click here!

BLACK POWDER VERSION 2


1 2 3 4 6